Workplace setup
- Basic requirements for Amphora workplace
- Web browser setup
- ID-card, Mobile-ID and Smart-ID
- Organization's digital stamp
- Signing
- Scanning
- Amphora Client
a. Amphora client setup
b. After installation, Amphora-related buttons did not appear - Amphora and MS Outlook integration
a. If after installation, Amphora-related buttons did not appear in Outlook - WebDAV
- VexPro
Basic requirements for Amphora workplace
Setting up an Amphora workplace may require certain IT knowledge, such as configuring web browsers and installing software. Some operations, such as installing the Amphora Client and Outlook interface, require administrator rights on the computer. Therefore, this guide is primarily intended for those who help organization users set up their workplaces. Some general requirements for the workplace:
- Amphora Professional is web-based software, so the user's computer must have an internet connection.
- The oldest supported operating system is Windows 10. Amphora also works with free or Apple operating systems, but the use of some individual features may be limited.
Web browser setup
Amphora Professional works with the most popular browsers: Microsoft Edge, Mozilla Firefox, Chrome and Safari.
Pop-up windows: If the computer has a pop-up blocker, allow Amphora pop-ups.
For example in Chrome: Settings → Privacy and Security → Site Settings → Pop-ups and redirects → add your organization's Amphora web address (example: https://server.amphora.ee)
ID-card, Mobile-ID and Smart-ID
You can log into Amphora and sign documents using ID-card, Mobile-ID and Smart-ID.
If the computer lacks the software necessary for signing with an ID-card, install it from https://installer.id.ee/.
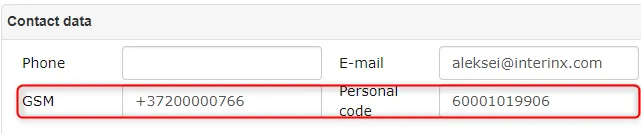
- For logging in, it is necessary that the user has a personal identification code added.
- To use Mobile-ID, it is also necessary to fill in the GSM field by adding the phone number without spaces (e.g. 5123456).
To add personal data, go to: Admin -> Users -> click on the user's name -> fill in the necessary fields (Personal identification code, GSM) -> save.
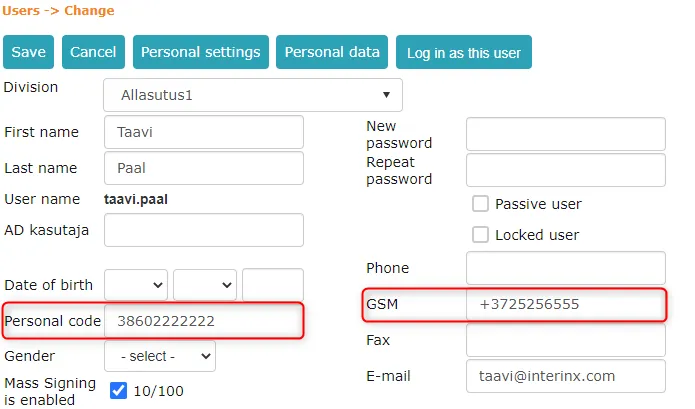 * Alternatively, you can configure contact information under Admin -> Personal settings -> Contact information.
 ***
***
Organization's digital stamp
In Amphora, it is possible to sign documents with the organization's digital stamp. For this, it is necessary that the ID-card software, SafeNet Authentication Client software, is installed on the computer. In addition, a crypto stick is also needed. The crypto stick must be connected to the computer before signing.
Signing with the organization's digital stamp only works through the wizard. If a document sent through processing or delegation needs to be signed, then you must press the Sign button in the Forwards panel and then wizard signing will open.
 In addition, it is possible to sign directly from the list view or document/letter editing view with a crypto stick (digital stamp).
When selecting a signature certificate, you must definitely choose the organization's certificate, not the person's certificate.
Signing
For signing with Mobile-ID and Smart-ID, no web browser settings are required. It is enough if the personal identification code and phone number are added in the personal settings in Amphora (see also "ID-card, Mobile-ID and Smart-ID").
For signing with ID-card, ID-card software is required, which can be installed from here.
In Google Chrome and Mozilla Firefox web browsers, an extension called Token Signing must also be enabled for signing.
Google Chrome - to enable the extension, open Google Chrome customization and control  -> More tools -> Extensions. Turn on the extension called Token signing.
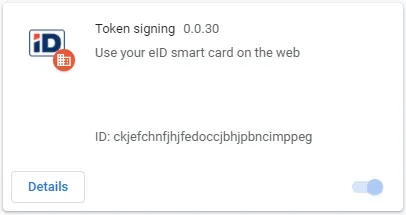 Mozilla Firefox - open Mozilla Firefox menu
  and then add-ons (Ctrl + Shift + A). There is a menu on the right side and from there select Extensions. If the Token signing extension is disabled, then enable it.
 ***
***
Scanning
In Amphora Professional, it is possible to scan documents.
For scanning to work, you need:
- The scanner must have a TWAIN interface.
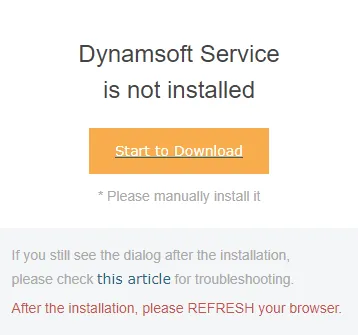
- The user's computer must have a plug-in (Chrome), add-on (IE, Firefox) called DynamicWebTwain in the internet browser. To install DynamicWebTwain, you need to open the scanning view in Amphora (e.g. by pressing Load document -> Scan), click on the Start to Download link and install the component.
- The user's computer must detect the scanner.
 ***
***
Amphora Client
Amphora Client is software that can be installed on a computer that connects MS Office programs with Amphora and works only with Windows operating systems.
-
With this you can save documents directly from MS Office programs (Word, Excel, PowerPoint) to Amphora.
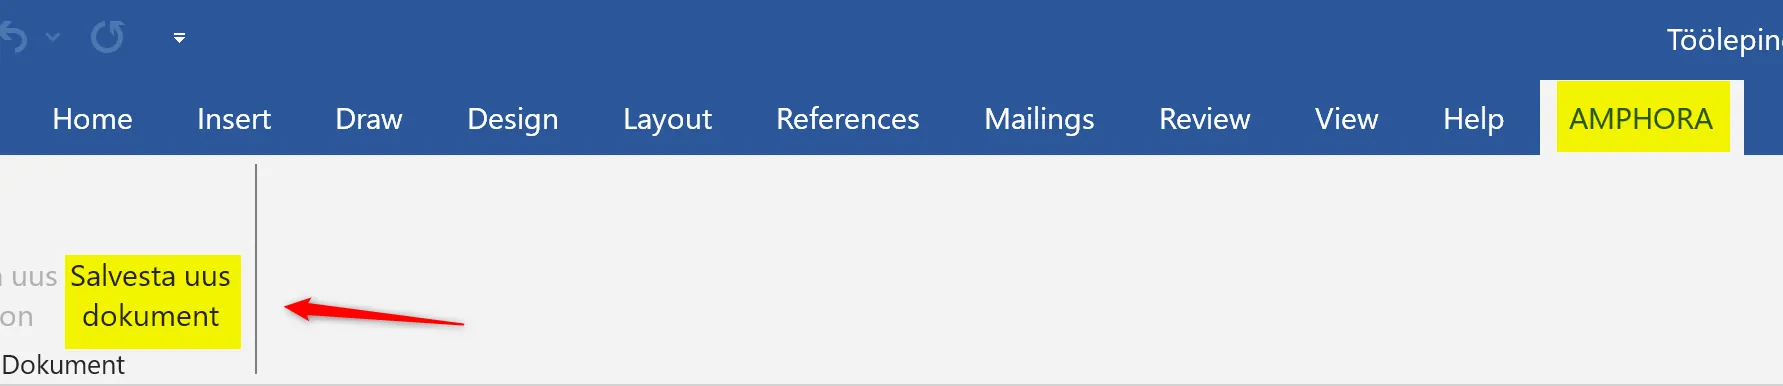
Select Amphora -> "Save new document". First save the document to your computer. Then the document is sent to Amphora and an Amphora window opens where you can fill in the document metadata.
-
Enables the use of mass importing if you want to upload multiple files at once. You can find a guide for this here.
Amphora Client setup
- Close all MS Office programs.
- Download Amphora Client HERE.
- Make sure you have Administrator rights.
When the prerequisites are met and the program is downloaded, you can move on to installing and configuring the program:
- Run the downloaded .msi file (installation file).
- Click Next on the first page of the installer and give permission to install in the administrator window (UAC).
- Wait until the installation is complete. The program starts automatically and a blue A icon appears under the hidden icons in the taskbar.
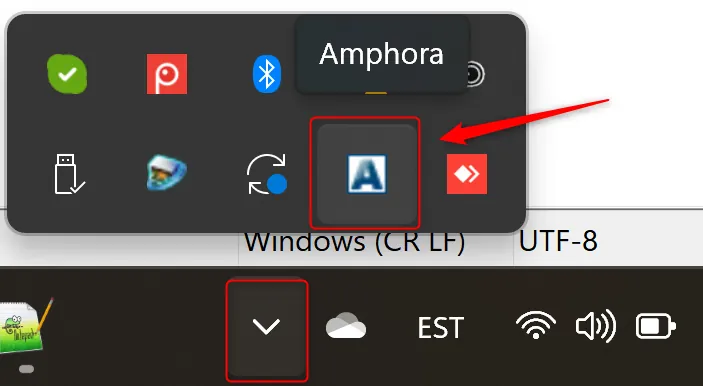
- Configure the Amphora client either automatically (using Token) or manually. Both methods are described below.
Automatic setup
-
Open Admin -> Personal settings -> Office software binding panel in Amphora. If the panel is not visible, check that the user group policy Office software administration is turned on.
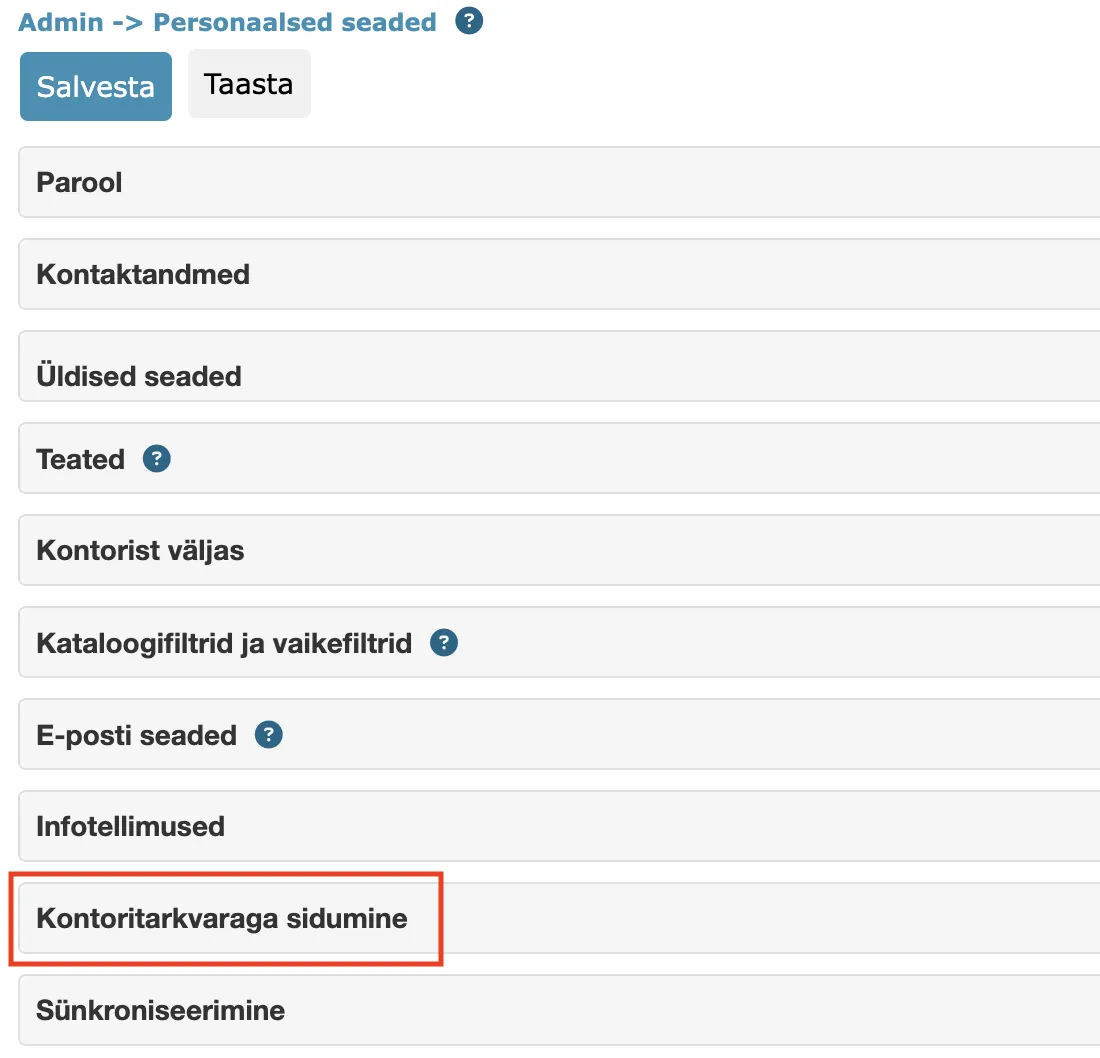
-
In the Office software binding panel, click on the link Click here to configure Amphora Client.
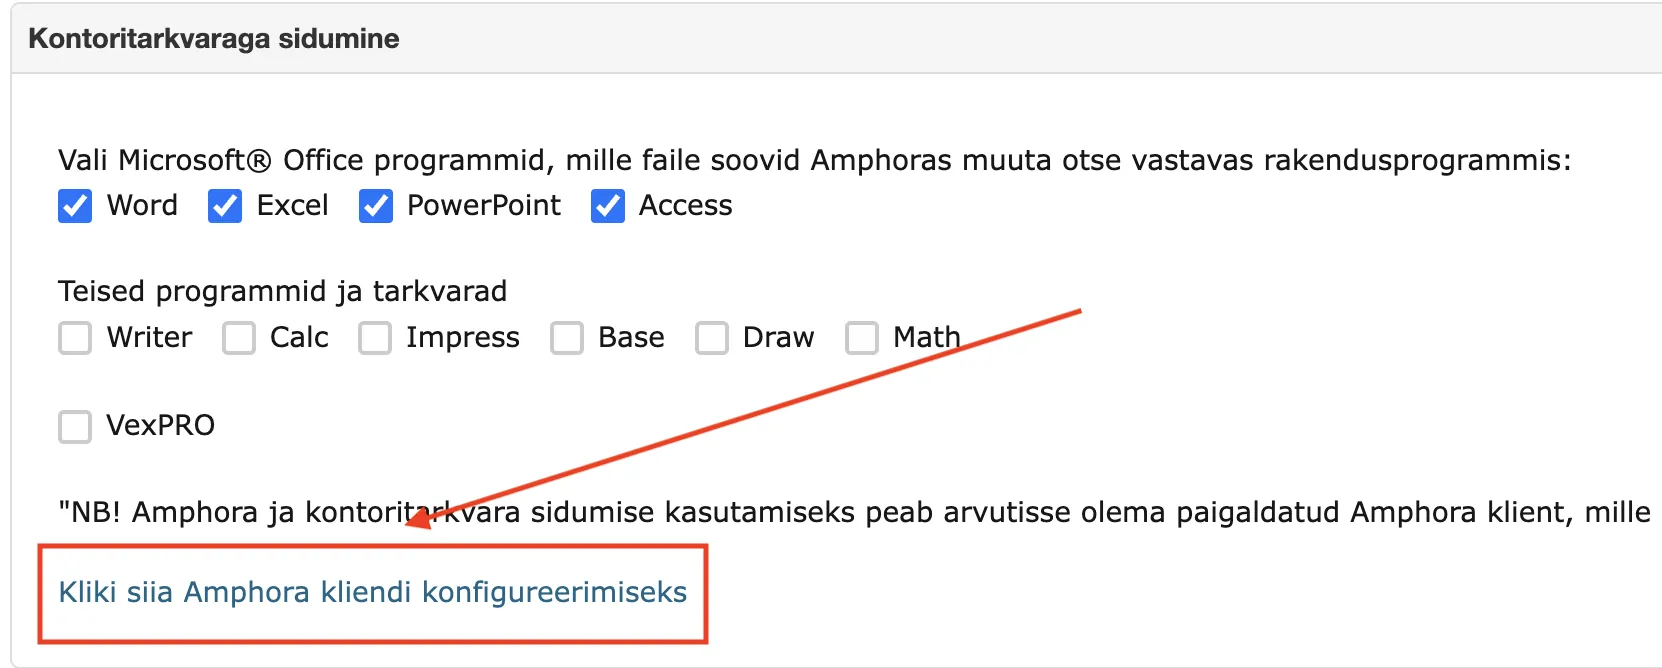
-
After configuration, the Amphora Client must be closed (right-click on the Amphora Client icon in the taskbar and press Exit) and reopened. Check the Amphora Client settings by right-clicking on the Amphora Client icon and selecting Settings -> Open Settings from the menu that opens. The Amphora Client settings view should look like this:
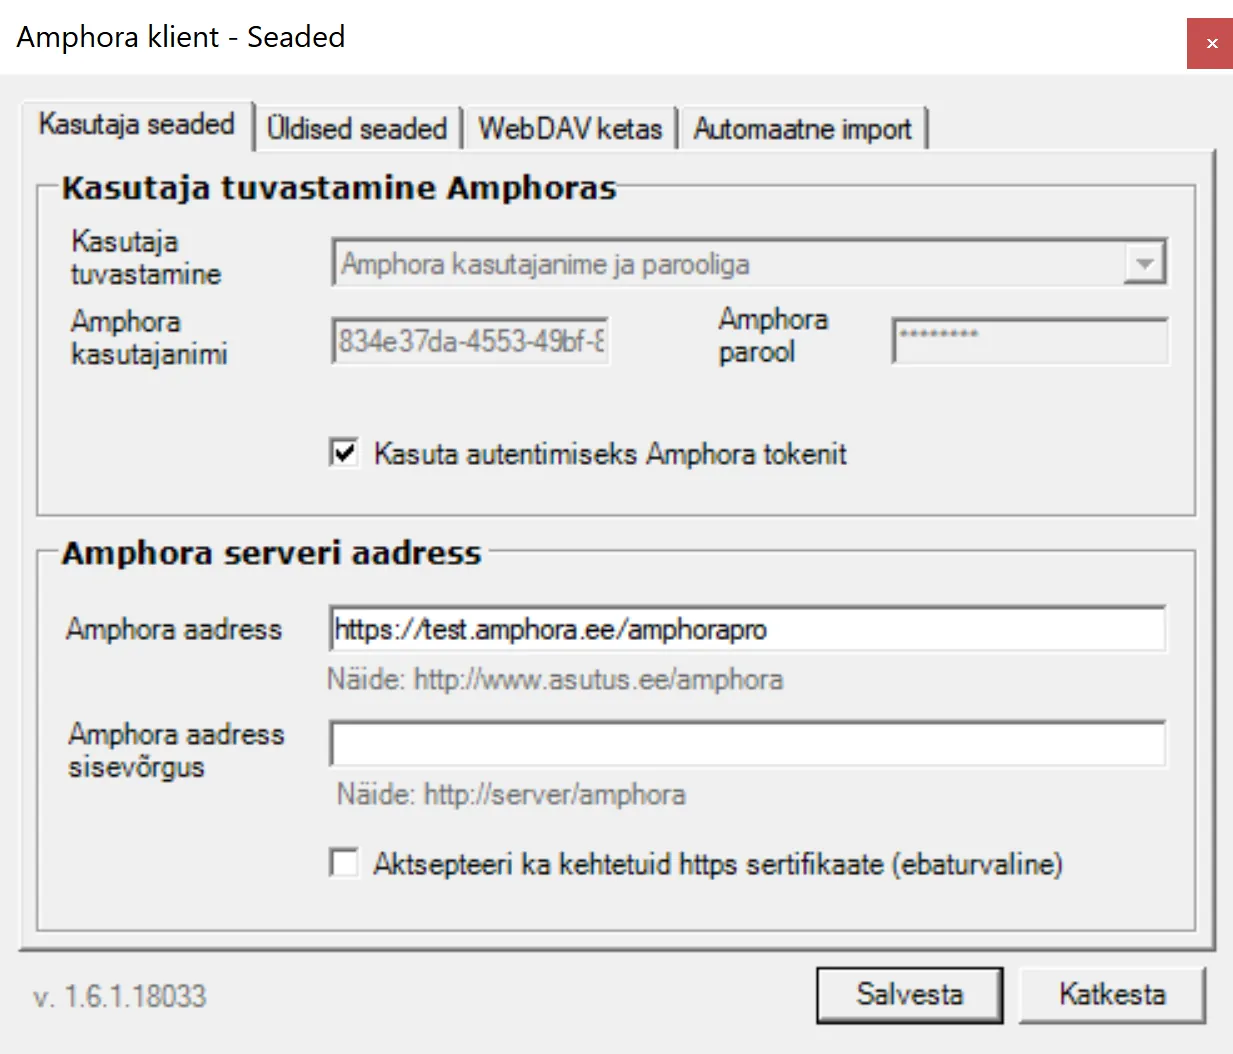 Amphora Client is now ready to use.
Manual setup with username, password and environment URL
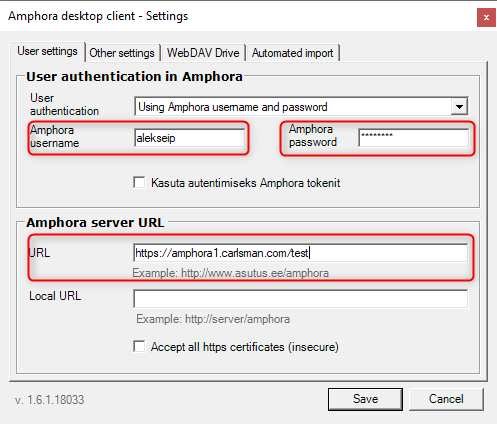
Enter your user data in the Amphora client settings:
- To open the Amphora Client settings, right-click on the Amphora icon in the taskbar and select Settings -> Open Settings.
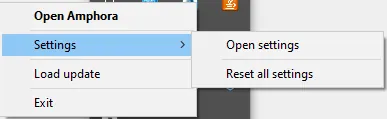
- In the settings window, enter your username, password and Amphora address (URL).
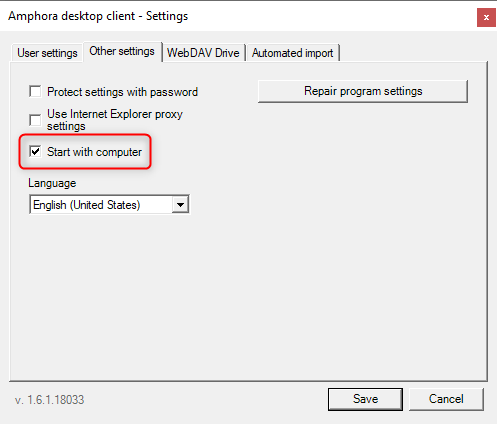
- Under General settings, select the checkbox "Start with computer" and press the Fix program settings button, then save.
 ***
***
If Amphora-related buttons did not appear after installation
If you cannot see Amphora buttons in Word after installation, check if Word has disabled the Amphora interface (Add-in):
- Open File -> Options -> Add-ins.
- Check if AmphoraMSOfficeAddin is added under Disabled Application Add-ins.
- If AmphoraMSOfficeAddin is disabled, press the Go button.
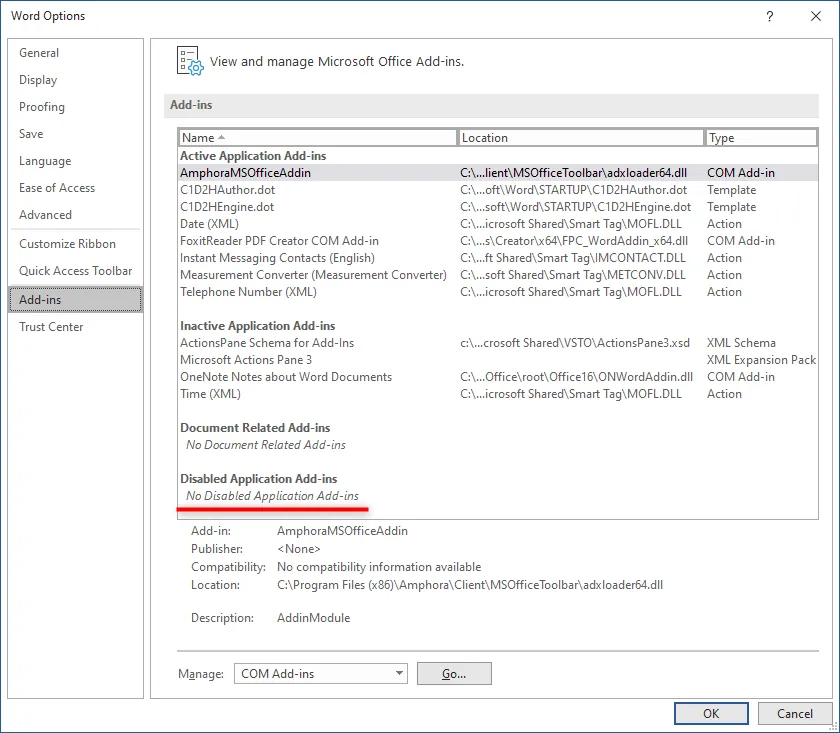 Mark AmphoraMSOfficeAddin as active in the opened window and press OK.
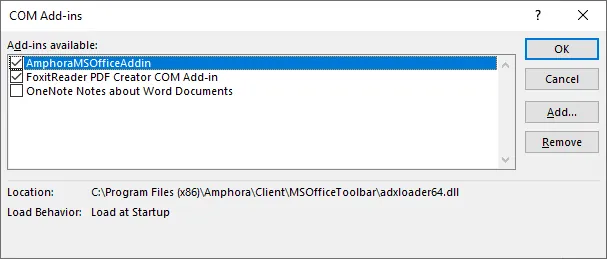 If the AmphoraMSOfficeAddin option is not in the COM Add-ins window, then you should press the Add... button and look for the correct DLL file (adxloader.dll or adxloader64.dll) in the directory where the Amphora client is installed (C:\Program Files (x86)\Amphora\Client\MSOfficeToolbar).
Amphora and MS Outlook integration
Extension for Outlook that must be installed separately and allows:
-
Register emails directly from Outlook to Amphora.
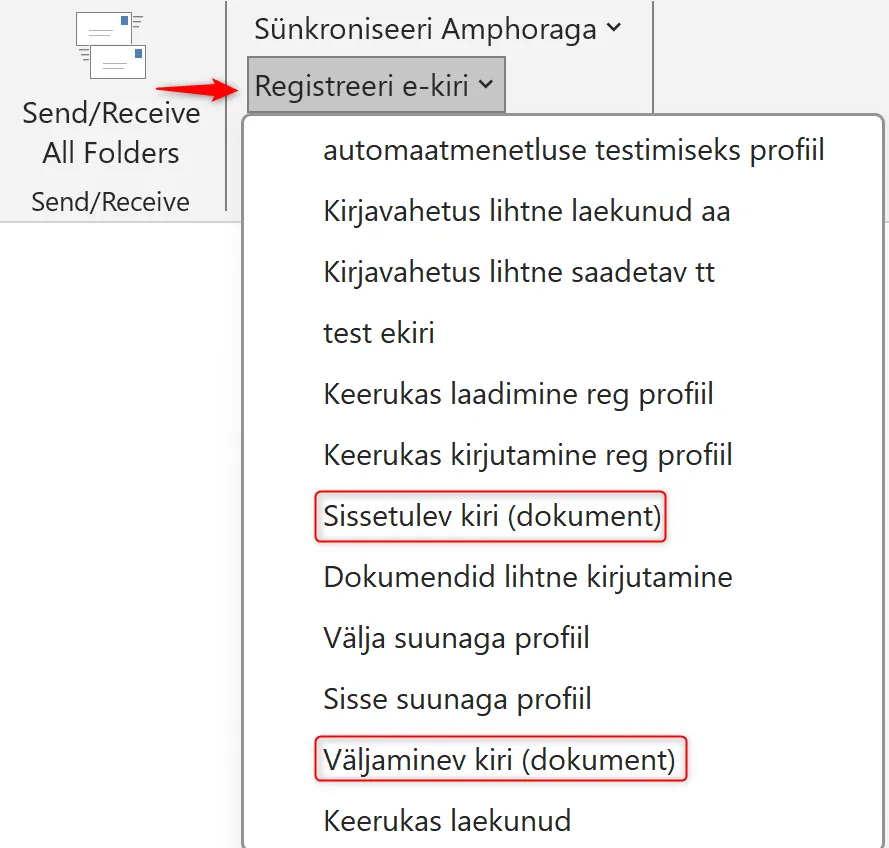
-
Synchronize calendar events and tasks.
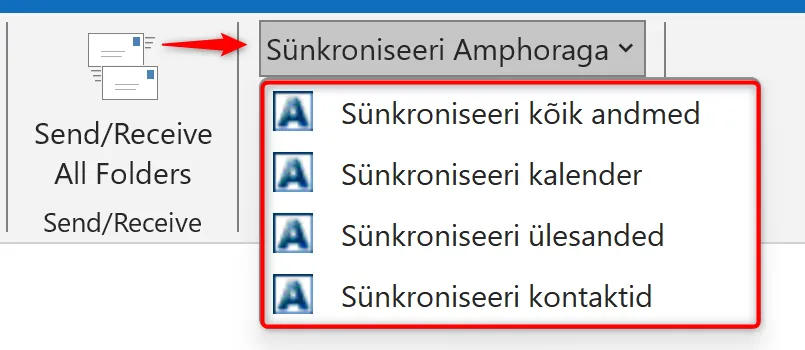
NB! Requires Amphora Client installed and configured on the computer and similarly to Amphora Client, Amphora and Outlook integration works only with Windows operating systems.
For Amphora Outlook integration, you can download the software HERE. For installation, you must have administrator rights. Close Outlook before installation. Install the program, no additional configuration is needed.
If Amphora-related buttons did not appear in Outlook after installation
If you cannot see Amphora buttons in Outlook after installation, try the following:
- Check if Amphora Client is correctly installed and configured.
- Open C:\Program Files (x86)\Amphora\OutlookClient and run FixRegistration.cmd.
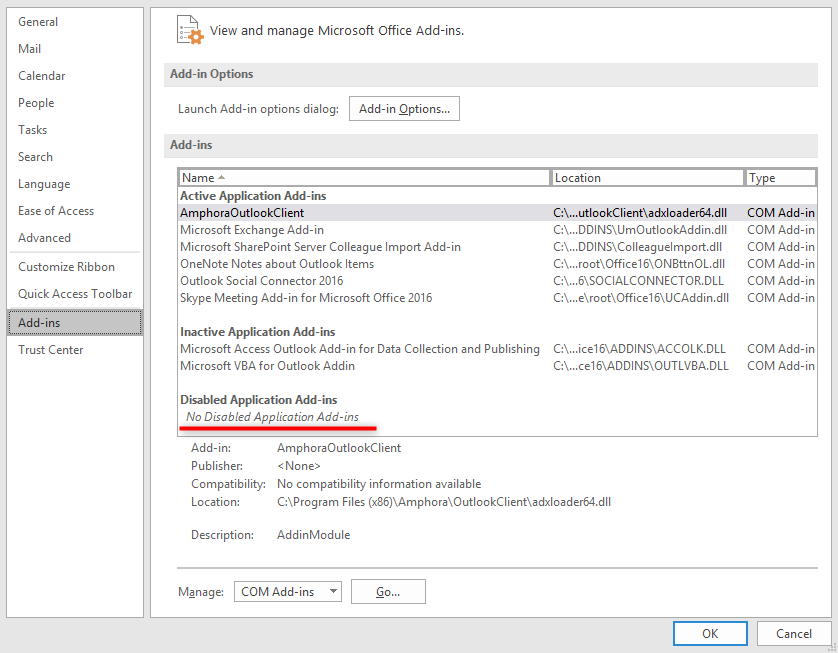
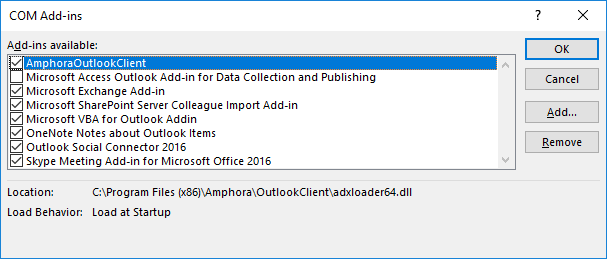
- Check if Outlook has disabled the Amphora interface (File -> Options -> Add-ins -> check Disabled Application Add-ins). If blocked, press Go… in the same window, put a checkmark back in front of AmphoraOutlookClient and press OK.
-
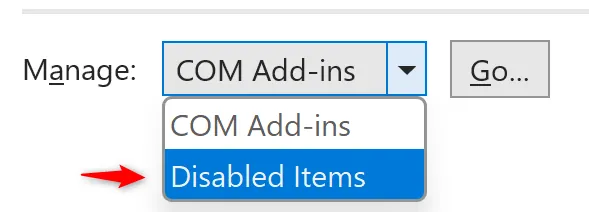
If the previous point did not work, select Disabled Items from the dropdown menu (next to the Go button) and then Go. In the new window, select AmphoraOutlookClient and press Enable.
-
Try restarting the computer.
 In case of problems or questions, contact Amphora customer support: help@amphora.ee
WebDAV
With WebDAV you can edit files directly from Amphora and in addition to MS Office files, allows you to edit other file types, such as .txt files. WebDAV can be downloaded here.
Important
WebDAV works with Microsoft Edge, Mozilla Firefox and Google Chrome web browsers.
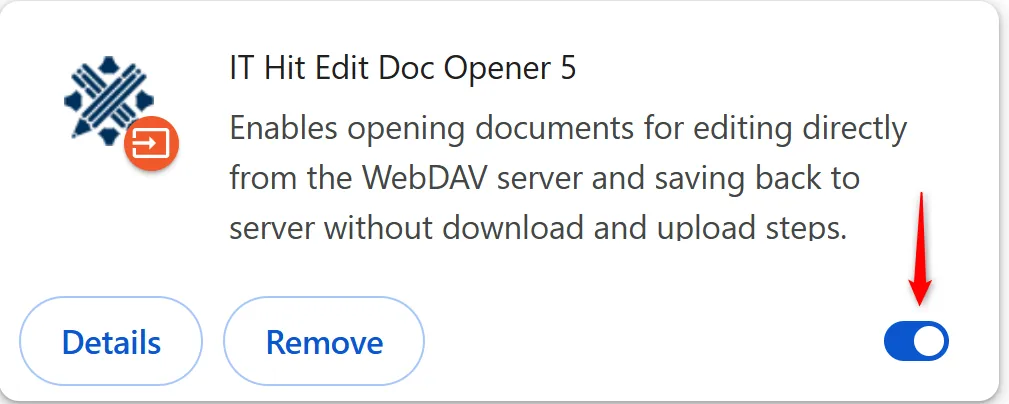
After installing WebDAV, check that the WebDAV icon IT Hit Edit Doc Opener 5 is available in the web browser.
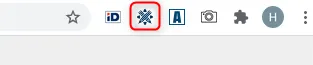 If it is missing, the extension must be enabled. Click on the three-dot icon on the right side of Google Chrome or Microsoft Edge and select Extensions → Manage Extensions. Enable the IT Hit Edit Doc Opener 5 extension.
To edit a file, press the Edit button next to the file in Amphora.
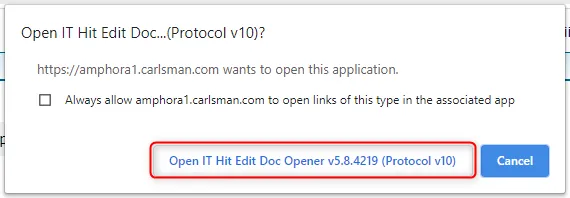
 In the confirmation window that opens, press the Open IT Hit Edit Doc Opener button. So that the window does not jump in front every time, check the option "Always allow test.amphora.ee to open links of this type in the associated app." In this case, pop-up windows must also be allowed in the web browser.
Make the desired changes in the document and save the file so that the changes reach Amphora.
VexPro
VexPro works only with Windows operating systems. All users of the legal acts system must have installed on their computer:
-
Enhanced VexPro, which you can download from Amphora public view.
-
WebDAV for those who use Amphora with Google Chrome or Mozilla Firefox.
Important
The previous VexPro must be removed before installing the new one so that there are not two different VexPros on the computer at the same time.
You can download WebDAV here.
Last modified: 17 October 2026, 11:05:57