Personal Settings
- Password change
- Contact information
- General settings
- Notifications
- Out of office
- Email settings
- Office software integration
- Google account authentication (Authentication and SSO)
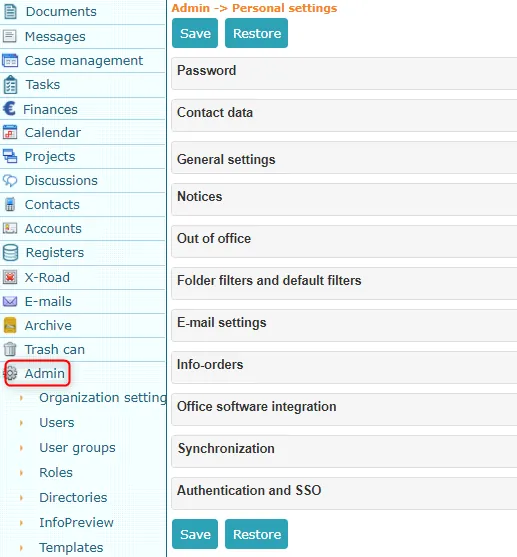
On the Personal settings form, each user can change their personal system settings. You can access the personal settings form by clicking on the Admin module. To confirm settings, you need to click the Save button.
 ***
***
Password change
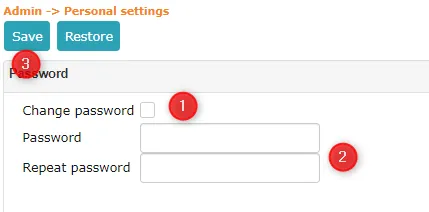
To change password, you need to check Change password on the opened form (1). After checking, the Password and Repeat password fields are activated (2). In the Password field, you need to enter the new desired password and repeat it in the Repeat password field. After that, you must click Save (3).
 ***
***
Contact information
To add or change contact information, modify/fill the necessary fields on the Contact information panel. Notifications by email are sent to the address entered in the Email field. The Mobile field should include your mobile phone number if you want to log into the environment using Mobile-ID or Smart-ID. For ID-card login, you need to enter your personal identification code.
NB!
Email address is mandatory. Saving personal settings without an email address is not possible. The email address is required for sending notifications.
 ***
***
Notifications
On the notifications panel, you can select which events you want to receive email notifications about.
Select the desired events by checking the box next to the corresponding notification type. Amphora sends notifications by email.
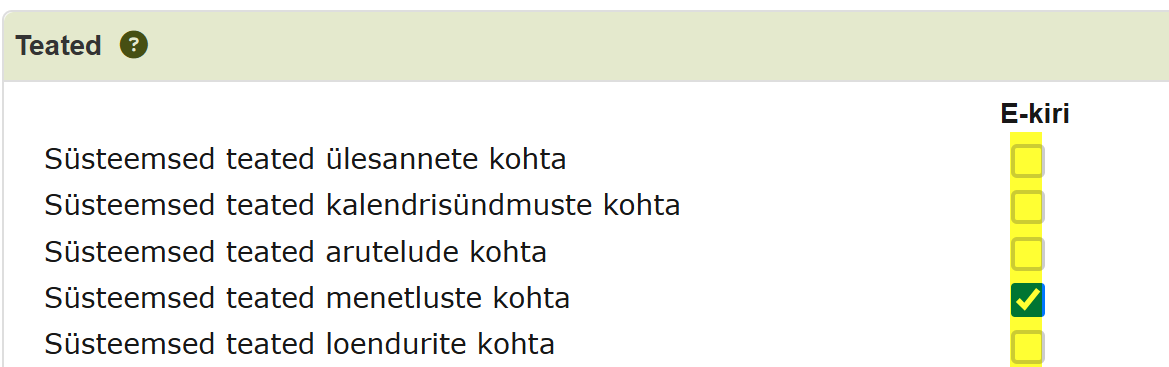
From Amphora, it is currently possible to receive the following notifications by email:
System notifications about tasks - you receive a notification when a task is created for you;
System notifications about calendar events - Amphora notifies by email about an approaching calendar event;
System notifications about processes - you receive a notification when a process you created is completed;
Failed forwards - you receive a notification when sending a letter you sent fails.
- When a user is made passive, all their notification settings are automatically deleted.
- When reactivating a user, the desired notification settings must be set again.
- If the notifications panel is missing, contact the system administrator.
General settings
On the general settings panel, you can change the Amphora usage language, appearance (Environment design) and hide your birthday.
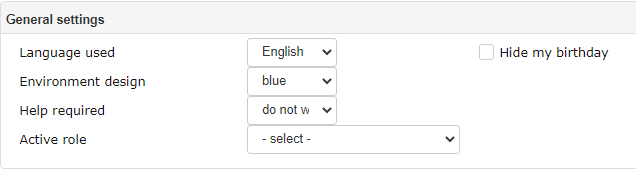 In the upper right corner, you can similarly change language and design.
 ***
***
Out of office
The out of office setting is intended for assigning a substitute during vacation. To set yourself as out of office, you need to check I am out of office (1) and fill the necessary data fields (3,4,5). When a user assigns a substitute, tasks addressed to them by name also go to the substitute. Tasks addressed to a role (for example a role step of an automatic process) do not go to the substitute; they stay with the role's members. The settings save only if the user has an e-mail address. If you want to make your absence publicly visible, you need to check Show info on homepage (2). After entering data, you need to click Save (6).
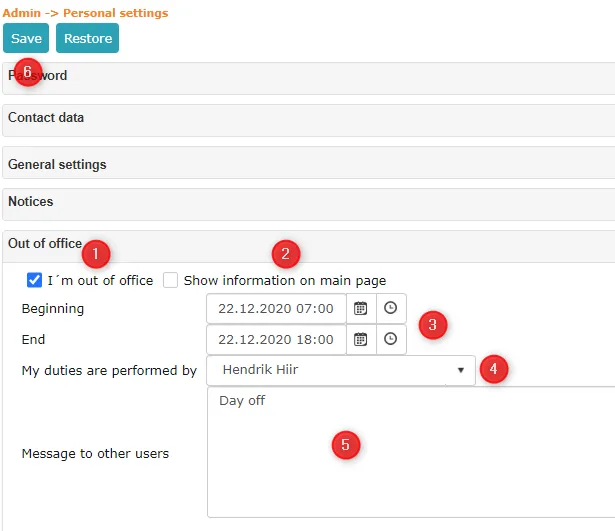
Amphora logs all "Out of office" panel changes. Main users can view logs in the Admin -- Organization Settings -- Logs view.
Substitute assignment supports multi-depth substitution. This means that if the substitute also has a substitute, Amphora forwards tasks to the final substitute. In the case of circular referencing, the process is interrupted and no substitute is displayed.
Email settings
It is recommended to have email set up by your organization's IT department. See email setup guide.
Office software integration
If you want to send document files (Word, Excel, Powerpoint) directly from the respective programs to Amphora through the Amphora client, then you need to check the corresponding program.
Important
Your computer must have Amphora Client software configured. Read how to configure Amphora Client.
Important
Amphora Client only works in Internet Explorer web browser. If you use Google Chrome or Mozilla Firefox, you need to install WebDav.
Google account authentication (Authentication and SSO)
It is possible to log into Amphora using your Google account. A user can link their Amphora user with a Google account and log into Amphora using the Google account.
Google account authentication is only possible at Premium and Elite levels. In organization settings, this must first be turned on in Admin -> Organization settings -> General settings -> "Activate Google authentication (Only for Premium and Elite users)"
To link with a Google account, you need to open Admin module -> Personal settings -> Authentication and SSO panel.
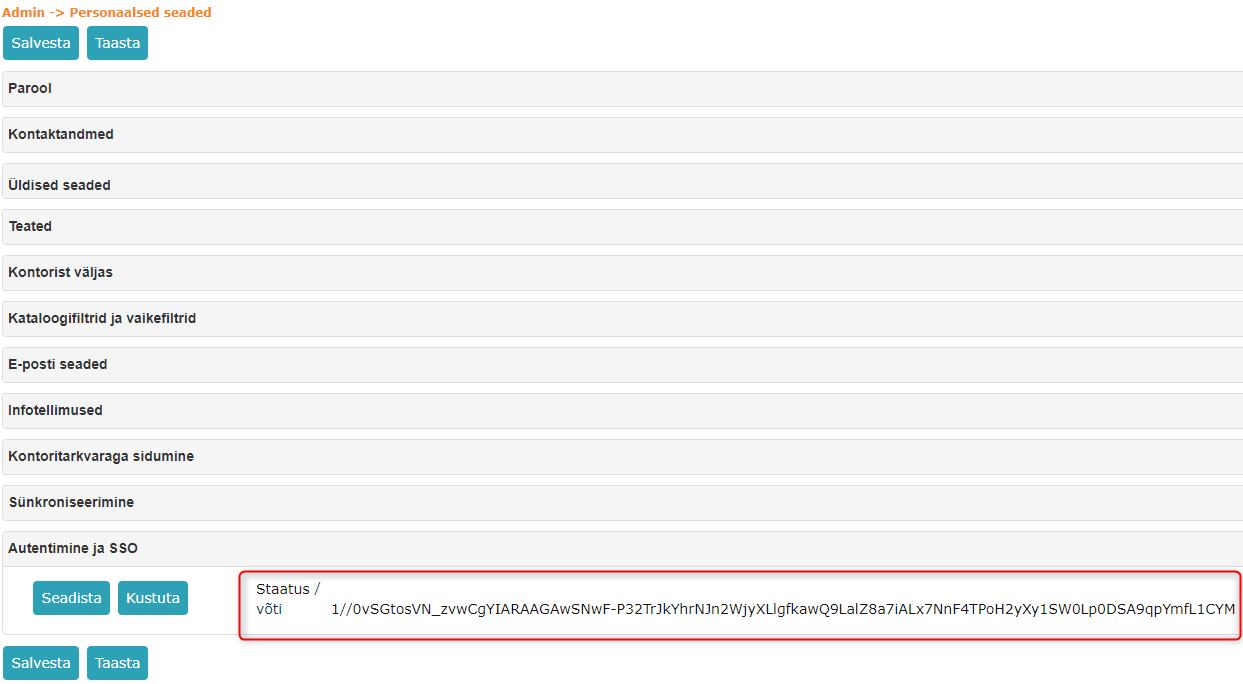
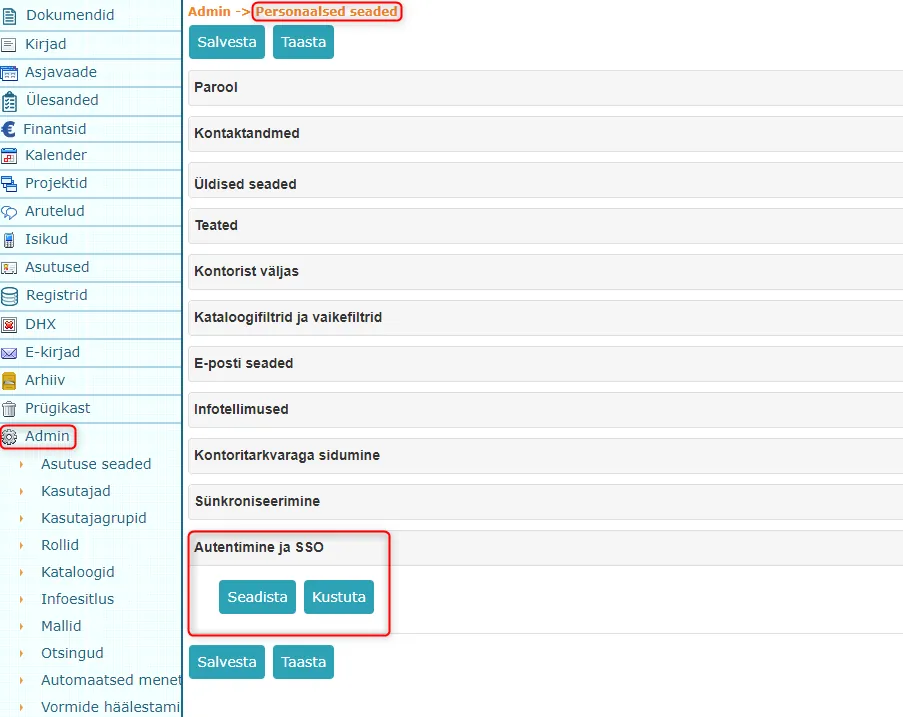 By clicking the Configure button, a Google account selection/addition view opens where you need to select an existing Google account or add a new one. When this is done, the user is taken back to Amphora and the Status key becomes visible.
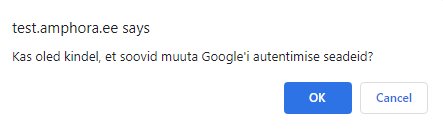
 If the Amphora user is already linked with a Google account, then when adding a new configuration, Amphora displays a confirmation window.
 When the status key is visible, you need to click the Save button at the top or bottom.
NB!
We recommend that before enabling the configuration, you definitely explain to users that they should turn on two-factor authentication on their Google accounts.
Last modified: 17 October 2026, 11:05:57