Automated Processes
Automated processes are located under Admin -> Automated Processes.
 ***
***
New Process
The process starts from the beginning. The start is always red and is immediately available when creating an automated process. The end is always green.
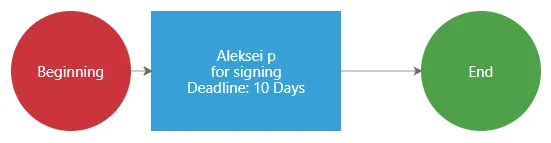 Process creation workflow:
- To add the first process step, click on the red Start circle. A window opens where you need to click Add New Step.
Once one process step has been added, to add a new step, click on the blue box of the previous step. A window opens where you can select Edit, Delete, or Add New Step.
| First Step Addition Window | Subsequent Steps Addition Window |
|---|---|
 |
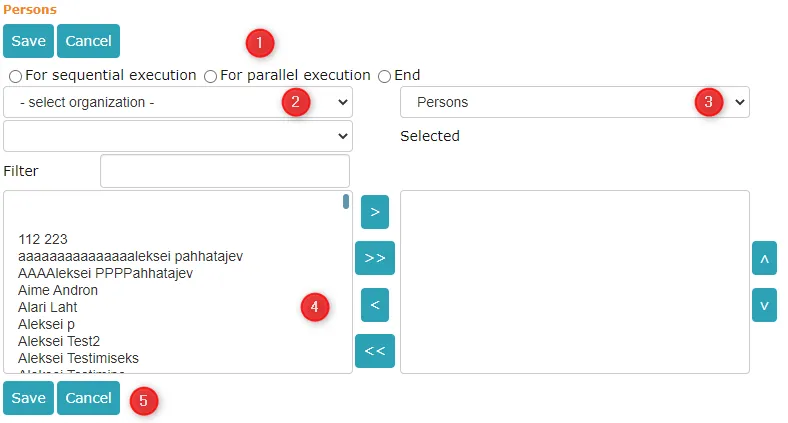
 * In the opened view, you need to choose whether it will be sequential execution or parallel execution (or if you want to finalize the process flow - End) (1). In the institution selection (2), you need to choose which institution the process will run within. Under (3), you can select whether you want to choose process participants from Persons or Roles. From the persons/roles list (4), you need to select the desired persons/roles and move them to the box on the right (using the > button). Finally, you need to Save your selection. * In the opened view, you need to choose whether it will be sequential execution or parallel execution (or if you want to finalize the process flow - End) (1). In the institution selection (2), you need to choose which institution the process will run within. Under (3), you can select whether you want to choose process participants from Persons or Roles. From the persons/roles list (4), you need to select the desired persons/roles and move them to the box on the right (using the > button). Finally, you need to Save your selection. |
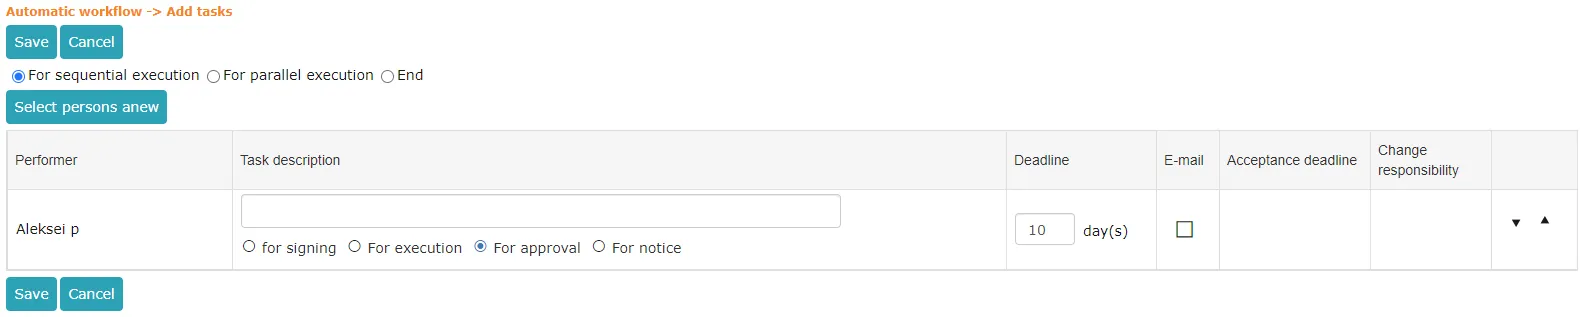
 * In the next view, we select the task type. It is mandatory to add a deadline. You can also add additional explanation (task description) for the selected person/role. When everything is done, select Save.
 * We are back in the initial view and can see that a process step has been created in the form of a blue box. You can continue adding additional process steps by going back to the first point.
- To end the process, click on the last step and click Add New Step. In the opened view, select End and Save. Now the process flow is ready.
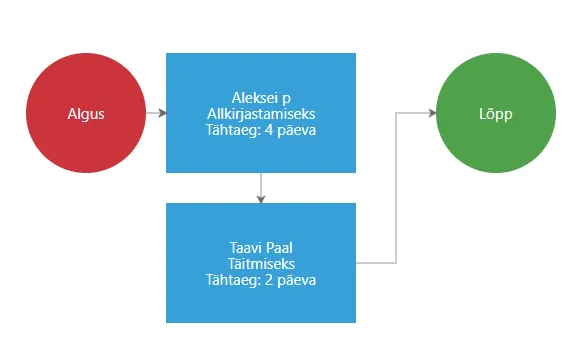 It is possible to delete or modify an existing step by clicking on the step, which opens a window with two buttons: Edit and Delete.
Tasks Panel and Graphical View
In the Tasks panel, it is possible to customize the process flow view. For setting the view, the following options are available:
- You can zoom in/zoom out with the mouse wheel
- CTRL + left mouse button allows you to move the entire graph
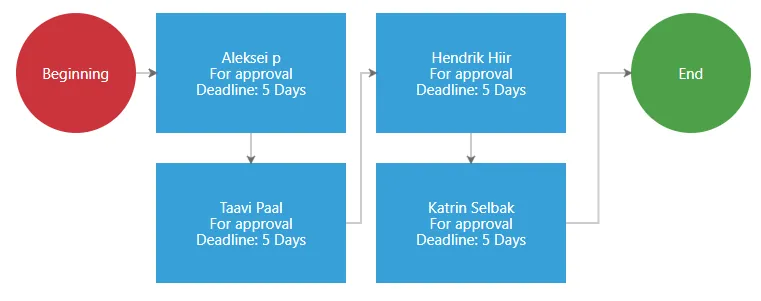
Above the Tasks panel, there is a  button. This allows you to open the process steps in full-screen view. This is useful for extensive processes with many steps. If there is more than one user in one step, it is possible to create a new step by clicking on the last (bottom) user.
When adding multiple different steps, all tasks from the previous step must be completed before users in the next step can receive their tasks.
Person Groups
In the automated process view, there is a Person Groups option.
 For the Person Groups option to appear, you need to enable the Show person groups selection for automated processes user group policy.
The Person Groups selection contains person groups that have been created in the Persons module (Persons - Groups).
The person groups selection allows you to regulate which automated process Amphora adds when creating a document. For example, multiple automated processes can be added to one catalog, and depending on the document registrar, Amphora can select the correct automated process. For this, a person group must be added to each automated process, and if Amphora detects that the document registrar is in a person group that is connected to an automated process, then this specific automated process is added when registering the document.
Last modified: 09 October 2026, 10:25:03