Document Import via Amphora Client
- Amphora Client Configuration
- 7-zip Program
- Document XLSM File
- Correspondence Module XLSM File
- Modifying Existing Documents/Letters
- Importing Documents/Letters to Amphora
- Required Files for Import
Amphora Client Configuration
Amphora client must be installed. Amphora client can be downloaded HERE.
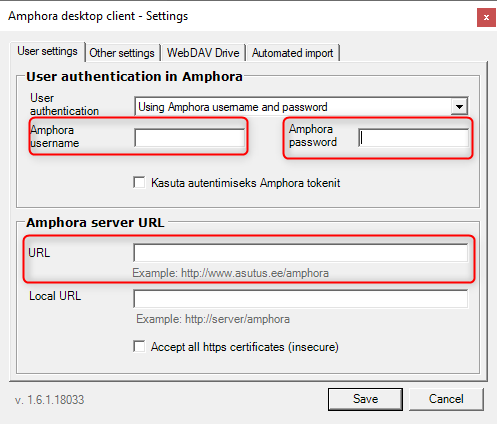
Amphora client user settings:
 Amphora client automatic import settings:
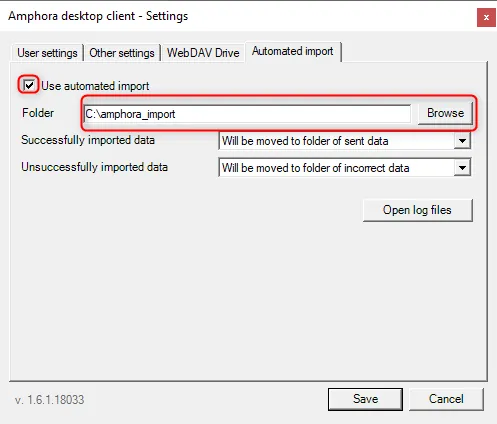 As the catalog, you need to specify a folder where .ZIP files from Excel will start accumulating. The folder must definitely be given write permissions.
7-zip Program
You need to download and install the 7-zip program. You can download it for free HERE
Document XLSM File
The XLSM file is needed to import existing files to Amphora as documents. The files required for import are located HERE. Mandatory options are: External_id, item_type, form_id, folder_id, and Caption.
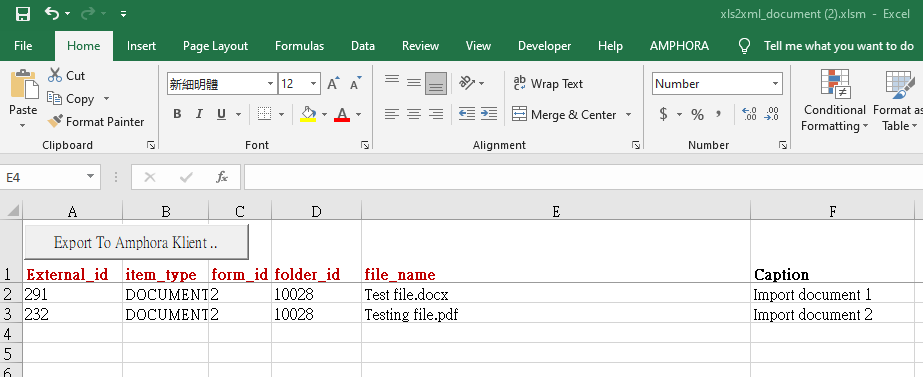 External_id - ID of the document to be imported, for example, external environment ID. Not a mandatory field.
item_type – object type, so we need to put DOCUMENT here since we want to import a document.
form_id – form ID. With this selection, you can specify which form the document is loaded to Amphora with. Form ID can be obtained directly from Amphora environment by going to Admin – Form Configuration. In the forms table there is a column named ID, that's where to get them.
 IDs may be different in each environment.
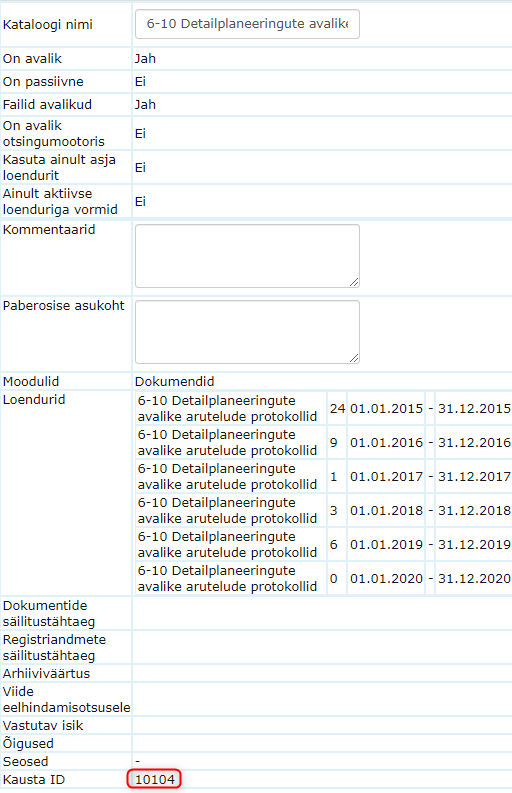
folder_id – folder ID. Determines which folder this document goes to. Can be configured in Amphora environment. Need to go to Admin – Directories, then find the appropriate folder and click on it. In the middle, this folder's data is displayed and you need to find Folder ID.
 Caption – document title. Must put such a title that you want to see next to the document in Amphora.
For importing contracts, it's also possible to import party data. For this, use partner.name for name and partner.address for address.
XLSM document options in black text (for example Caption) must be identical to the Amp. field name in Amphora form configuration. To find the desired form's Amp. field names, you need to:
-
Go to Admin – Form Configuration and open the desired form. You need to click on the form title.
-
Hover the mouse cursor over the field name.
 ***
***
Correspondence Module XLSM File
Overall, there's not much difference compared to documents, but there are some points that need attention.
For letters, mandatory fields are: External_id, item_type(MESSAGE), form_id, folder_id, and Title. Title is the letter title. You can read about the other fields in the Document XLSM File chapter, as they are the same.
The big difference compared to documents is that data fields cannot be found under Form Configuration. Due to this, we added a table under this guide's additional files where all correspondence-related data fields are available.
Modifying Existing Documents/Letters
For modifying documents and letters already registered in Amphora, there are separate Change files that you can find at the end of this guide.
Existing documents are identified by external_id.
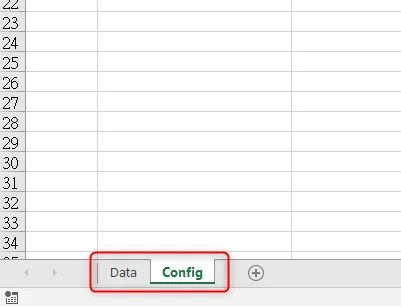
Overall, nothing has changed, but a Config tab has appeared below, which allows specifying what action needs to be performed with the given file(s).
Action:
UPDATE – changes those fields that are specified in XML.
REPLACE – replaces all document metadata and additional files, process data is preserved. For documents, previous versions are also preserved.
REPAIR - replaces all document metadata except number. All additional files and processes are removed. Connections with document attachments and response letters remain. For documents, previous versions are also preserved. (from Amphora 11.8.3)
SKIP – doesn't give an error message if the same document already exists in Amphora.
ERROR – gives an error message if the same document already exists in Amphora.
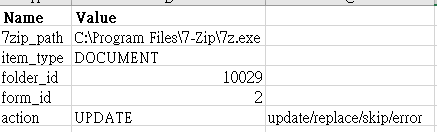 7zip_path – location where 7zip.exe file exists.
Item_type, folder_id, and form_id – if these fields are filled under Data tab, then they have no importance here. If these fields are not filled under Data tab for documents, then these values are taken from Config tab and applied to all documents.
Data and Config tabs are located in the bottom left corner.
 ***
***
Importing Documents/Letters to Amphora
When Amphora client is configured and 7-zip program is downloaded and installed, we can start importing.
-
We place the XLSM and files we want to import to Amphora in the same folder.
-
We open the XLSM and enter the correct data.
-
When data is checked and correct, we click the Export To Amphora Client button. A separate .zip file is created for each document. The .zip file consists of an XML file and the document file.
-
If the entered data was correct, documents/letters should appear in Amphora environment. This can also be checked in the import catalog (when configuring Amphora client, we selected a catalog where .zip files will start accumulating).
If the .zip file ends up in the failed folder, it means something went wrong and there's an error somewhere. If it goes to the sent folder, then everything is fine. sent and failed folders are created in the catalog that was added under Amphora client Automatic import.
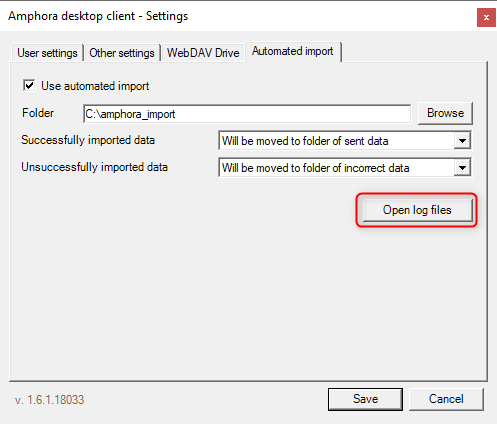
 Additionally, you can also view logs in Amphora client. Open Amphora client and go to Automatic import tab and click View log files there.
 ***
***
Required Files for Import
You can download the required files HERE.
Last modified: 09 October 2026, 15:35:15