Entra ID Configuration
Overview
User groups must be added to the ENTRA environment before loading users into Amphora, where the name begins with the word "Amphora". It is recommended to create 2 user groups: "Amphora administrators" and "Amphora regular users". Assign users in the ENTRA environment to these groups where they should belong in Amphora. They can also be assigned to multiple groups simultaneously.
On the Amphora side, user groups named "Administrators" and "Regular users" need to be created beforehand. These are probably already available in Amphora by default. Amphora first queries user groups from the Entra environment that start with the name "Amphora" and then the members of these groups. After that, Amphora starts associating and adding users to the Amphora environment.
ENTRA ID Configuration
The created application is visible by going to Applications -> Enterprise applications/App registrations. Different settings can be made under both options. Below, the settings for the App registrations option are discussed. In Enterprise mode, you can set a logo.
Create a new application in the Entra ID environment: Home -> App registrations -> New registration
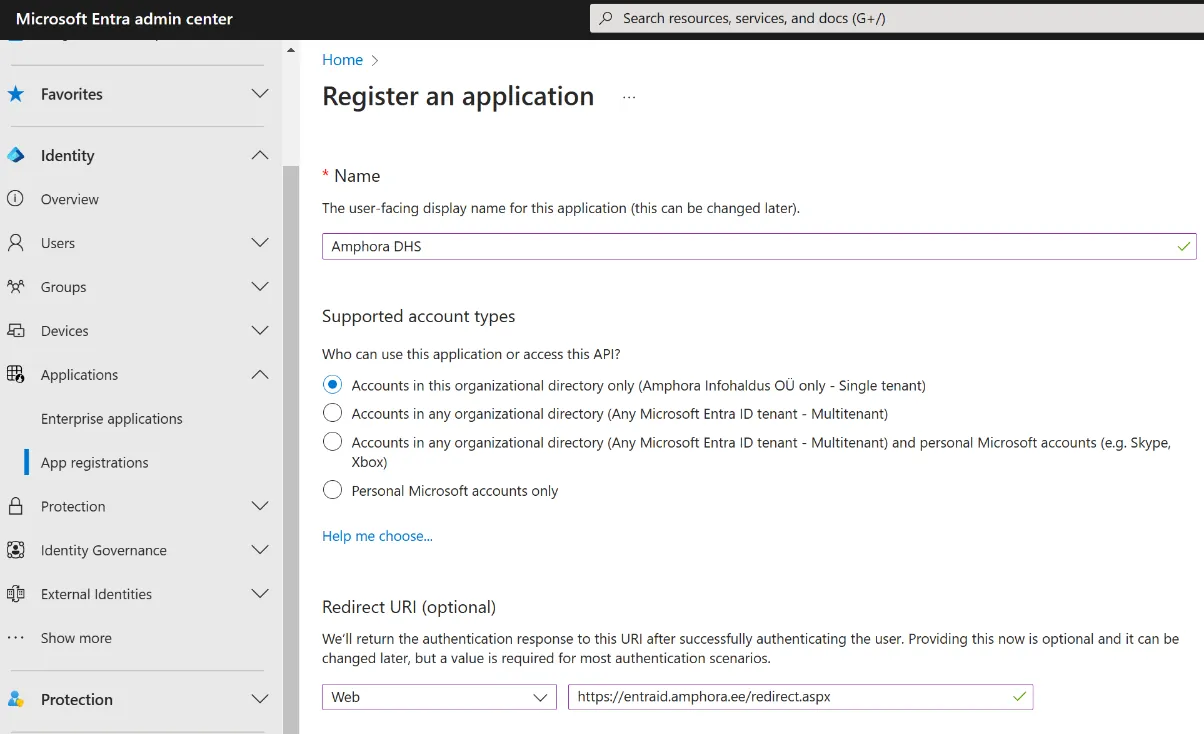 Example:
- Name: Amphora DHS (you can freely choose the name)
- Accounts in this organizational directory only (Amphora Infohaldus OÜ only - Single tenant)
- Redirect URI: Web, https://entraid.amphora.ee/redirect.aspx
-> press Register
-
General data can be configured from the Enterprise application option
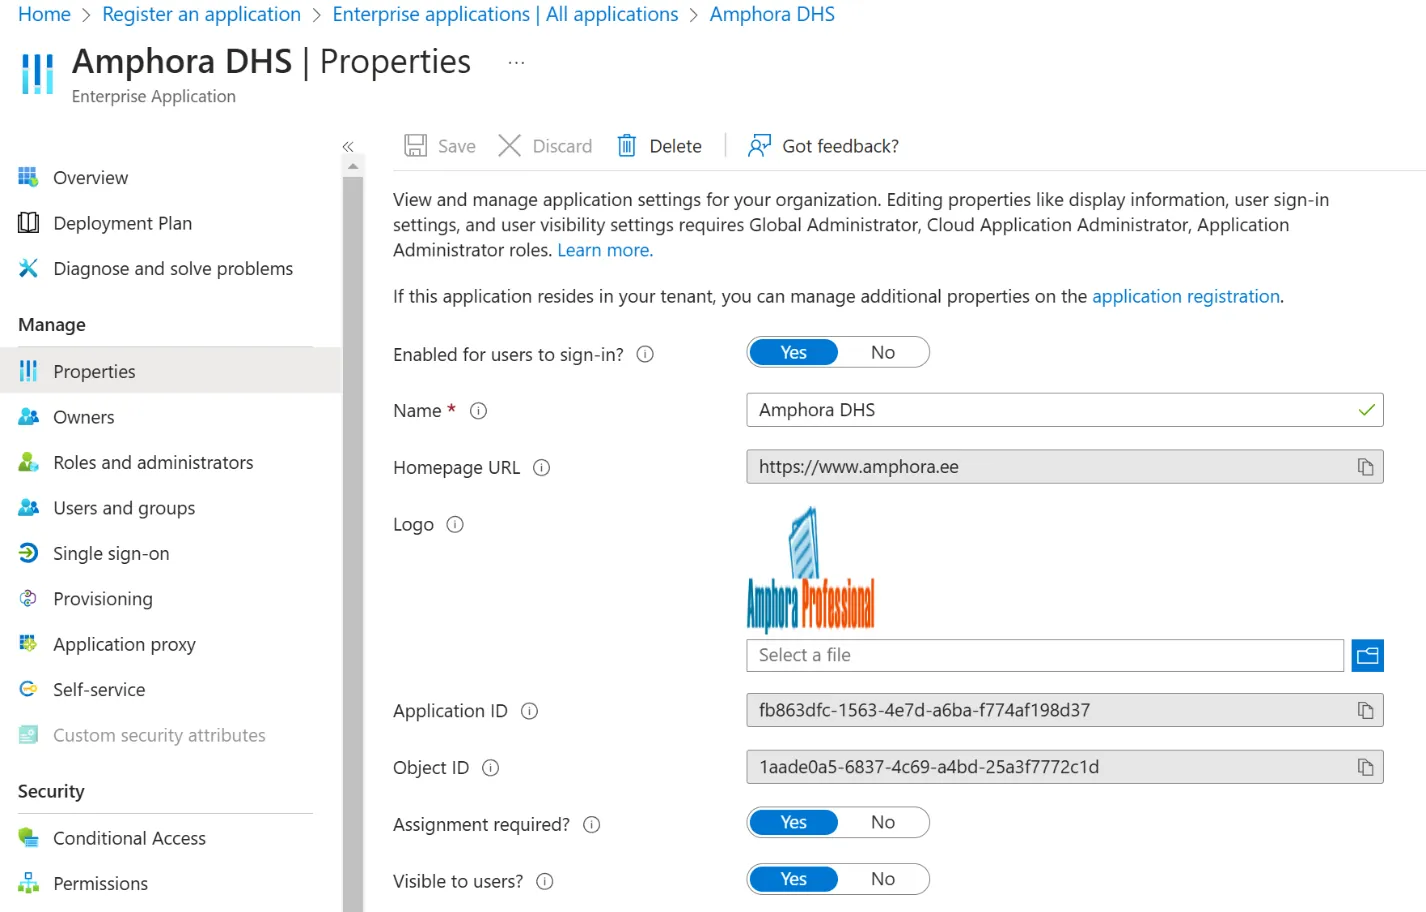 2. More detailed settings can be made from App registrations
Authentication settings (Authentications)
Front-channel logout URL: https://entraid.amphora.ee/logout.aspx 3. Add application access password (Certificates and secrets)
Certificates & secrets -> new client secret (recommended to select max period)
Immediately after adding, the password is displayed in the "Value" field (this is the client secret value in Amphora), this needs to be saved because it will not be displayed later. Later, only the first 3 symbols of the password are displayed. 4. Add additional parameter for Amphora (Token configuration)
Add optional claim -> Token type=Id -> sid (mark this value) -> Add
As a result, this picture should appear: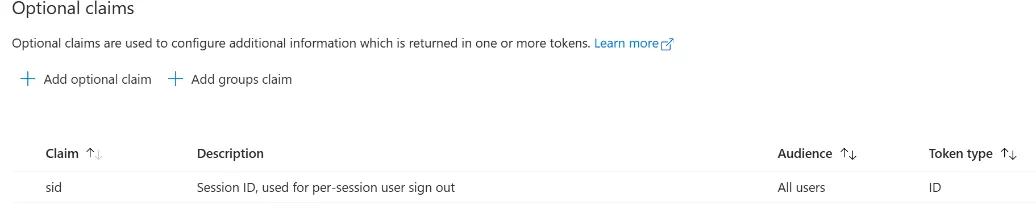 5. Add application permissions (API permissions)
For authentication, "Delegated permissions" need to be added:
5. Add application permissions (API permissions)
For authentication, "Delegated permissions" need to be added:
API Permissions -> Add a permission -> Microsoft Graph -> Delegated permissions ->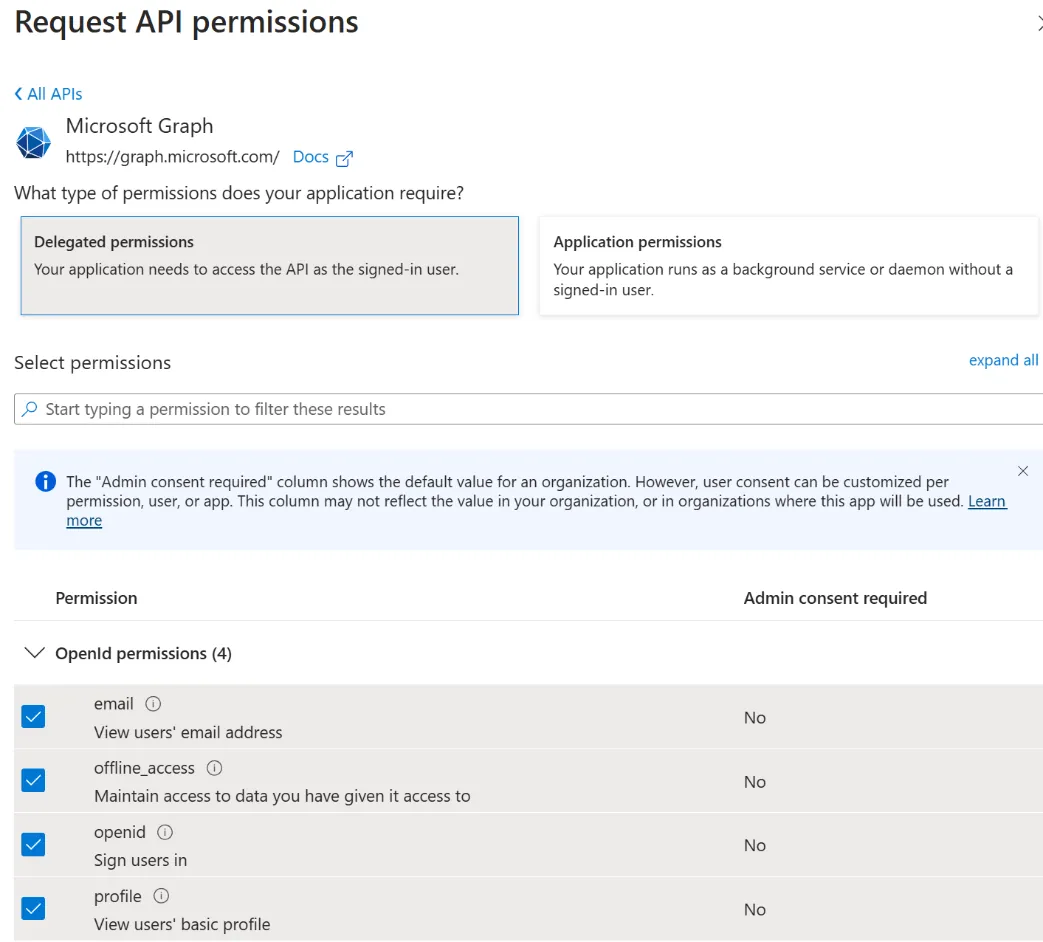 6. For synchronizing user accounts with Amphora, it is necessary to add "Application permissions"
API Permissions -> Add a permission -> Microsoft Graph -> Application permissions ->
- Group.Read.All (Read all groups)
- GroupMember.Read.All (Read group memberships)
- User.Read.All (Read all users' full profiles)
Configuration in Amphora
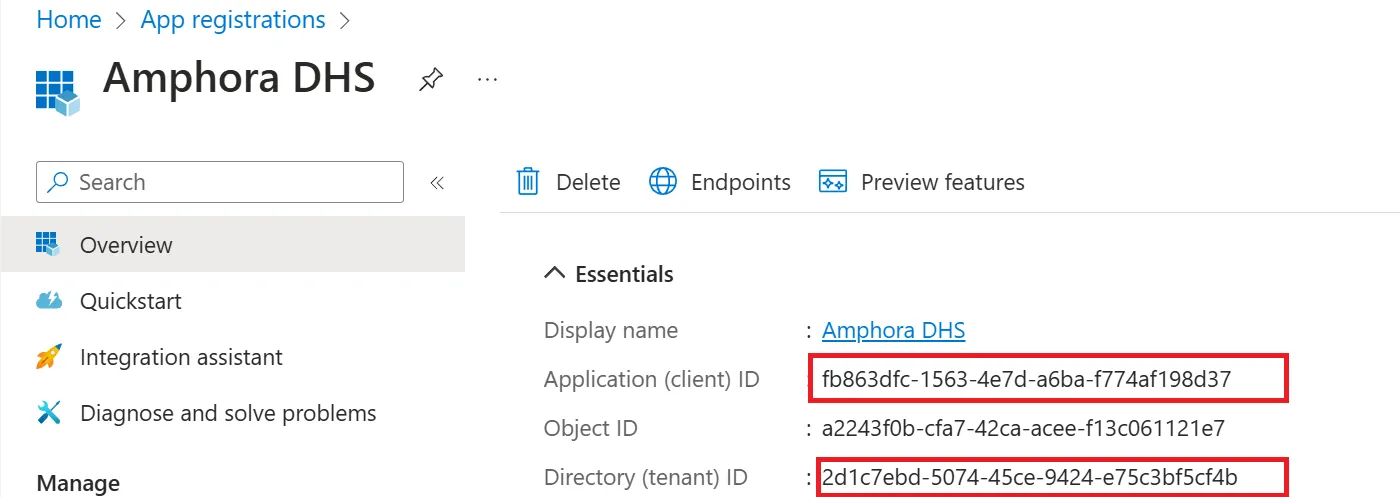
Amphora needs the following data from the ENTRA ID environment:
* Application (client) ID
* Directory (tenant) ID
* Client secret
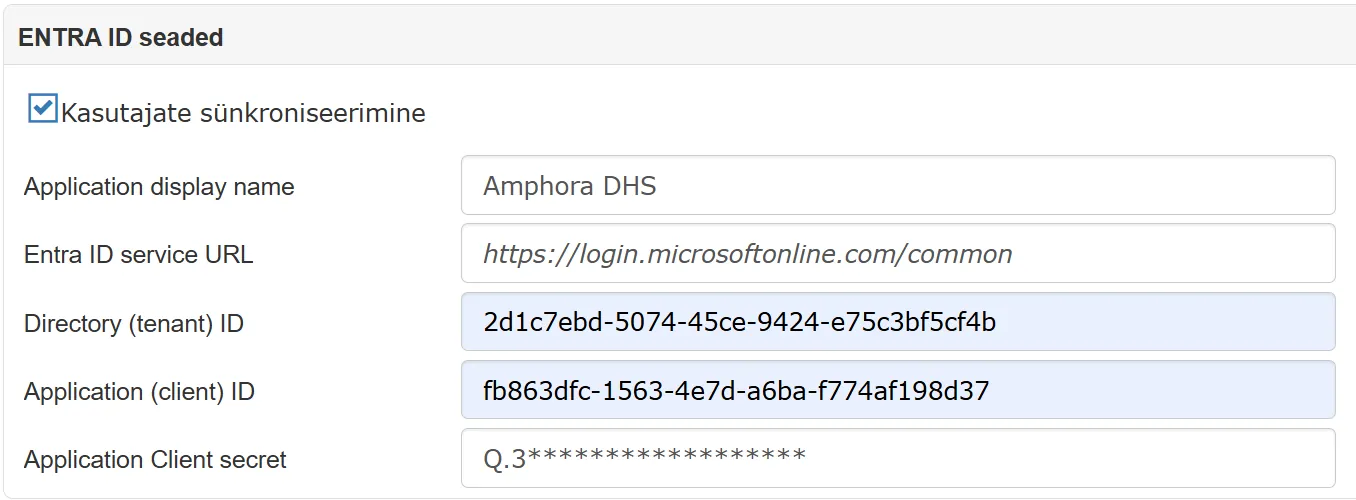
The application name is optional, it is recommended to use the same name as in Entra. The ENTRA-ID service URL is available by default, need to enter it if it should differ for your organization.
 Enter this data into your Amphora environment: Admin -> Unit Settings -> ENTRA-ID settings
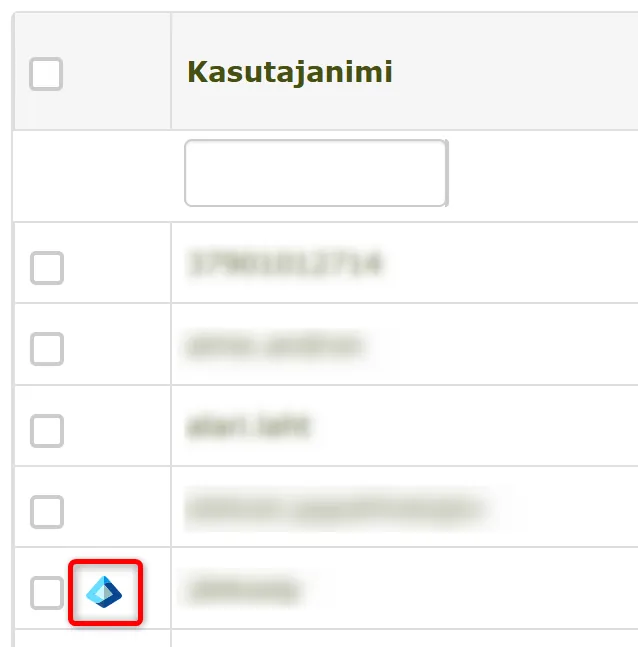
 If you press the "Synchronize with ENTRA ID" button in the users view and the button press does not give an error, then account synchronization works.
An Entra ID icon appears in the users list if the user account is linked to an Entra-ID account.
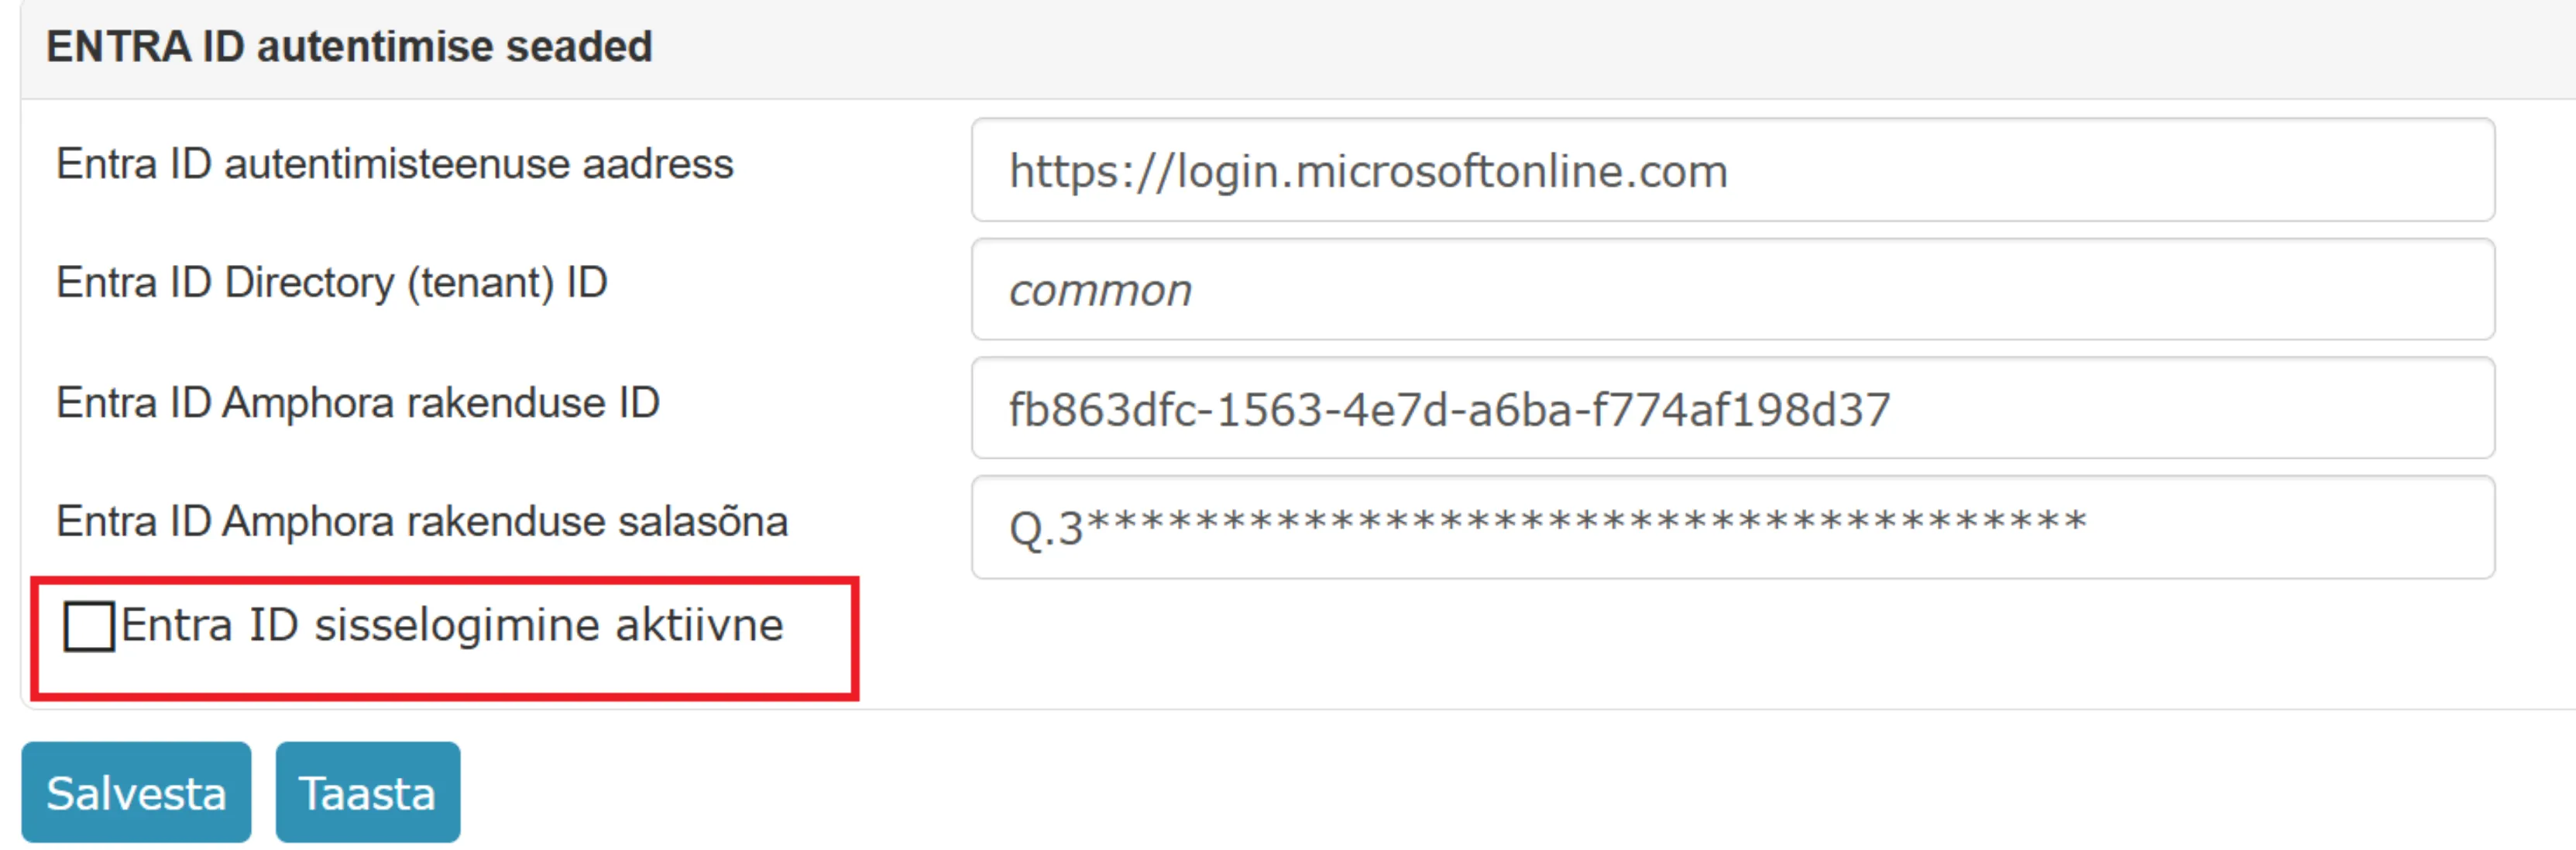
To activate Entra ID authentication, you also need to activate ENTRA ID in the organization settings. Here, authentication is by default to the Amphora ENTRA ID application. If you want to use only your organization's users for authentication, then also add your ENTRA ID settings here.
For Information
-
We have tested Entra ID user groups with Security type, but it probably also works with Microsoft 365 type.
-
Adding Entra ID service URL is not necessary, the default value usually works.
-
New accounts are created automatically in Amphora if the user is in a group for which a corresponding group also exists in Amphora.
Last modified: 17 October 2026, 09:18:57