Self-Service Portal
Table of Contents
Overview
Amphora Self-Service Portal is an external environment intended for individuals who are not users of the Amphora internal environment. Authentication is done using ID-card, Mobile-ID, or Smart-ID.
The Self-Service Portal allows:
- Reviewing documents sent for information -- electronic delivery
- Signing documents sent for signing
- Submitting requests and applications using Amphora forms (both signed and unsigned)
Using the Self-Service Portal helps ensure secure document delivery and reduce email-related risks.
Submitting Applications in Self-Service Portal
In the Self-Service Portal, external persons can fill forms, and upon saving, the document is automatically registered in the Amphora internal environment. This is a good solution for submitting applications or requests, for example.
The portal can be accessed using ID-card, Mobile-ID, or Smart-ID.

Login and Automatic Person Creation
The Self-Service Portal can also be accessed by external users for whom a person record does not yet exist in the Amphora environment. In such cases, Amphora creates the person record automatically.
Before using the Self-Service Portal, the external user must confirm their email address. The process works as follows:
- The external user logs into the Self-Service Portal using ID-card, Mobile-ID, or Smart-ID.
- Amphora creates a person record for the external user, but the Self-Service Portal cannot be used until the email address is entered and confirmed.
- Amphora sends a confirmation email to the entered address.
- The external user confirms their email address via the link in the email.
- After confirmation, the external user gains access to the Self-Service Portal.
New person initial view:
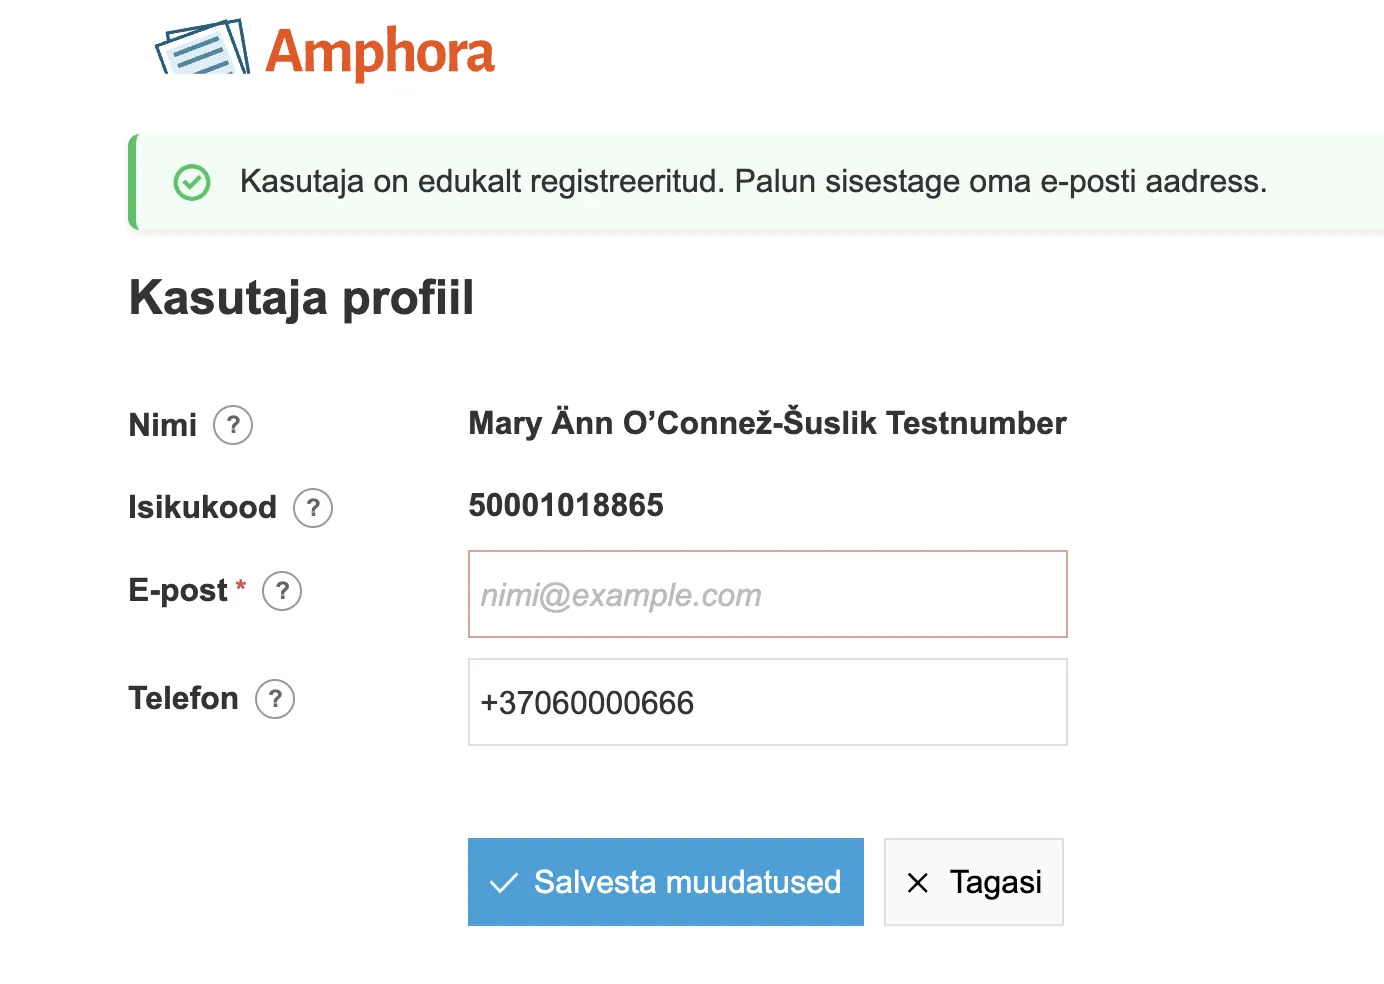
The external user can modify their personal data. To do this, click the gear icon located after the external user's name and personal code. It is possible to change the email address and mobile number. When changing the email address, a confirmation email is sent to the new address. The new email address becomes active after confirmation.

Self-Service Portal Forms
By default, no form is visible in the Amphora Self-Service Portal. To make a form visible:
- Go to Admin -> Form Configuration.
- Select the desired form (click on the form name).
- In form settings, add a checkmark in front of Self-service. Optionally, add a checkmark for "Show Submit Unsigned button", which allows submitting the form without a signature.
- Verify that a default catalog is assigned to the form.
- Click Save.
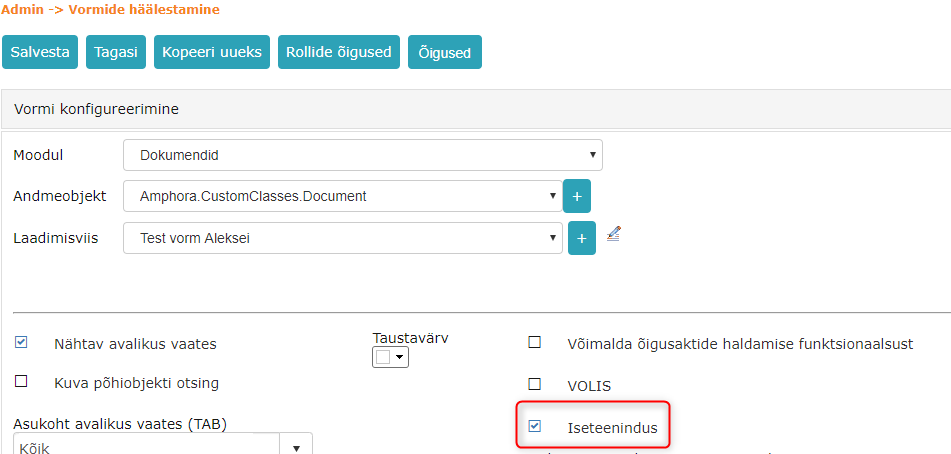 After saving, the form becomes visible in the Amphora Self-Service Portal.
Self-Service Portal View
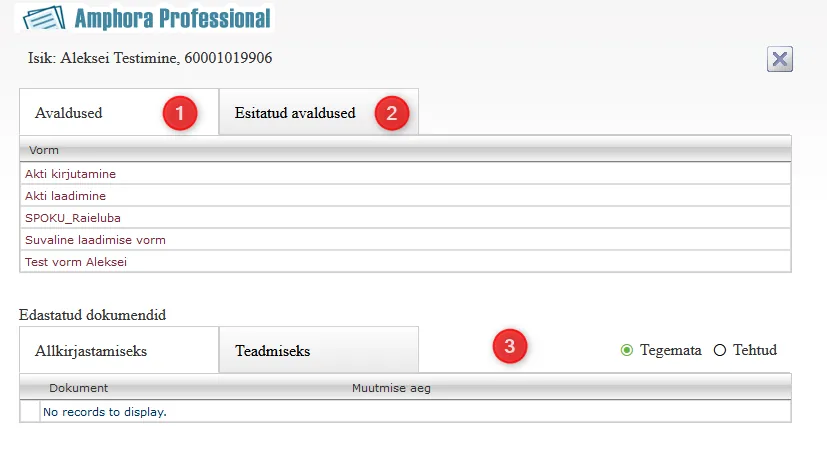
-
Application Forms -- all Amphora forms that the Amphora internal environment administrator has made visible in the Self-Service Portal (the "Self-service" option is checked in form settings).
-
In Progress -- applications that the external user has started composing but has not yet finally submitted. In-progress applications can be modified and deleted by the external user.
-
Submitted -- all applications submitted by the external user. Submitted applications cannot be modified or deleted.
-
Form Search -- allows searching both by application form name and by organization.
-
Application Forms List -- the organization associated with the form is displayed in parentheses after the form name. Since one Amphora environment may contain both the main organization and managed organizations, you can immediately see which organization's form it is. Additionally, if a form is made visible in the Self-Service Portal but the required configuration is incomplete, a notification is displayed: "Settings are not correct, cannot be used yet".
Creating, Modifying, and Submitting Applications
To create an application, click the desired form name in the Application Forms tab.
The following fields are not displayed in the Self-Service Portal:
- Title -- Amphora composes the title automatically in the format: Form name (person's first and last name).
- Main File -- The external user cannot add the main file themselves. The main file slot is reserved for the template. Each upload-type form can have a template file associated with it, which Amphora fills when the application is submitted (signed or unsigned) and stores as a new main file, including the application number. A draft carries the unfilled template. If additional files need to be added, the additional files functionality must be enabled on the form -- in that case, the additional files panel is visible in the Self-Service Portal.
- Catalog -- must have a default value set on the form. If no default catalog is configured, the Application Forms tab displays the notification "Settings are not correct, cannot be used yet" next to the form.
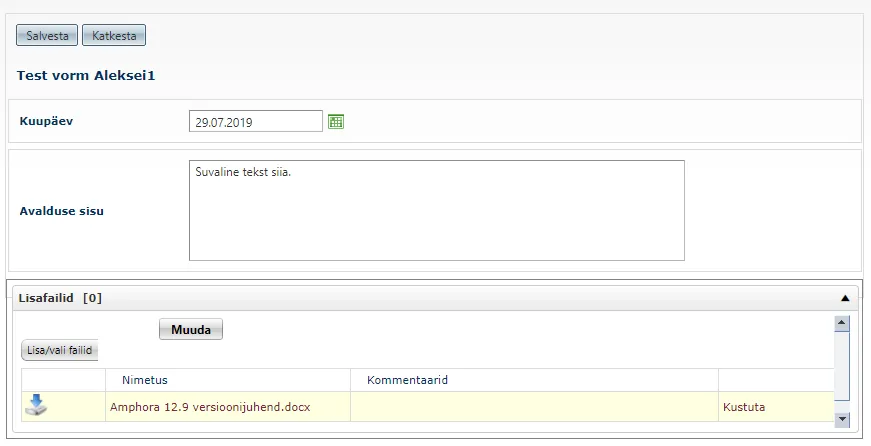
-
Save as Draft -- Saves the application as a draft without submitting it. Drafts are shown under the In Progress tab. The external user can modify and delete drafts. The document is saved to the Amphora internal environment, but no number is assigned and no automatic process is started.
-
Sign and Submit / Submit Unsigned -- Allows signing the application and submitting it immediately. Submitted applications appear in the Submitted tab. After submission, the external user can no longer modify or delete the application. The document is saved to the Amphora internal environment with a document number, and the automatic process is started. If the form settings have the option Show "Submit Unsigned" button enabled, the Submit Unsigned button is displayed instead of Sign and Submit.
-
Cancel -- Cancels the application creation. No document is saved to the Amphora internal environment.
-
Informational Text -- Displays information about which organization's form is being used.
-
Application Form Fields -- Fields required for filling out the form. Mandatory fields are marked with a * (asterisk) symbol. If mandatory fields are not filled, the application cannot be saved or submitted.
-
Additional Files Panel -- Allows the external user to add files to the application from their device.
The Sign and Submit button offers all three signing methods -- ID-card, Mobile-ID, and Smart-ID. The signing method does not depend on the authentication method.
The In Progress tab view looks like this:

-
Download main file or open PDF copy in preview mode. Main file icons are visible if a template is associated with the form.
-
Application title with composer name. Clicking the title opens the application edit view, where you can modify, submit, or delete the in-progress application.
-
Application last modified date and time. Displays the date and time of the last modification.
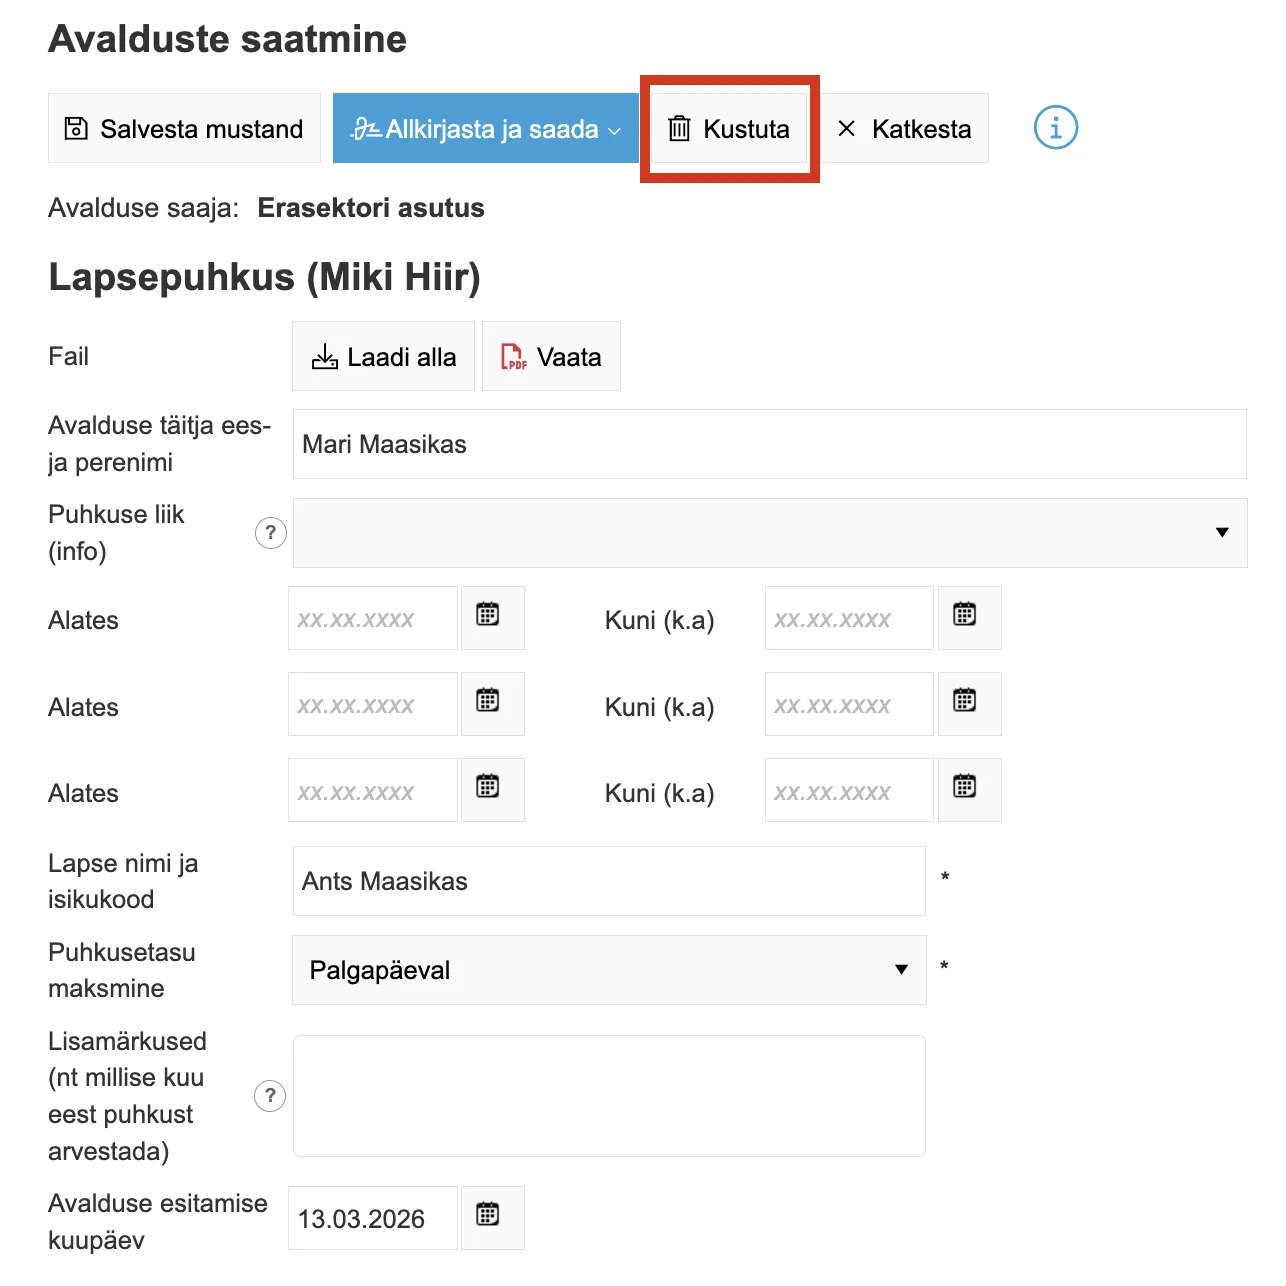
The edit view for an in-progress application looks the same as the new application creation view, but additionally includes a Delete button.
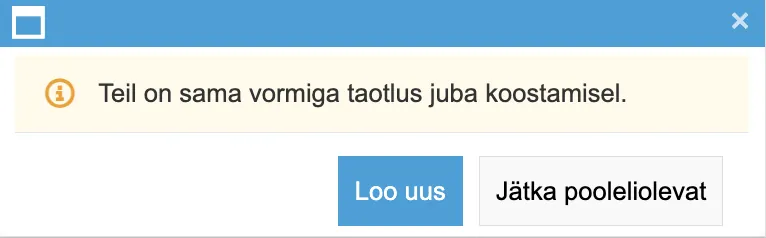
If the external user already has an application in progress with the same form and tries to start a new application with the same form, a notification is displayed with two options:
- Create New -- starts creating a new application. The in-progress application is not affected.
- Continue In-Progress -- opens the in-progress application in edit view. The external user can continue filling and submitting the application.
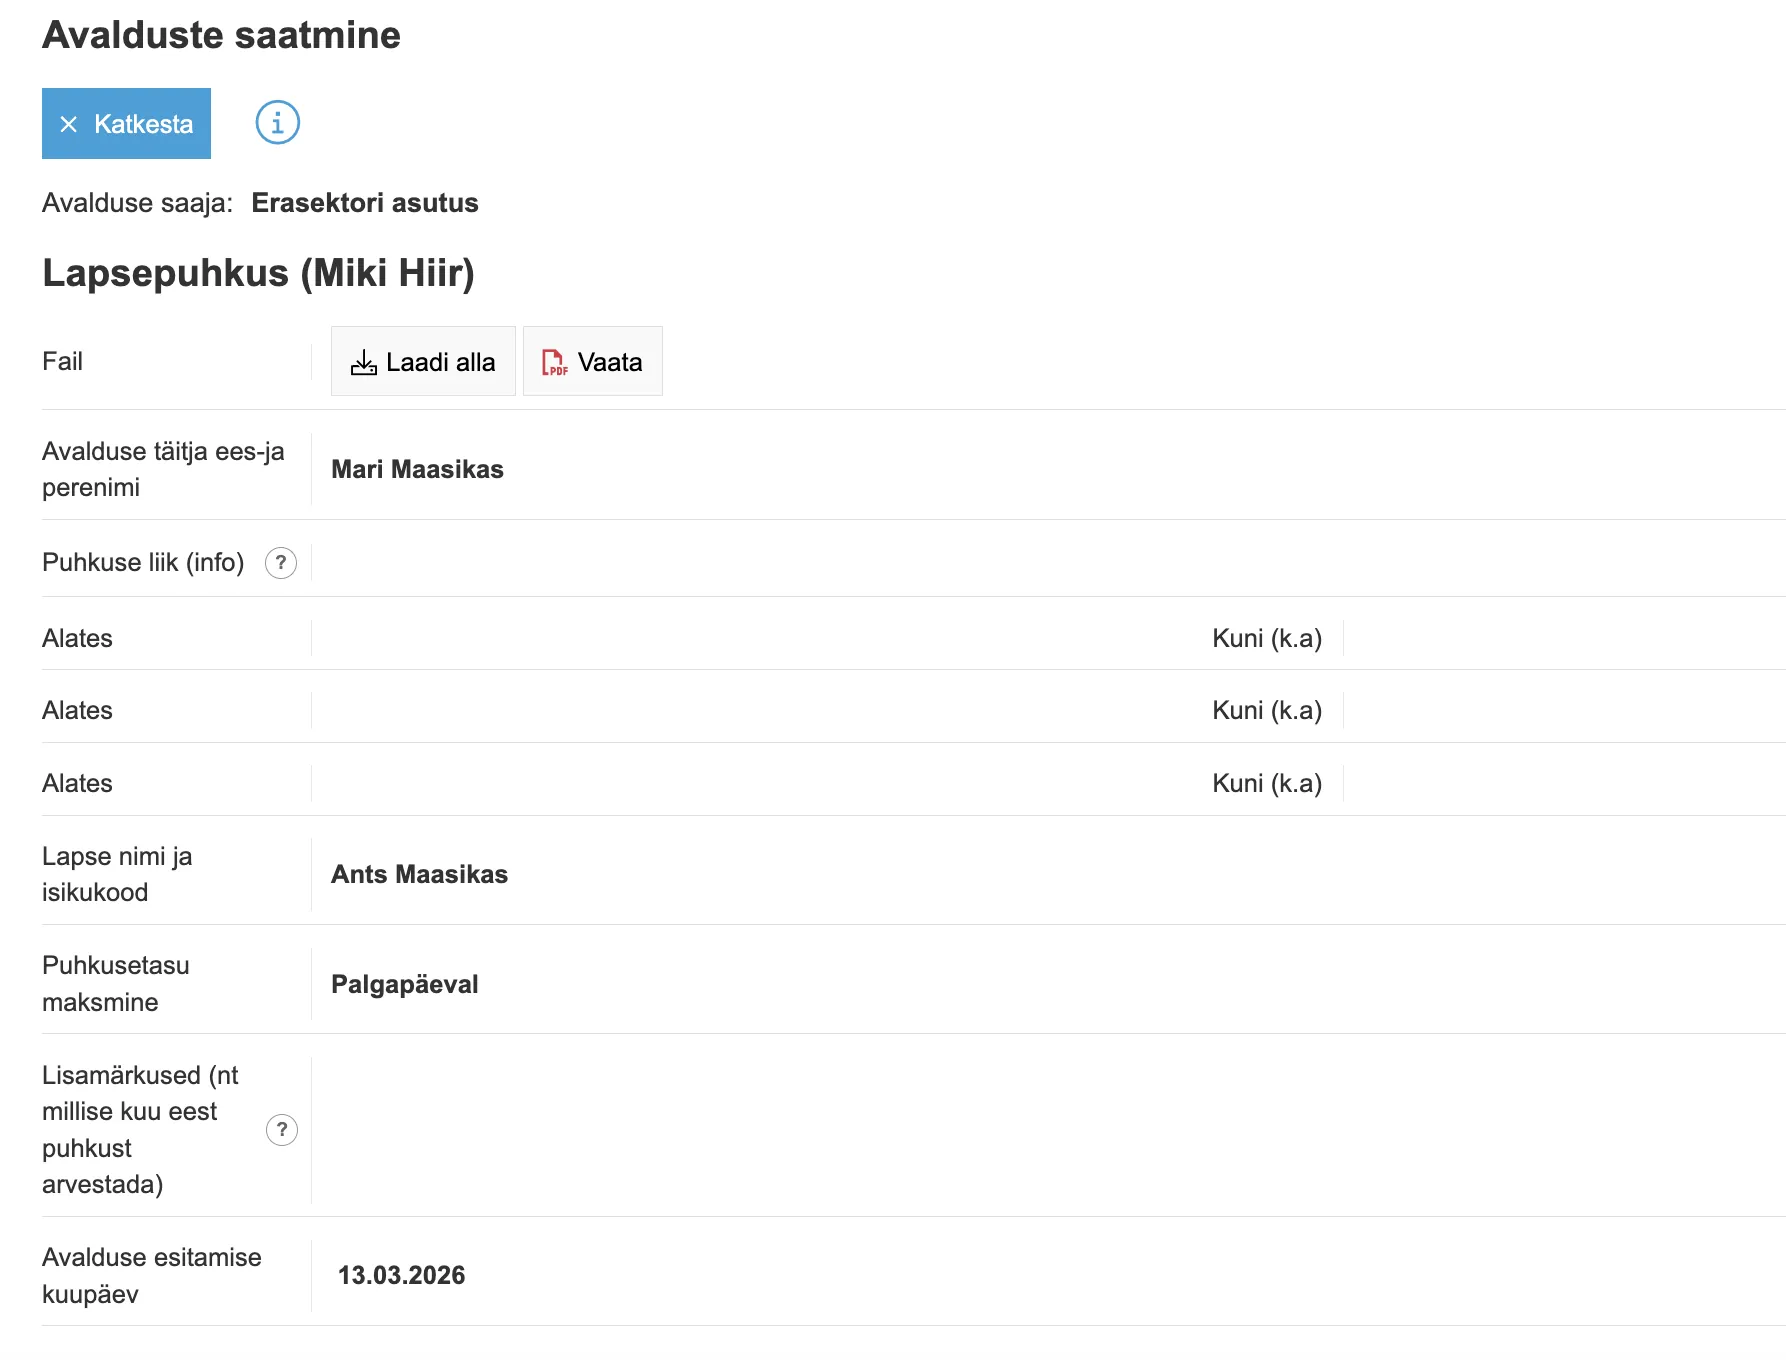
The Submitted tab contains all applications submitted by the external user (both signed and unsigned).

-
The main file can be downloaded directly from the table column or opened in a preview window.
Main file display rule: If a signature container exists, the signature container is displayed. If there is no signature container, the template file in the main file is displayed. If the main file is missing, the main file column is empty for that application.
-
The application title is displayed with the submitter's name in parentheses.
- The exact submission date and time are displayed.
- Shows the process status. Values can be Completed, Incomplete, or empty if no automatic process has been added.
- Displays the official's or employee's name with the task type. The external user can see in real time which process step is currently active.
A submitted application can be opened to review entered data and download all files associated with the application (including additional files).
Adding the registry number to an application
An application submitted from the self-service portal receives its registry number immediately on submission when the folder's counter settings do not have Drafts allowed ticked. If that tick is there, the application does not receive a number on submission and the organization's user registers the document themselves in the Amphora internal environment.
Self-Service Portal Automatic Processes
Automatic processes should be configured for Self-Service Portal forms so that Amphora users receive an immediate email notification about submitted applications and can continue working with them.
When the external user clicks the Sign and Submit or Submit Unsigned button, the automatic process starts immediately.
Configuring Automatic Process in Internal Environment
Important
Creating a group is not mandatory. When creating an automatic process, it can be linked to a persons group. If this link is established, Amphora starts the automatic process only when applications are submitted by external users who belong to that group. If the automatic process is not linked to any persons group, Amphora starts the automatic process for every application submitted by an external user.
1. Creating a Group
Go to the Persons module and then open Groups.
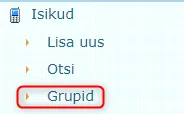 Click New Group and add the persons who will be submitting applications in the Self-Service Portal.
2. Enabling the Policy
Go to Admin -> User Groups and enable the policy Show person groups selection in automatic processes for the appropriate user group. After activating the policy, log out of the Amphora environment and log back in.
3. Creating the Automatic Process
Go to Admin -> Automatic Processes and click New Process. If the above policy is enabled, a new box named Groups (Self-service) appears in the automatic process creation view.
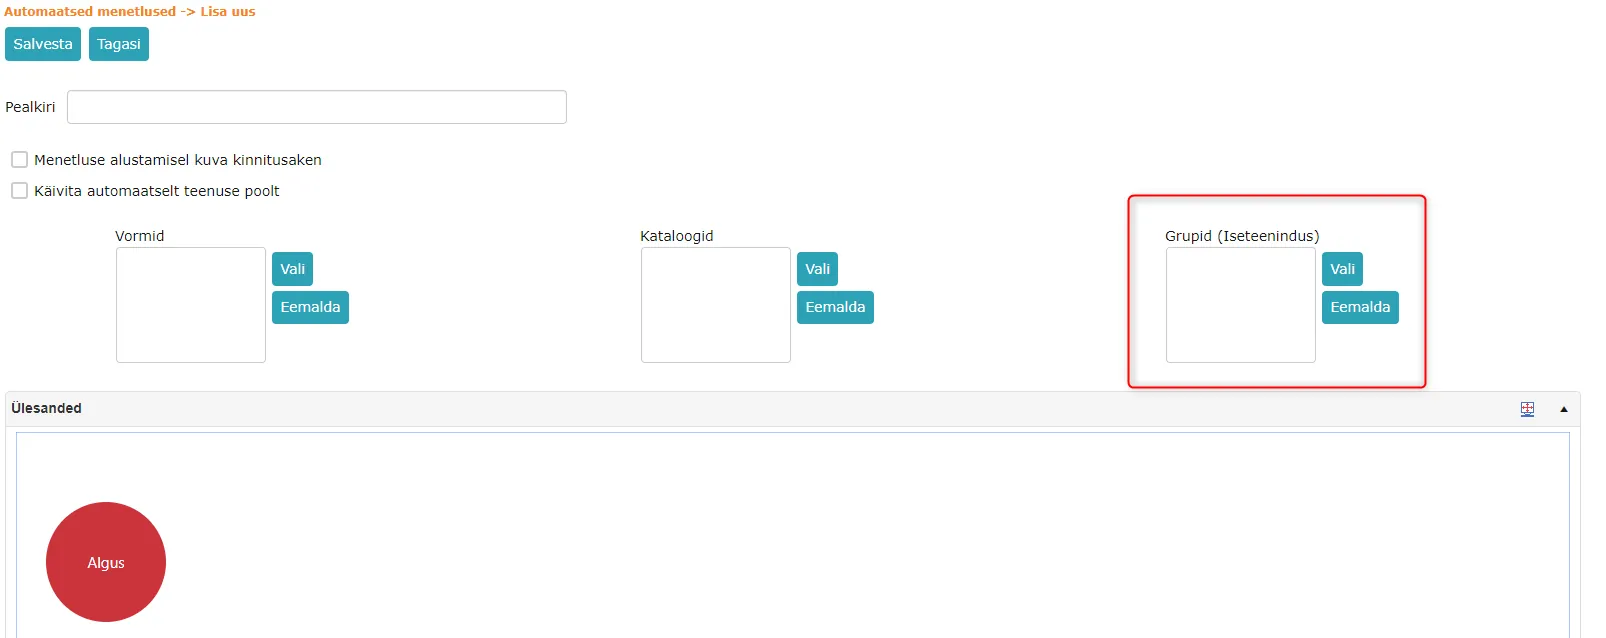 The Groups (Self-service) box should contain the persons group created earlier.
Additionally, you need to fill in:
- Forms -- add the form that is used in the Self-Service Portal.
- Catalogs -- add the catalog that is set as the default catalog on the form. If the form's default catalog and the automatic process catalog differ, applications cannot be composed with that form in the Self-Service Portal. In that case, a notification is displayed next to the form: "Settings are not correct, cannot be used yet".
The rest of the process configuration proceeds as usual. It's also possible to use roles. A detailed guide for configuring automatic processes can be found at this link.
Task Rejection and Further Action
If the submitted application data is incomplete or incorrect, the Amphora user who received the task through the process must reject it.
For an approval task: choose No or Neutral as the response and add a comment with the reason for rejection.
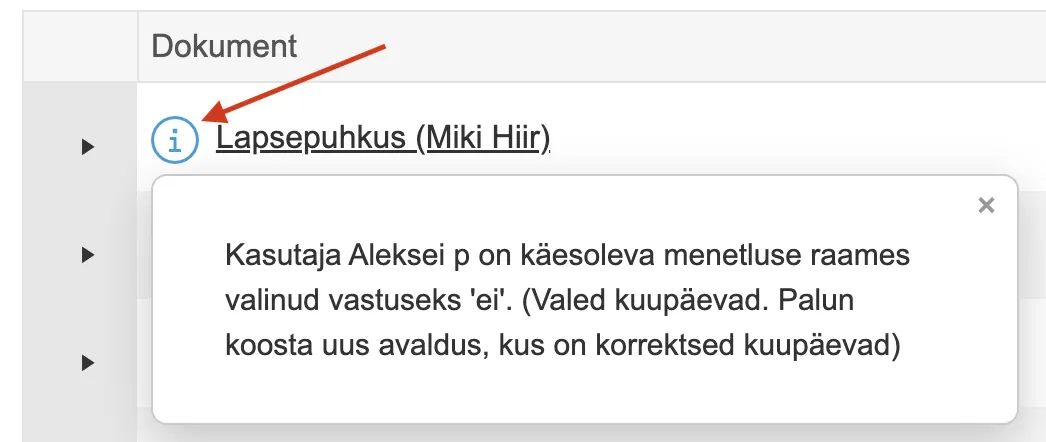
For a signing task: click Do Not Sign and add a comment with the reason for rejection.
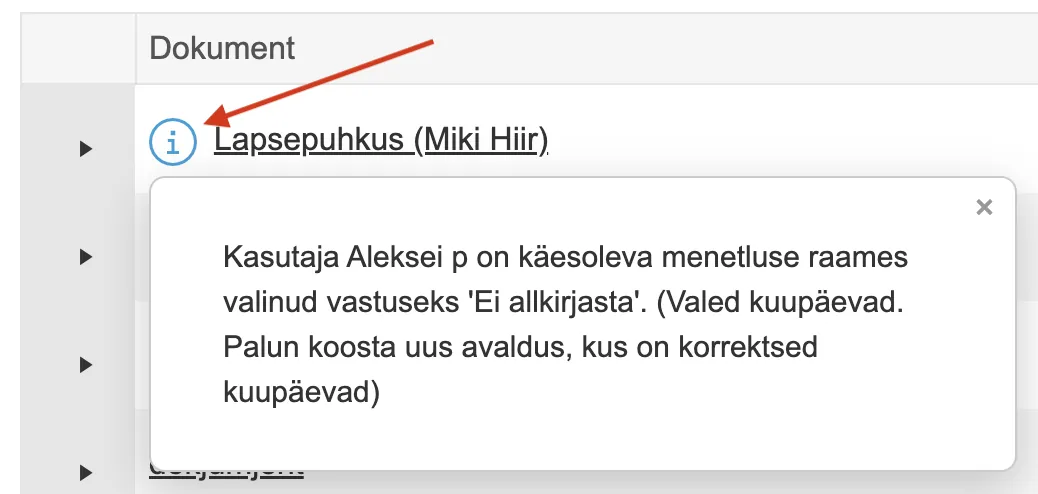
Upon rejection, the following happens:
- An information task is sent to the application submitter along with an email notification.
- In the Self-Service Portal, this task is displayed in the Transmitted Documents panel under the For Information tab.
- The application row shows which answer the official chose (e.g. "ei"). The portal does not show the official's comment; tell the applicant the reason separately.
Amphora User in Self-Service Portal
Amphora internal environment users can also use the Self-Service Portal. In the internal environment, there is a Self-service link at the bottom of the left menu that takes the user directly to the Self-Service Portal.
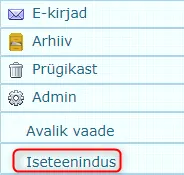 Amphora users can submit applications exactly the same way as external persons.
Recommendations
-
Template usage -- if a .docx template is used with the form, do not add a unit to the template. Since external persons are not associated with any unit, a template with a specified unit won't work in the Self-Service Portal. You can find the templates guide at this link.
-
Personal code must be unique -- one personal code may only belong to one user or one person. Users are visible in the Persons module as system persons (column System shows mark x). Amphora must not have a user and a regular (non-system) person with the same personal code at the same time. You can find the Persons module guide at this link.
Sending Documents to External Persons in Self-Service Portal
Adding Person to System
Amphora allows sending documents for signing and for information to external users who are not Amphora users. This is a simple and secure way to deliver documents to external users without needing to send them by email.
External users can create their own person record when they log into the Amphora Self-Service Portal for the first time. If the external user's person record does not exist and a document needs to be sent to them, the person must be created in the Amphora internal environment.
A new person needs to be added to the Persons module:
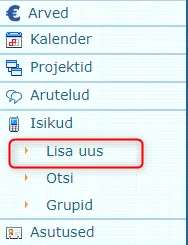
- Open the Persons module from the left menu.
- Click Add New.
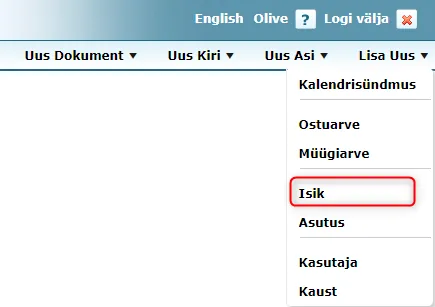
Alternatively, you can use the quick menu -- select Person under Add New.
In the opening view, you need to enter:
- First name and last name
- Personal code
- Email address
The data must be correct, as notifications about documents are sent to the email address.
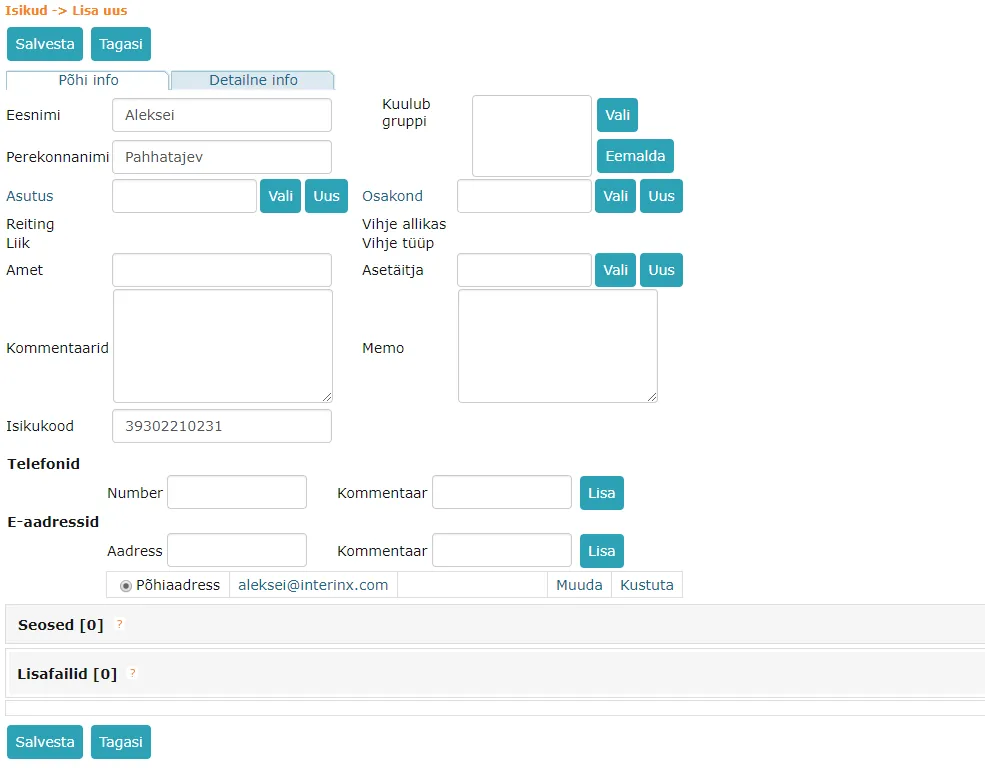
NB!
When adding email, you must remember to click the Add button -- otherwise the email address won't be saved.

When data is checked and correct, click the Save button.
Directing Document for Information or Signing
After adding the person, you can send them tasks for signing or information. This can be done from either the registry view or the object edit view.
Registry view:
 There are two options for sending:
 Processing -- allows sending the document to a processing circle, where each person can be assigned a different task (for completion, information, approval, or signing).
 Delegation -- allows assigning the same task to all persons.
Object edit view:
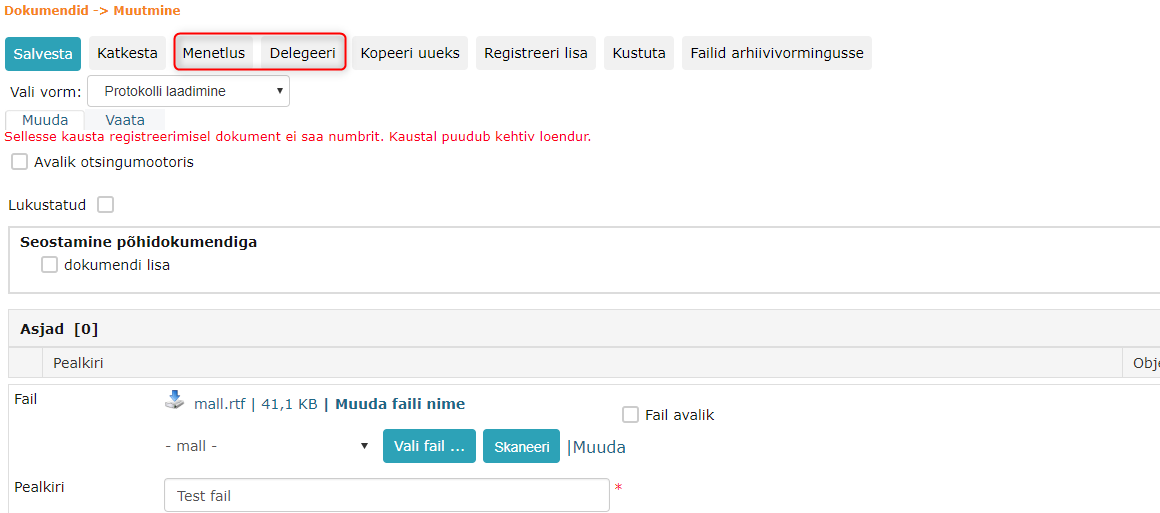 Next, add the persons to whom you want to send the document:
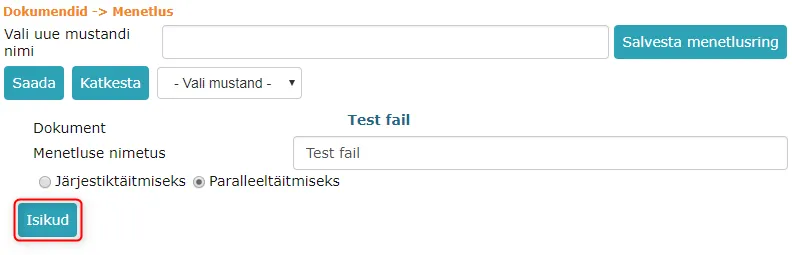
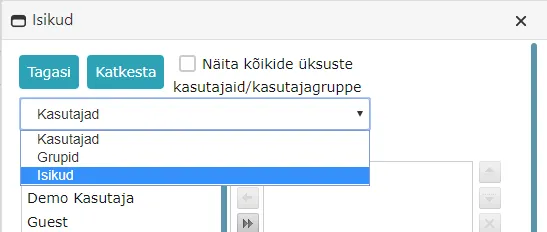
The list distinguishes two categories:
- Users -- Amphora internal environment users.
- Persons -- persons added to the Persons module.
If a person is not displayed in the list, check that the personal code and email address are correctly entered.
Tasks can be sent to the Self-Service Portal for signing or information. You do not need to check the email box, as the notification is sent automatically. It is also possible to add a task comment: comments are visible to the external user in the Self-Service Portal.

Creating Task for External Person via Communications Panel
When creating an outgoing communication, it's possible to select the following as communication method:
- Self-service (for information)
- Self-service (for signing)
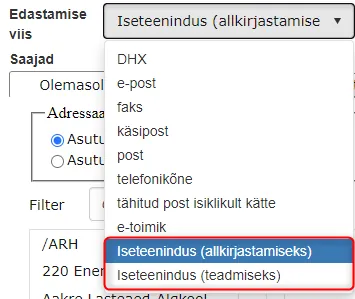
When sending through the communications panel, Amphora automatically creates a sequential completion process that sends the document to the external person for signing or information (depending on the selected communication method) and also to the communication sender for information.

Self-Service Portal Communication Sending Reminder
- The recipient person must have both personal code and email address filled in.
- It's not possible to send Self-Service Portal tasks to institutions (even when adding via New Recipient).
- Files must be selected when sending -- only files are visible in the Self-Service Portal.
- A person added via New Recipient is saved to the Persons module if the data is correct. Institution-related fields must not be filled. Required fields: name, surname, personal code, and email address.
Using Self-Service Portal as External Person
The external user to whom a document was sent can access the Self-Service Portal at the address:
<amphora environment URL>/selfservice.aspx
For example: https://server.amphora.ee/vallavalitsus/selfservice.aspx
NB!
Before version 16.0, the URL ended with /externalparty.aspx. Going forward, the URL ends with /selfservice.aspx.
The person receives an email notification in this format:
 Fields marked in red are changeable according to the environment. The notification text can also be customized.
In the Self-Service Portal, authentication is done using ID-card, Mobile-ID, and Smart-ID. If the person's data already exists in the Persons module, login proceeds immediately. If a person record does not yet exist, Amphora creates it automatically after email address confirmation (see Login and Automatic Person Creation).
In the Self-Service Portal view, there is a separate section Documents Transmitted to Me for forwarded documents. There are three tabs: For Signing, For Information, and Completed.
For Signing tab:
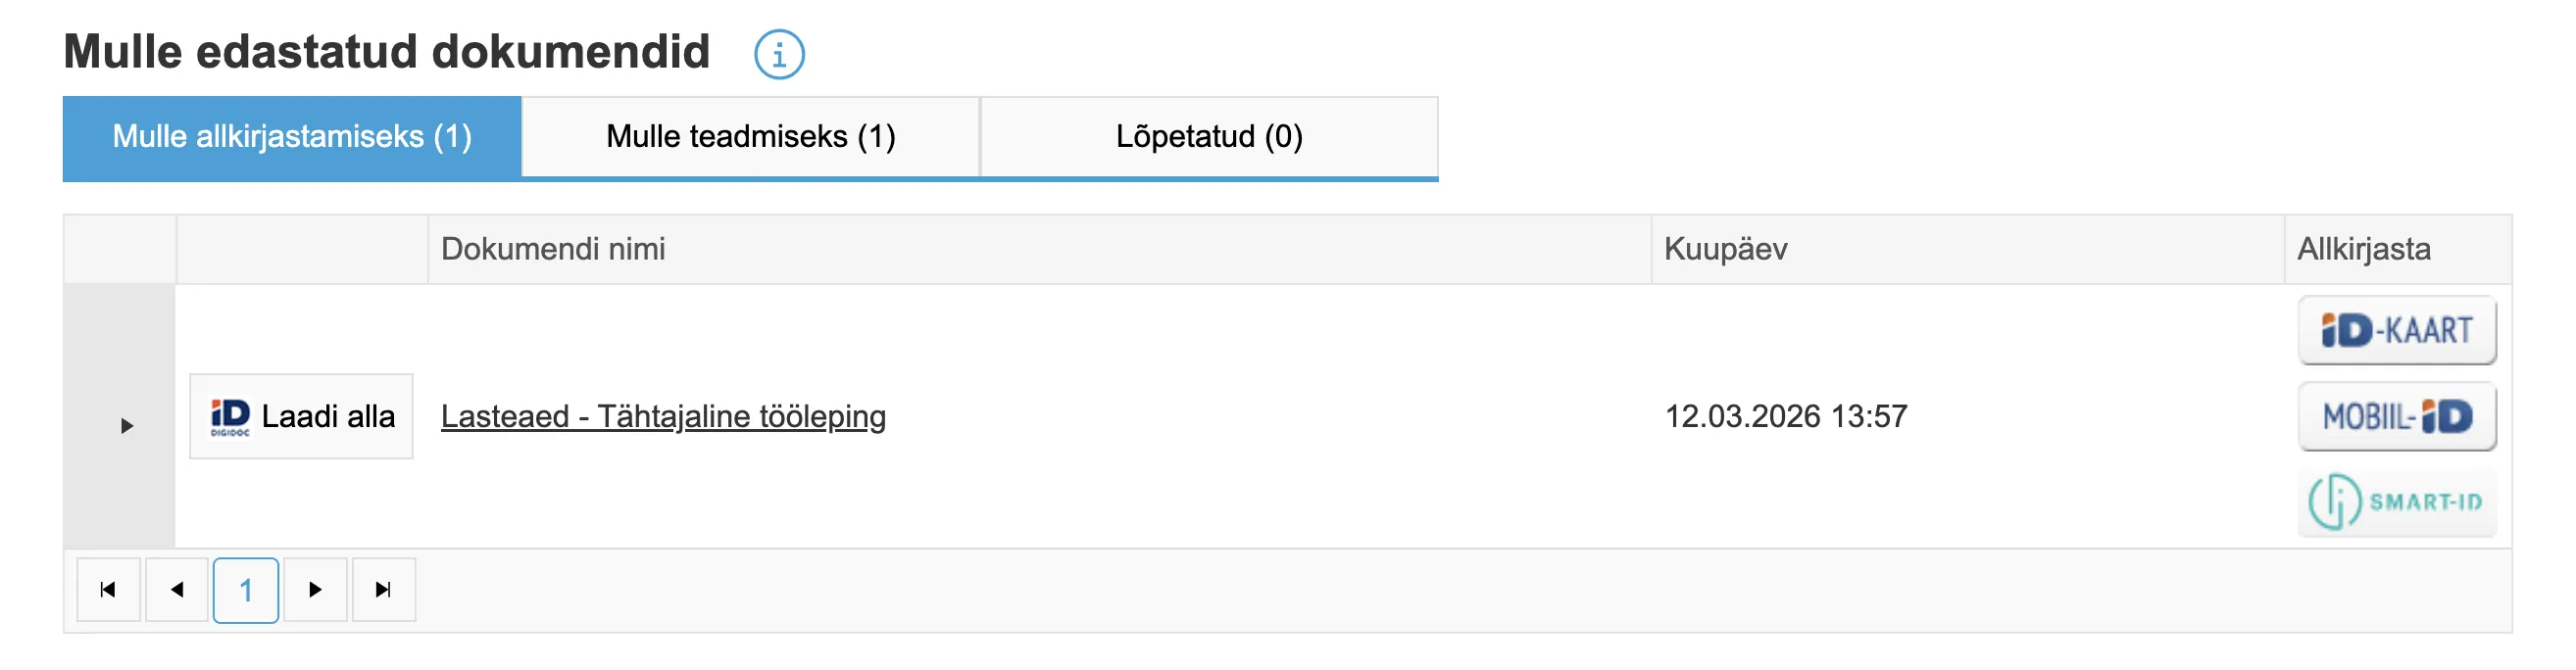
The For Signing tab shows all documents forwarded to the external user for signing. The signing method does not depend on the login method. Signing is always available with ID-card, Mobile-ID, and Smart-ID -- each method has a separate button.
On successful document signing, Amphora shows the external user a notification -- Document has been signed.
For Information tab:
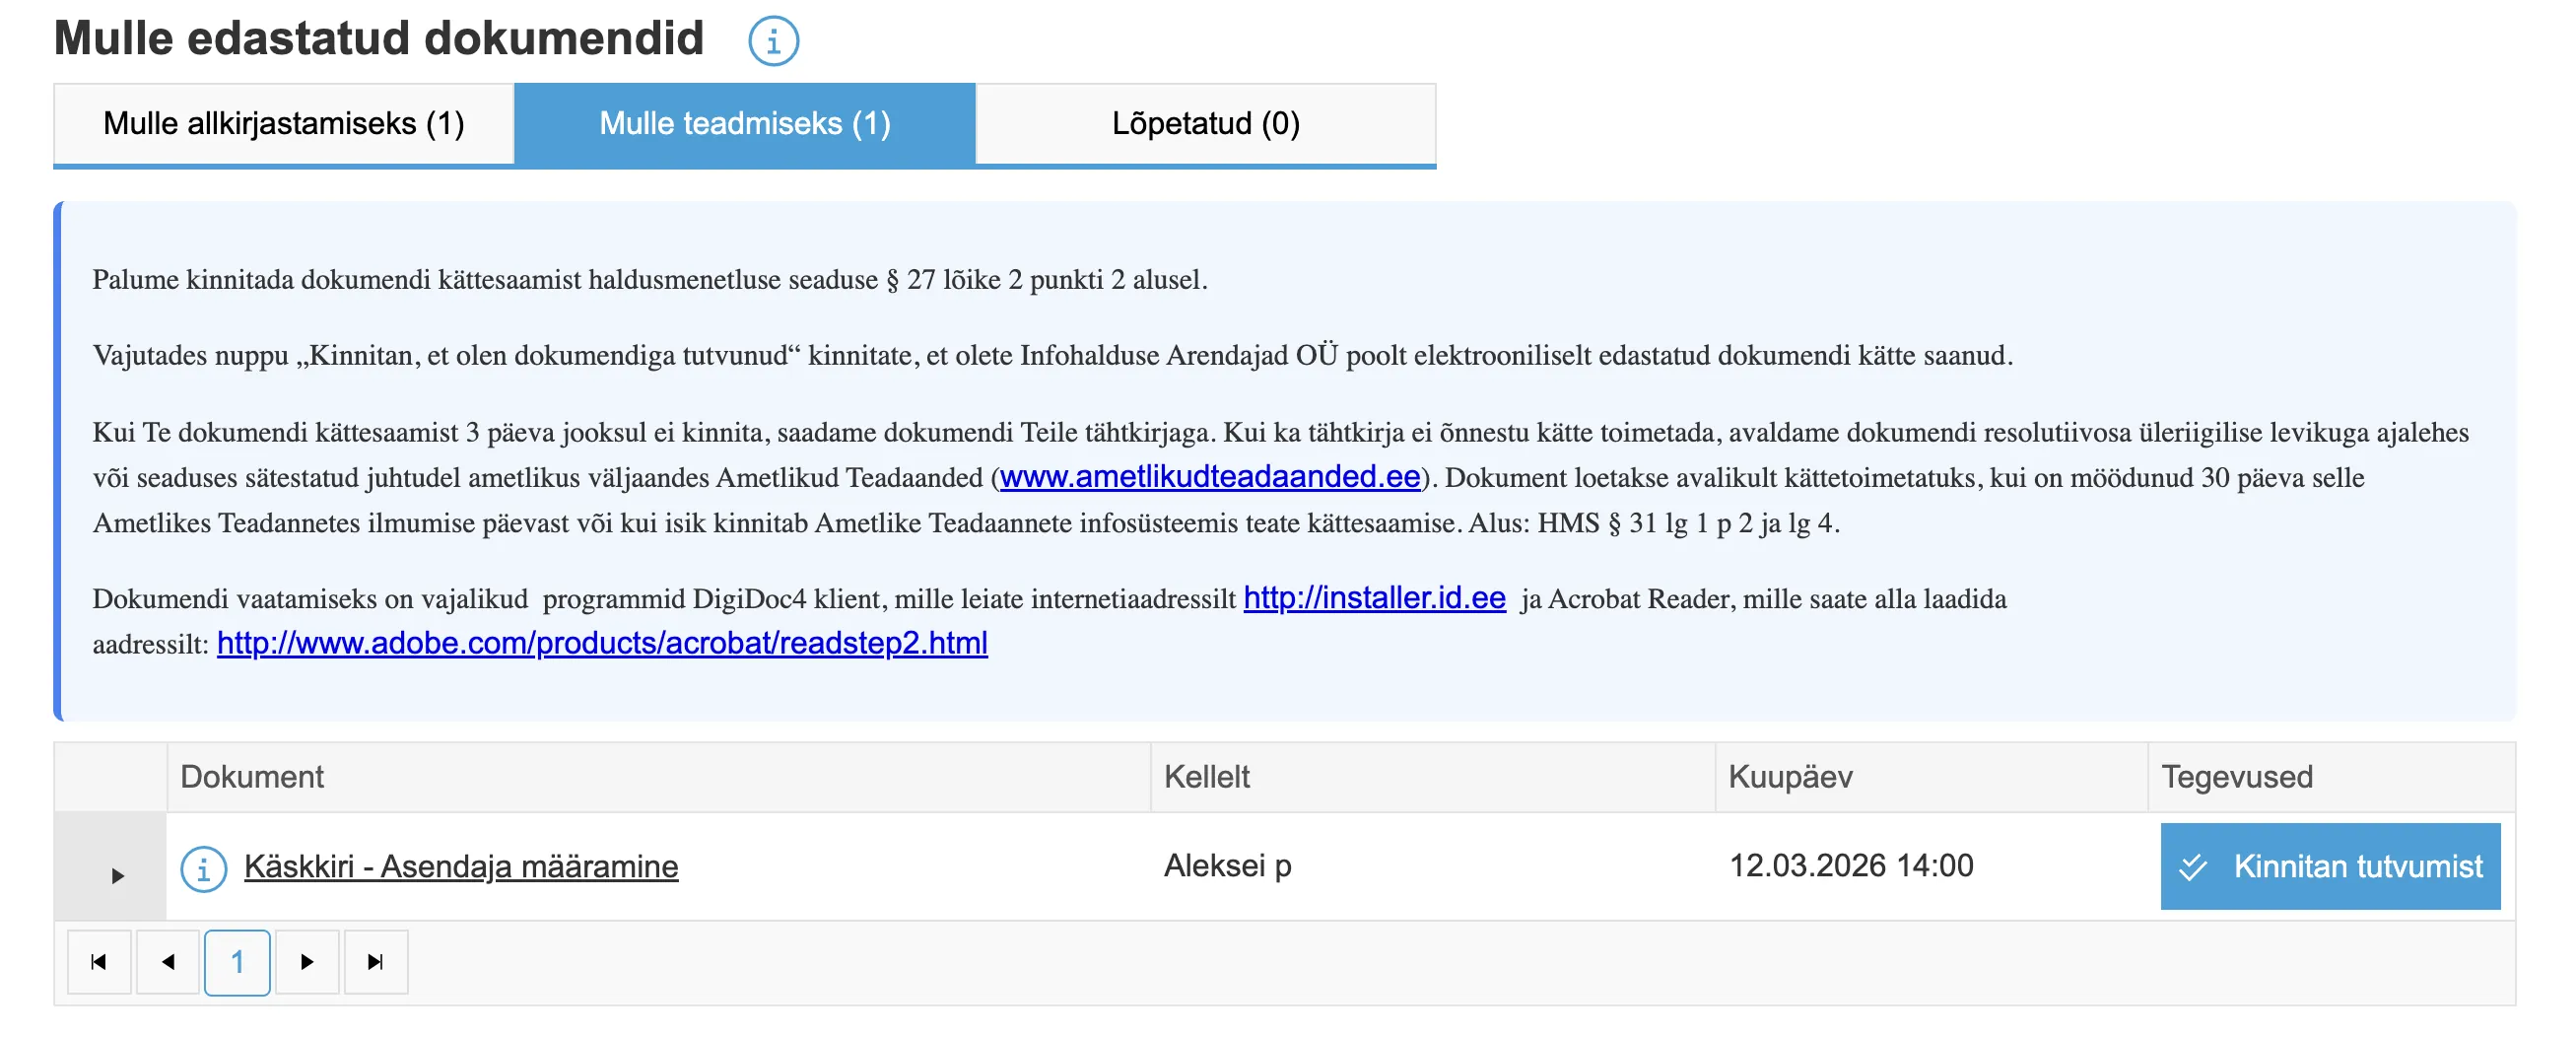
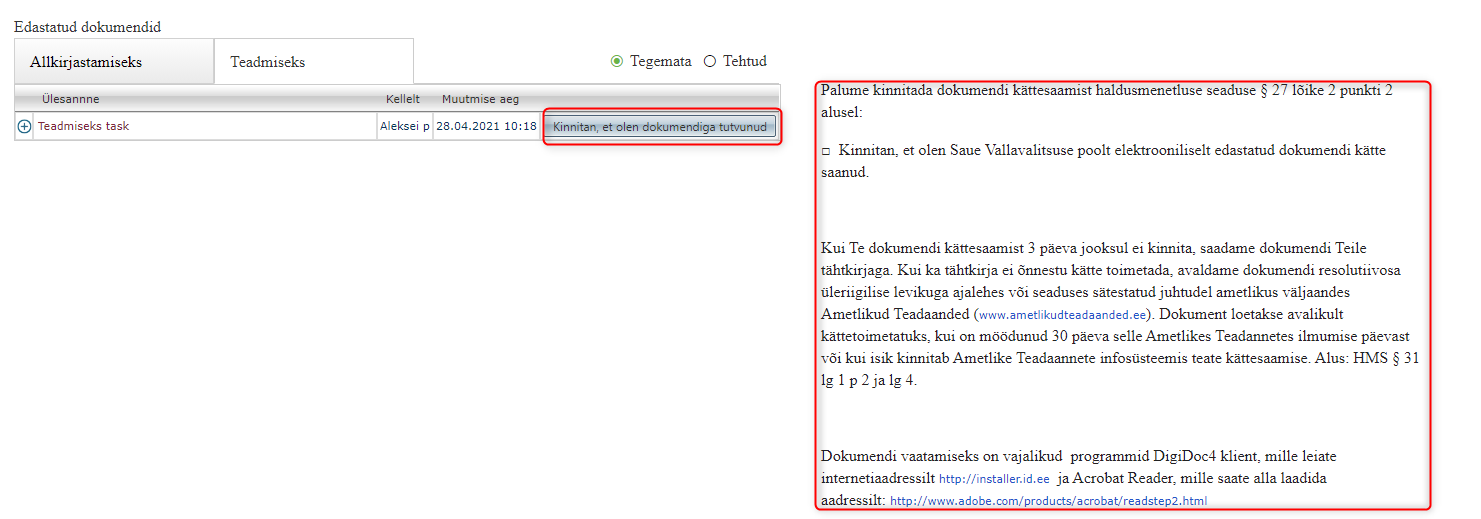
The For Information tab shows all documents forwarded to the external user for information (review). Additionally, an informational text is displayed if configured -- you can read more about this HERE. When the external user has reviewed the document, they must confirm they have done so by clicking the I confirm that I have reviewed the document button.
On confirmation, Amphora shows the external user a notification -- Document review has been confirmed.
Completed tab:

The Completed tab contains all documents forwarded to the user (both for signing and for information) that have been either signed or confirmed as reviewed. These documents do not disappear, and the external user can always download them later.
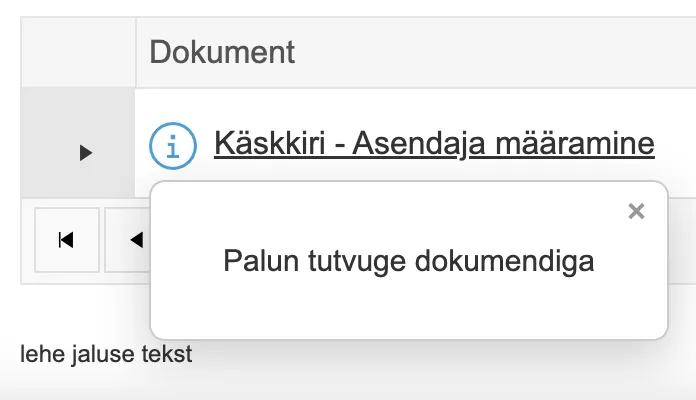
A comment is visible next to the forwarded document if a comment was added when creating the process. Such documents have an "i" icon before the title, and clicking it opens the comment. The comment is also displayed next to forwarded documents that have already been signed or confirmed.
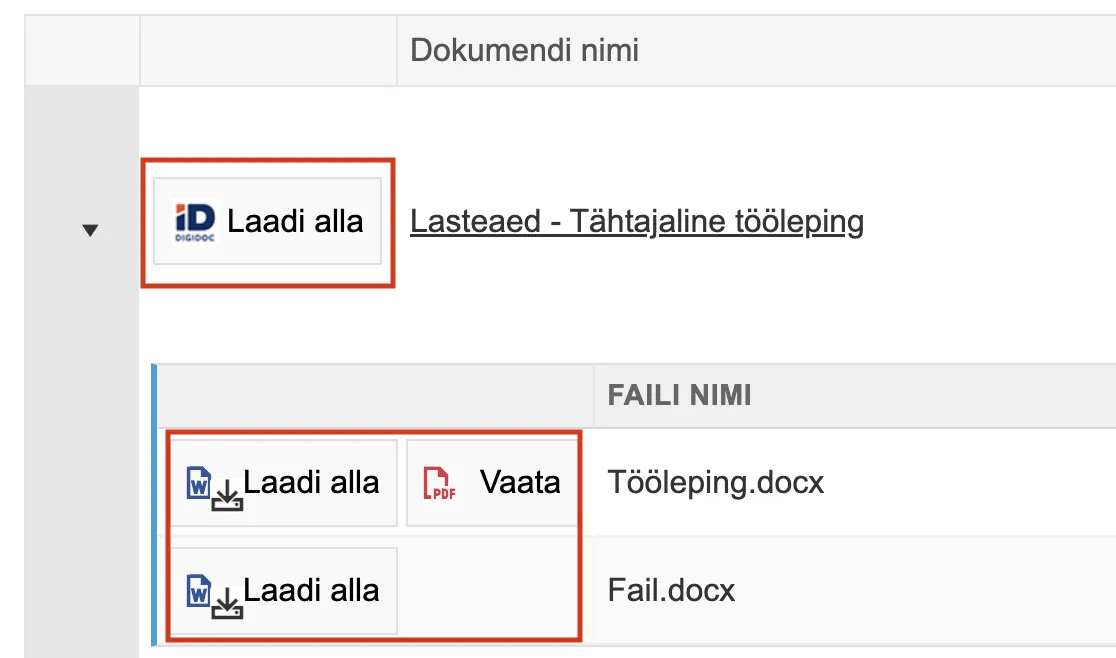
Clicking the "arrow right" icon in front of a forwarded document opens a detail view showing all document files. Additionally, comment and signer information is displayed if available.
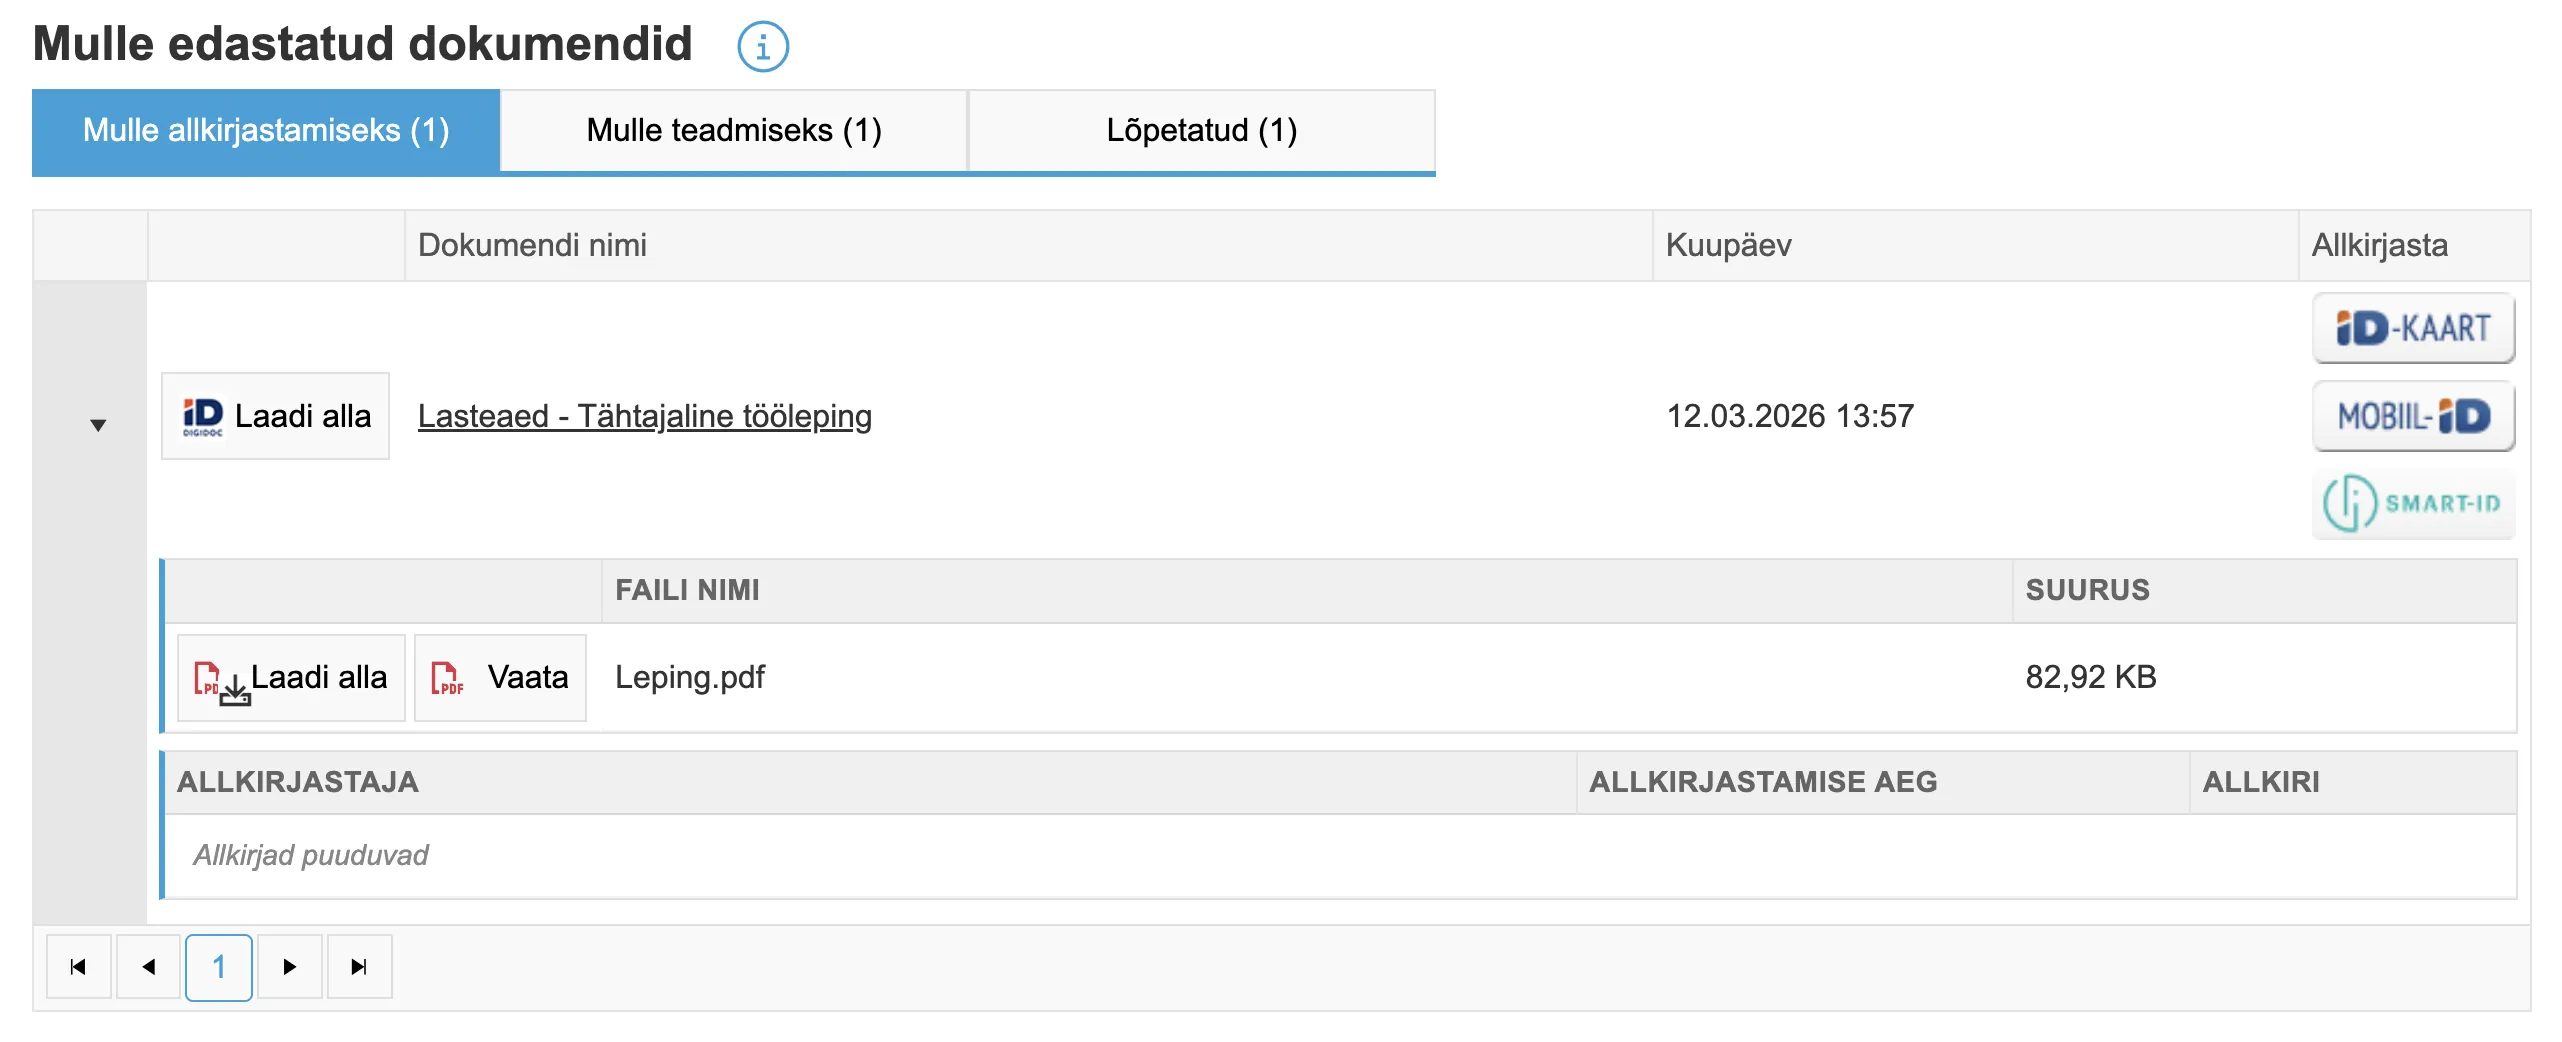
Forwarded document files can be downloaded, or PDF files can be opened in a preview window. The preview window can also display a PDF copy of the main file if the main file is, for example, a Word file. It is also possible to download the signature container.
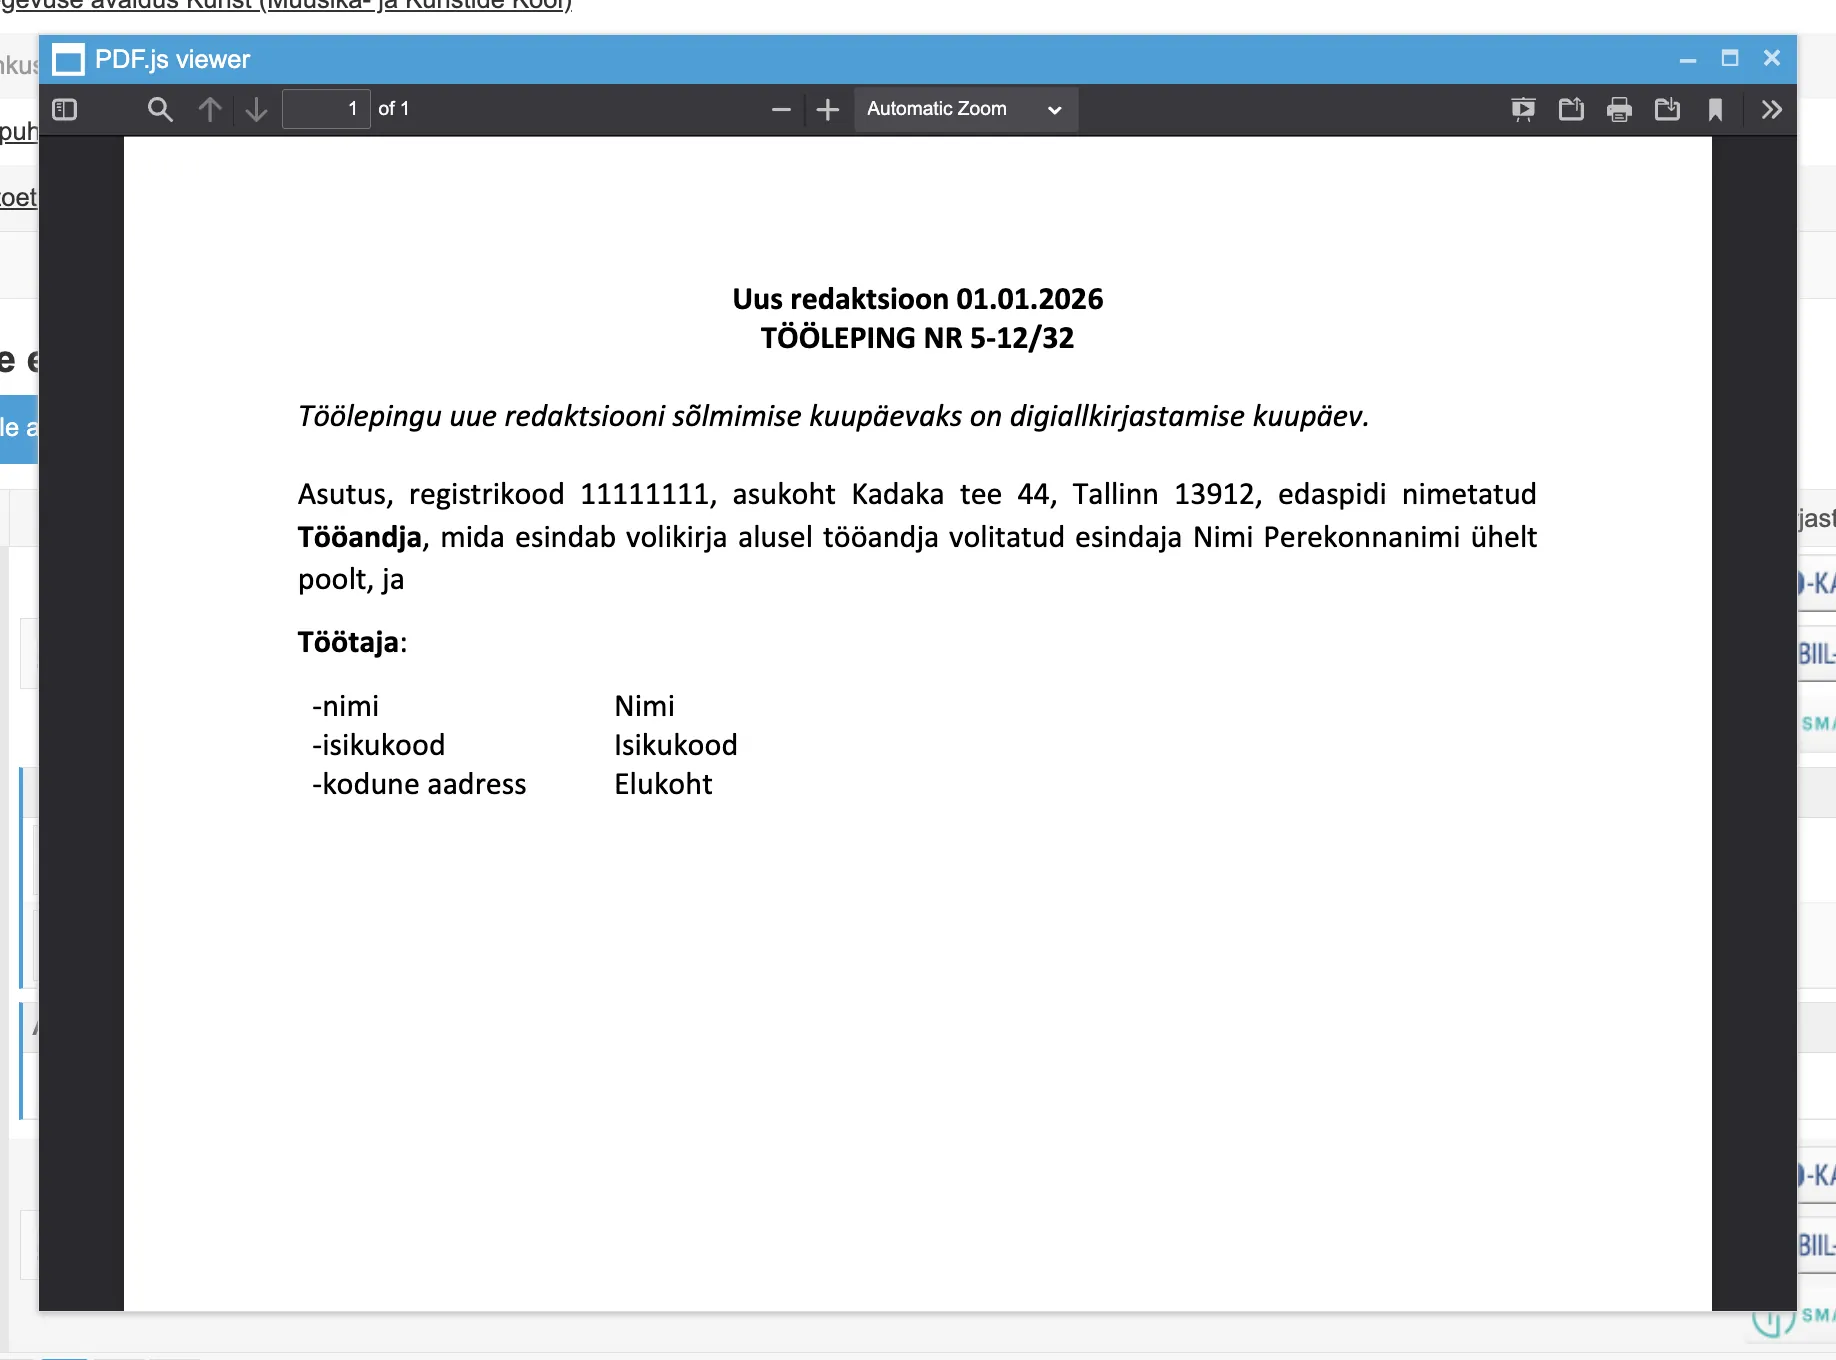
The PDF file preview window looks like this (files can be conveniently opened on both desktop and mobile devices):
Changing Self-Service Portal Email Notification
When sending a document to an external user, Amphora automatically sends an email notification. The notification content can be customized using HTML.
To change the notification, go to Admin -> Translations and search for the following keywords:
- ExternalPersonEmailBody -- signing task notification.
- ExternalPersonTakeNoticeEmailBody -- information task notification.
To change the notification content, click the "pencil" icon on the keyword row:
 Translation should be added under ET. After adding translations, click the Update button in the translations window and then the Save button.
Default signing task email notification content in HTML, where #1 is the portal address and #2 is the institution name:
Hello
<br>
<br>
Documents have been sent to you for signing.
<br>
The signing environment is at address: #1
<br>
<br>
Best regards
<br>
#2
NB!
The modified notification content must keep #1 (the portal address).
Customizing Self-Service Portal Login Page
The Self-Service Portal login page can be customized. Both the title and the text below the title can be modified.
To customize, go to Admin -> Translations. The keywords are SelfService_AuthTitle (title) and SelfService_AuthDescription (text below the title). To modify a translation, click the "pencil" icon.

Translation should be added under ET. After adding translations, click Update and then Save. The change is immediately visible in the Self-Service Portal.
Information Task Notice
In the Self-Service Portal, it is possible to display an additional notice when opening the incomplete For Information tasks view. To configure this, go to Admin -> Directories, select the desired unit, and fill in the Self-service (for information) text editor.
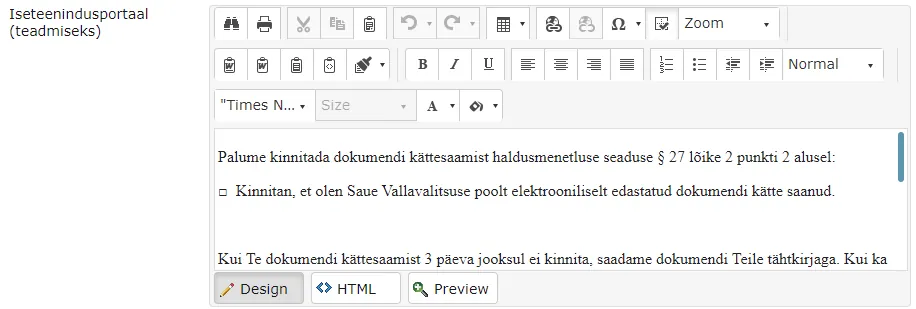 This is intended primarily for conveying additional information to external persons -- for example, how many days they have to confirm document receipt or which software is needed to open files. This is not a mandatory setting.
The button for completing an information task is labeled I confirm that I have reviewed the document.
 ***
***
Last modified: 09 October 2026, 15:35:15