Personal Settings
- Notifications
- Directory filters and default filters
a. Adding a new filter
b. Modifying an existing filter
c. Deleting an existing filter
d. Adding an existing filter to a user or creating a new filter
e. Setting filter for both group and individual - Email address configuration
a. Personal configuration for user
b. Configuration for user group
c. Configuration steps
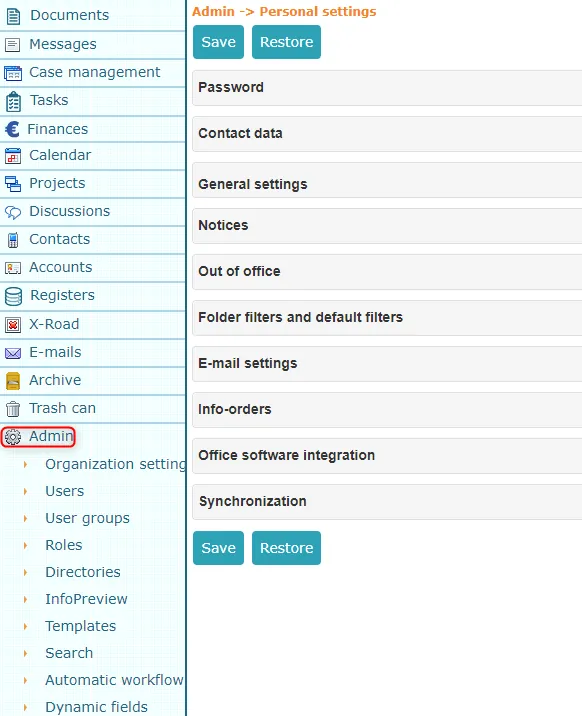
Personal settings are visible when you open the Admin module. Personal settings can mostly be configured by all users.
How to configure password, contact information, out of office, general settings and office software integration can be found in the End User Guide.
This guide highlights panels that can only be configured by Amphora environment administrators.
 ***
***
Notifications
In the notifications panel, you can select which events you want to receive email notifications about. SMS sending functionality is no longer in use.
Select the desired events by checking the checkbox next to the corresponding notification type. Amphora sends notifications via email.
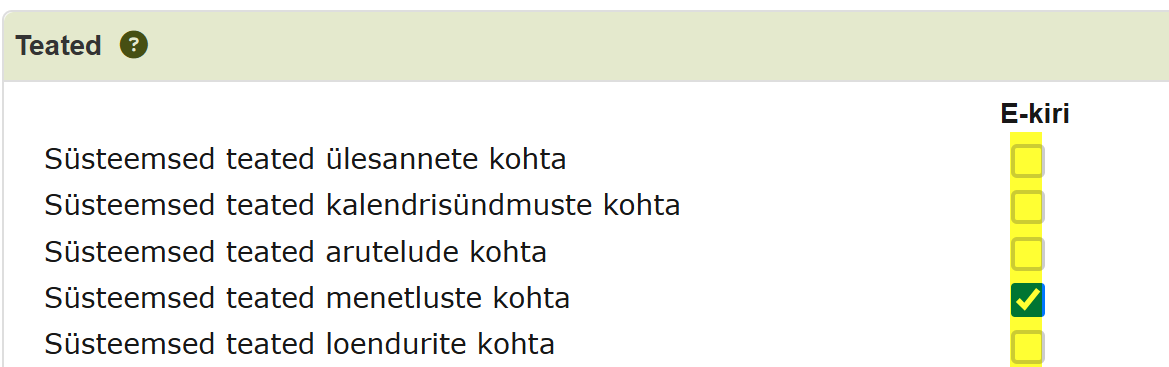
Currently, the following notifications can be received from Amphora via email:
System notifications about tasks - you receive a notification when a task is created for you;
System notifications about calendar events - Amphora notifies you via email about an upcoming calendar event;
System notifications about processes - you receive a notification when a process you created is completed;
Failed deliveries - you receive a notification if sending a message you sent out failed.
- If a user is made passive, all their notification settings are automatically deleted.
- When reactivating a user, the desired notification settings must be set again.
- If a user lacks the Notifications panel, the user group policy "Notification administration" should be enabled.
Directory filters and default filters
This functionality allows the user to divide the directory tree into thematic parts, displaying the currently needed part of the directory tree. Default filters allow getting a quick query response immediately when entering a module. To add a new filter, click the Add new button, then move the desired directories from left to right, after making the desired selection click the Done button. To store the filter, then click Save on the Personal settings page. Back discards the filter and its changes.

Adding a new filter
Click the Add new button.
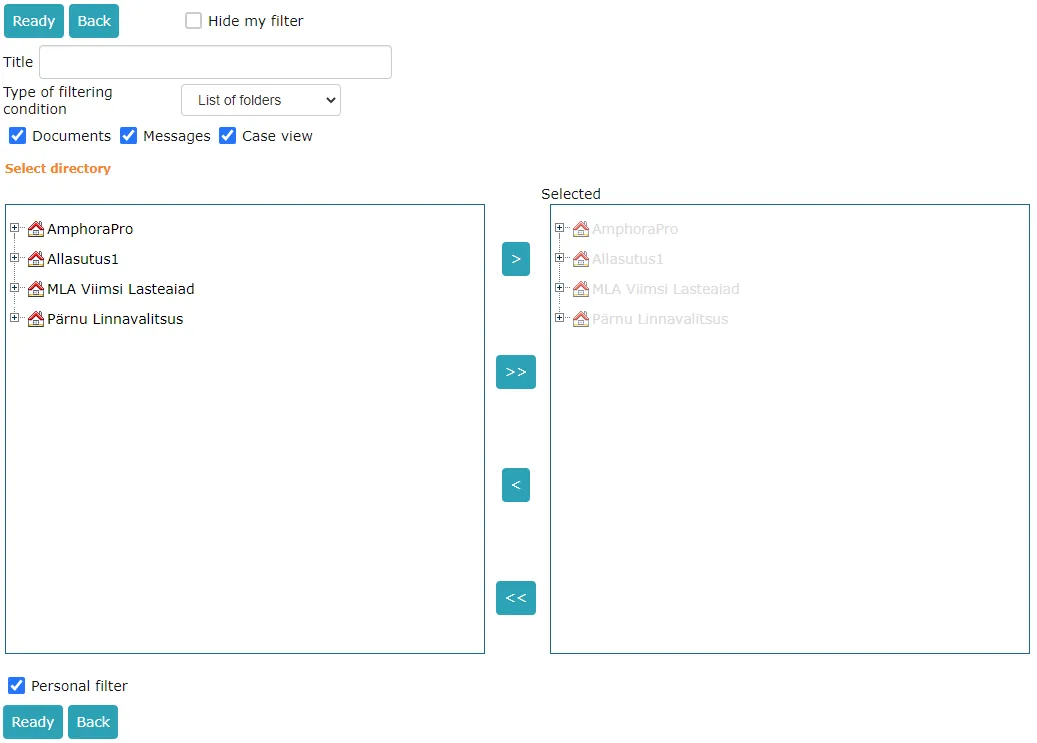 Checkboxes in the Documents, Messages, Case view boxes determine that directories from all these modules are displayed. If desired, you can create a filter for only the correspondence module, for example, by unchecking the documents and case view boxes. As a result, only the message module directories remain in the list.
Write the filter title, select the filtering condition type from the dropdown menu. The filtering conditions are: Directory selection and Search by directory info.
Select the necessary directories/units in the left box (click on the desired directory name, after which the selected directory becomes active), click the > button to add the selected directories/units to the filter.
All directories that should be visible in the filter must be sent to the other box using the > button.
If you uncheck the Personal filter checkbox, it is possible to add other people, groups, roles to the filter users. Then others will also see the created filter. By default, the filter is visible only to the creator.
When the filter is created, click the Done button. Done returns to the Personal settings page; the filter is stored only when you click Save on that page.
Modifying an existing filter
To modify, click on the filter title, make the necessary and desired changes, click the Done button, click the Save button.
Deleting an existing filter
To delete, go to Admin, the Personal settings module opens. Open the Directories and default filters panel. Click on the trash can icon  after the desired filter.
Adding an existing filter to a user or creating a new filter
Open Admin -> Personal settings -> Directory filters and default filters, open the necessary filter, add the user to the list of people in the filter, click the Done button, the Save button.
To add or modify a personal filter for a user, open Admin -> User, click on the username, click Personal settings.
In the opened view, open the Directory filters and default filters panel. To add a filter, click Add new, to modify a filter, click on the filter name.
If a user is added to a group that already has a group-based filter added, this filter is automatically added to the new user.
Setting filter for both group and individual
Log in as an administrative user, Admin -> Personal settings -> Directory filters and default filters, open filter.
To add a group, select Groups in the right dropdown menu, click on the group name in the left box, >, Done, Save.
To modify an individual filter, open the filter modification view, check that "users" is selected in the right dropdown menu and add the desired person(s) to the filter (>), click Done, save.
Email address configuration
Email addresses can be configured in Amphora both personally for a user and for an entire user group. If an email address is configured for a user group, then all users in the user group can see incoming and outgoing messages.
Personal configuration for user
To configure an email address personally for a user, you need to go to the Admin module, then select Users.
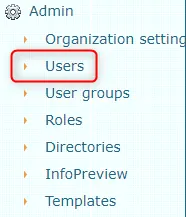 In the user list, you need to click on the username. When the user view opens, you need to click on the Personal settings button at the top.
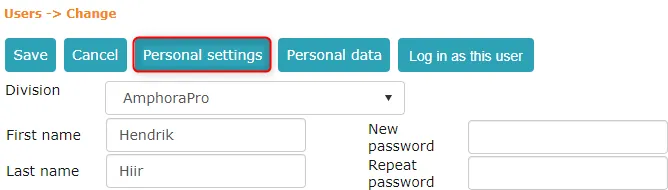 Under personal settings, there is a panel called Email settings. You need to click on this panel to open the email address configuration area.
Configuration for user group
To configure an email address for a user group, you need to open the Admin module and then click on User groups.
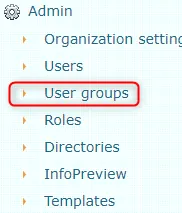 From the user group list, you need to click on the correct user group name. When the user group is opened, you need to scroll down until the Email settings panel becomes visible.
Configuration steps
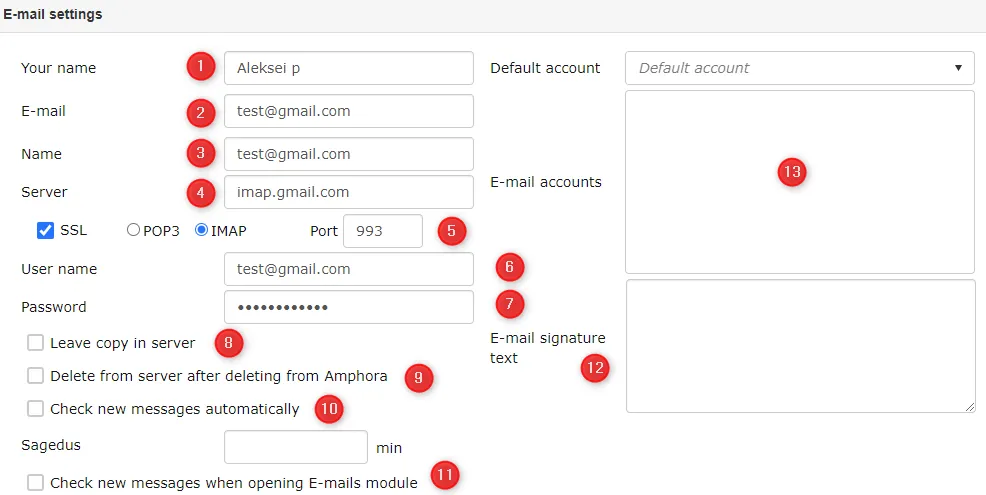 1. This is always the name of the user who is making the configuration.
2. Email address.
3. By default, Amphora sets the email address as the name, but this can be changed. The name doesn't play a major role in configuration.
4. Mail server.
5. Protocol selection (IMAP and POP3).
1. This is always the name of the user who is making the configuration.
2. Email address.
3. By default, Amphora sets the email address as the name, but this can be changed. The name doesn't play a major role in configuration.
4. Mail server.
5. Protocol selection (IMAP and POP3).
IMAP – allows access to email accounts on the server. With IMAP, all folders on the server appear in Amphora. Emails are always stored on the server.
POP3 – by default, emails are not stored on the server. With POP3, there are only three folders in Amphora (Sent, Received, Drafts).
SSL - protocol that encrypts the connection between Amphora and the server with a digital certificate so that third parties cannot see the content of messages you read or send. We recommend enabling SSL.
By default, the port is set to SSL connection IMAP – 993 and POP3 – 995. If the mail server has different ports, these need to be changed.
6. Email username.
7. Email password.
8. Option to leave a copy on the server.
9. This option deletes the email from the server when it is deleted from Amphora.
10. With this option, it is possible to automatically check emails at certain intervals.
11. If this option is enabled, then every time the user opens the Emails module, Amphora checks for new messages.
12. Here you can write email text that is automatically added to the text editor when sending an email.
13. This box contains email addresses that are saved for the user/user group.
Last modified: 09 October 2026, 10:25:03