Letters in Documents Module
- General Info
- Frequently Asked Questions
- Outgoing Letters a. Delivery Status Colors for Emails b. Email Delivery Status Info c. Email Logs d. Important Info e. "Sent Outside Amphora" Button for Outgoing Communications f. "Resend" Button g. Editing Communication Data with "Sent" Status h. Response Document Feedback Functionality
- Received Letters a. Displaying Sender Name in the Routing Panel
- Composing a Reply Letter a. Composing a Follow-up Letter
- Replying to Letters in the Correspondence Module
- Communication Panel Info in Public View
- Making Communication Content Public
- New Reports
- New Policies in Documents Module a. Changing Responsible Person When Forwarding Document b. Automatic Changing of Responsible Person When Forwarding Document c. Mark All Document-Related Tasks as Done When Responsible Person Responds d. Edit Sent Communications
- Useful Recommendations
In Amphora version 12.7, correspondence functionality was developed for the Documents module. This means that from now on, letters will be registered in the Documents module. Transition information can be found at this link.
General Info
All correspondence directories are visible in the Documents module. No additional configuration is needed for this. All letters in the Documents module get their number through the letter counter.
Important
Letters previously registered in the Correspondence module are not visible in the Documents module.
In the Correspondence module, reading view is now the default view when opening a letter.
Unlike the Correspondence module, the Documents module has only one letter form called Letter, and it must be used when registering every letter.
The most important panel on the Letter form is the Deliveries panel. In this panel, you can select the letter's addressees, and incoming letter senders are also added here.
 Each communication has a
  button that contains communication detail info. Here you can find info about delivered files and comments. The delivered files info is important for determining which files were sent out or which files came in.
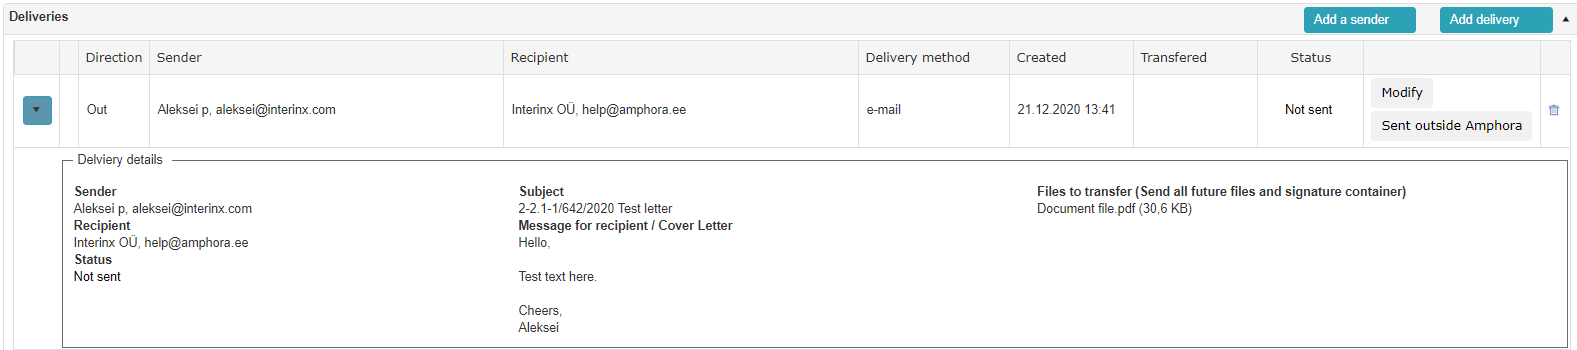 * Sender and Recipient – sender and recipient data.
* Delivery method – the method by which the letter was delivered.
* Created – the date when the communication was created.
* Delivered – the date when the letter was delivered. For incoming letters, the delivery date is the same as the creation date.
* Status – for outgoing letters, there can be 3 different statuses: Not sent, Sending (when sending via DHX), and Sent. Incoming letters can only have 1 status: Received. There is also a status called Sending failed. In that case, an error message is also displayed.
* Sender and Recipient – sender and recipient data.
* Delivery method – the method by which the letter was delivered.
* Created – the date when the communication was created.
* Delivered – the date when the letter was delivered. For incoming letters, the delivery date is the same as the creation date.
* Status – for outgoing letters, there can be 3 different statuses: Not sent, Sending (when sending via DHX), and Sent. Incoming letters can only have 1 status: Received. There is also a status called Sending failed. In that case, an error message is also displayed.
You can also register letters through a case. To do this, select the Document upload dropdown option in the case edit view. Then select the Letter form.
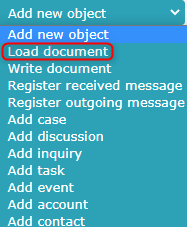 A letter gets its number through the case if the corresponding setting has been configured.
Default access restrictions are automatically added to a letter if such a setting has been made in the directory settings. When adding a letter to a directory, Amphora first checks for the document's access restriction. If it exists, it uses that. If there is no document access restriction, Amphora checks for the correspondence access restriction. If a correspondence access restriction exists, it is added to the letter. If no access restriction exists, nothing is added.
Frequently Asked Questions
If the correspondence folder is not visible in the Documents module:
- You should select All folders from the folder filter (the dropdown above the folder tree)
- The folder filter can be changed from personal settings -> Directory filters and default filters
If editing letters does not work:
- The corresponding user group needs to have the policy Message registration allowed enabled (Admin -> User Groups -> Select the correct group -> Policies -> Message registration allowed -> Save -> Save).
If you need to register letters in the Correspondence module:
-
The corresponding user group needs to have the following policies enabled:
- Adding incoming letter via DHX
- Adding outgoing letter via DHX
- Complex sent message adding
- Simple sent message adding
- Complex received message adding
- Simple received message adding
Sending a DHX letter to Riigi Teataja:
- When sending a DHX letter to Riigi Teataja, first make sure that only the signature container (.asice or .bdoc extension) is included. Amphora does not allow sending other files. A check has been added that verifies only one signature container (.asice or .bdoc extension) is included. If there is no signature container or another file has been selected in addition, Amphora displays the error message – Riigi Teataja validation error - one signature container must be attached.
Outgoing Letters
The form for an outgoing letter is the form called Letter.
Using the Add sending button in the Deliveries panel, you can select persons and/or organizations and their groups to whom you want to send the letter. You can also add a new organization or person.
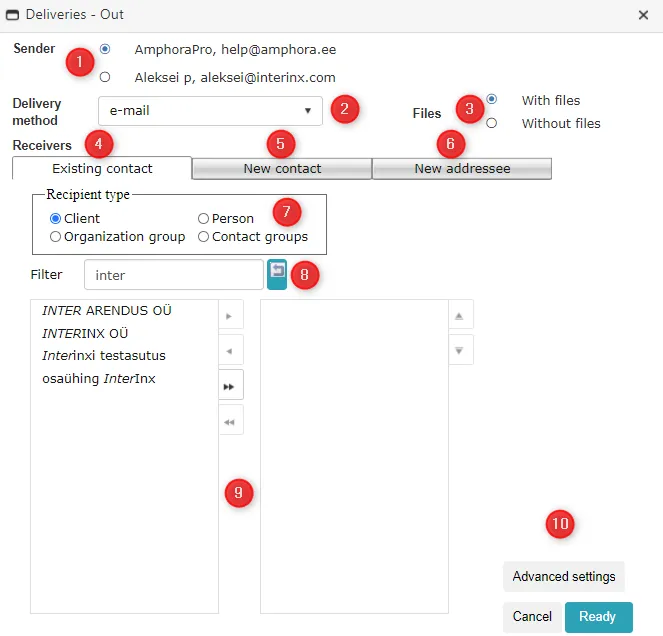 1. Here you can select the email address from which the email will be sent. By default, the organization's email address associated with the person is selected. The selection also includes the user's personal email address (configurable in Admin -> Personal settings).
-
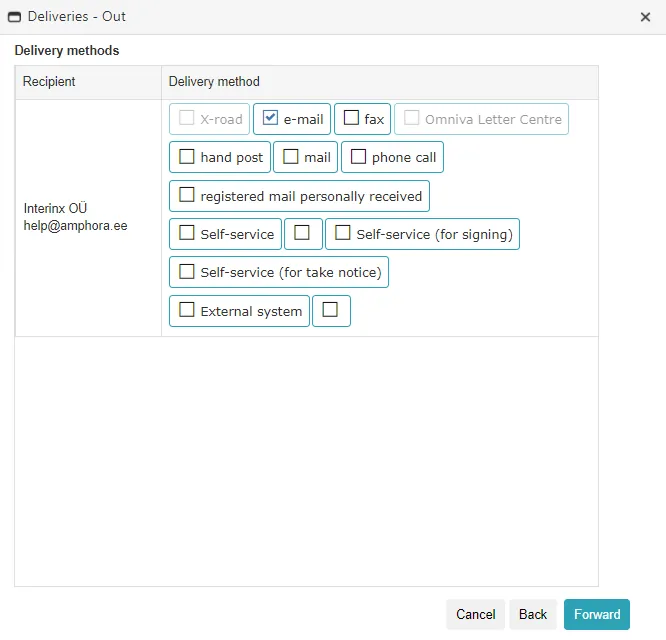
Delivery method selection. The main delivery methods are DHX and email, but there are also other delivery methods: postal mail, hand delivery, phone call, etc.
-
Communication file selection. If the With files option is selected, then by default Send all future files and signature container is selected. This means that the signature container and other files not in the signature container will be included in the communication. If the Without files option is selected, then by default Send without files is selected. The Send without files option means that only the text editor content or comment to recipient is sent via email.
-
Existing contact selection. All organizations and persons in the selection are taken from the Organizations and Persons modules in the Amphora environment. If you need to modify these organizations or persons (for example, an organization or person is missing an email address and you need to add an email delivery method communication), you must go to either the Organizations or Persons module.
-
Under New contact, you can create a new organization or a new person. After adding the organization or person, it is saved to the Organizations or Persons module, and going forward it can be selected under Existing contact.
-
Manual organization/person entry. The added organization/person will not be saved to the Organizations/Persons module.
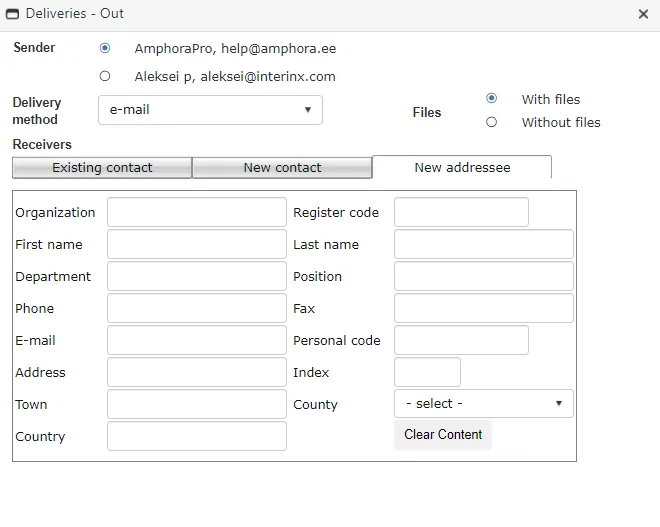 All data fields can be filled in and no field is mandatory. A new addressee must be added separately from other selections. This means that when adding a new addressee, you must not select already existing addressees within the same communication. Other recipients can be added separately later.
 -
If Existing contact is selected, you can choose whether to display organizations, persons, or their groups.
-
Search field. Lets you quickly find the right organization or person.
-
Buttons that allow moving organizations, persons, or their groups to the right-hand box or removing them from there.
The Detailed settings button opens detailed communication settings.
In the Communications window, you can select a different delivery method for each organization individually. These delivery methods do not need to be the same.
 In the next window, you can choose which files to send and whether to use the comment to recipient/cover letter or text editor content. Amphora remembers the email content selection, so if the user has selected, for example, comment to recipient / cover letter, the same option is selected by default next time.
Important
When sending via email, the text editor content or comment to recipient/cover letter is mandatory.
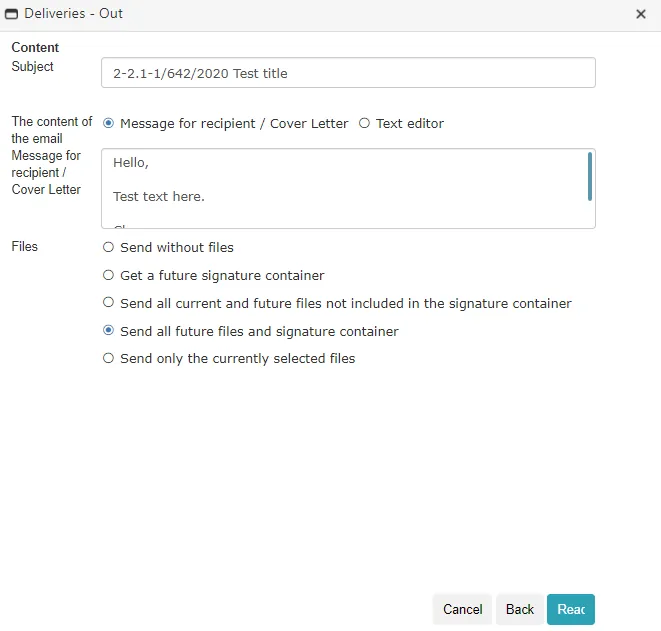 * Send without files – with this option, no files are included in the communication. For DHX delivery method, this option is not allowed.
-
Send future signature container – when this option is selected, the file selection disappears. Only the signature container is included for sending, which may already be attached to the letter or may be added later. This option should be selected when you want to add a communication and send only the signature container, but the files have not yet been signed. If the document has 2 unpacked signature containers, the container to which the last signature was added is sent. An email or DHX letter cannot be sent without a signature container.
-
Send all current and future files not in signature container – when this option is selected, the file selection disappears. All files that are not part of the signature container are included for sending. If there is no signature container, all files attached to the document are sent. An email or DHX letter cannot be sent without files.
-
Send all future files and signature containers – when this option is selected, the file selection disappears. The later signature container and all files not in the selected signature container are included for sending. If there is no signature container, regular files are included for sending. An email or DHX letter cannot be sent without files.
-
Send only currently selected files – only the files that are attached to the document at the time of adding the communication are included. The file does not need to exist. If the file does not exist, the letter is sent without the file.
Important
You can always change the file selection and email content as long as the communication status is still Not sent.
To send a letter via email, the person or organization must have an email address. If the email address is missing, Amphora displays a corresponding notification.
 If you need to send a letter via DHX but the organization is missing a registration code or the person is missing a personal identification code, Amphora displays a corresponding notification.

Delivery Status Colors for Emails
The status color changes only on communications where email is selected as the delivery method. If a communication uses a different delivery method, the status color is always black.

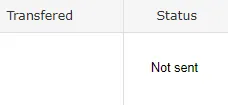 A black status is shown when the communication has not yet been sent and the status is Not sent.
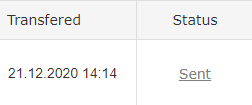 A grey status is shown when the communication has already been sent but email logs have not yet reached Amphora. Typically, email logs reach Amphora within 1–2 minutes.
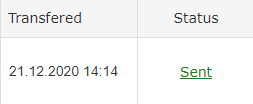 A green status is shown when the communication has already been sent and the email logs contain an event called Delivered. This means the email has been delivered to the recipient's mail server.
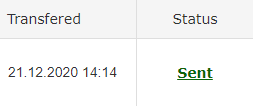 A dark green status is shown when the communication has already been sent and the email logs contain an event called Open. This means the recipient has opened the email. Unfortunately, this log event does not occur with every email. It depends on the recipient's email settings.
Description of the Open event: When an email is sent, an invisible image is added to it. When the addressee opens the email, the image is loaded by the mail application and an Open event appears in the logs. However, the email user may have disabled image loading in their settings, or it may be disabled by default. In that case, the Open event is not added to the logs because there is no way to know whether the email has been opened.
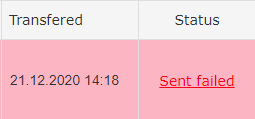 A red status is shown when the communication has already been sent but sending failed for some reason. Amphora displays the reason for the failed sending in the Error column.
Important
Amphora updates status colors once per hour.
Email Delivery Status Info in Registry View
In the Documents module registry view, icons are displayed next to documents with communication(s), indicating the communication status(es).
 * Blue exclamation mark icon: The document has communications with Not sent status – the communication has not been sent.
* Green checkmark icon: The document has communications with Sent status – the communication has been sent.
* Red cross icon: The document has communications with Sending failed status – sending failed (for example, due to an invalid email address).
* Blue exclamation mark icon: The document has communications with Not sent status – the communication has not been sent.
* Green checkmark icon: The document has communications with Sent status – the communication has been sent.
* Red cross icon: The document has communications with Sending failed status – sending failed (for example, due to an invalid email address).
You can also filter documents with communications by unsent, sent, and failed communications. A checkmark in the corresponding box ensures that only documents with communications of that status are displayed.
Email Logs
In the Deliveries panel, you can view the sent email log. When an outgoing communication with email delivery method has been successfully sent, the communication status changes from Not sent to Sent. You can click on the Sent status, and Amphora opens a window with the sent email log.
 Logs window:

Important Info
-
It is still possible to send emails using the
 icon. After sending, Amphora adds the outgoing communication to the Deliveries panel.
 -
When the document title is changed, Amphora also updates the subject on all unsent outgoing communications. It is enough for the user to change the title, click the mouse cursor somewhere else on the form, and the subject is immediately updated on the communication.
Important
If the subject has been changed in the communication window's detailed search at step 3, changing the document title will no longer update the subject.
-
When replying to an incoming document, title and subject change functionality has also been added. If you change the document title, the outgoing communication's subject is also immediately updated. Additionally, a main file check has been added. By default, the reply letter's outgoing communication has Send without files selected. So if an email is sent without files, there is no longer a need to modify the communication. If the user adds a main file, the file selection automatically changes to Send all future files and signature container, and the added file is included in the communication.
-
Using the Edit button, you can modify an already added communication. If the communication is still unsent, all data can be changed. If the communication has already been sent, only the recipient data can be changed.
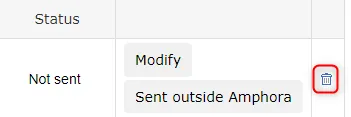
 * If the communication has a Not sent or Sending failed status, it can be deleted. A trash can icon is available on the right side, and clicking it deletes the communication.
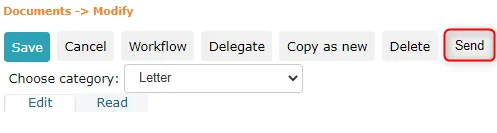
 * Added communications have Not sent as the default status, and to send the letter, you need to click the Send button. The Send button is located at the top and bottom of the button row.
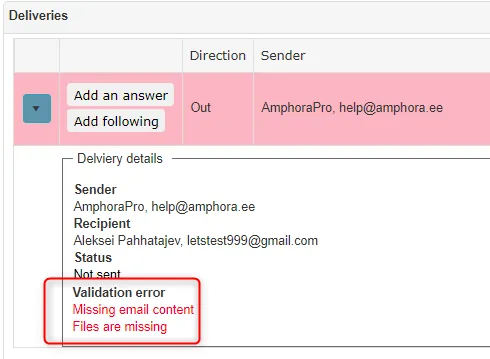
 * Errors may occur during sending. If an error occurs during sending, the communication's background color turns red.
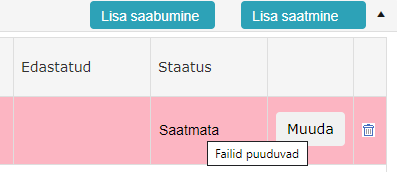
 * Error info can be found in the communication's detail info (click the arrow in front of the communication) or by hovering the mouse cursor over the status.
 * For the DHX delivery method, the document date, title, document reference number, and document type must be filled in. Additionally, the main file must be present.
-
For DHX letters, it is important to check the Restrictions panel. If the checkbox For in-house use is checked, the following fields are mandatory:
- Note made
- Access restriction basis
- Restriction in force till
If one of these fields is empty, a notification appears when sending the DHX letter: Limitation is not correct! and the DHX letter will not be sent.
See also: Delivery Status Colors for Emails
"Sent Outside Amphora" Button for Outgoing Communications
The Sent Outside Amphora button should be used in situations where a document was sent outside of Amphora, but the document has been registered in the Amphora environment and needs to be marked as sent.
 For example, this button would be useful in situations where an email was sent from elsewhere (Outlook), but the document needs to be registered in Amphora and the communication status must be "Sent".
The Sent Outside Amphora button is visible only on an outgoing communication with "Not sent" status. When the button is clicked, the status is changed to "Sent" and the delivery method is set to "External system".
"Resend" Button
If after sending an email the communication status is Sending failed, a Resend button appears below the status. In some situations, resending may help and the email is successfully delivered on the new attempt.
 If the recipient's email address is, for example, misspelled, you should use the Edit button to change the recipient's email address and use the Send button to resend the email. In previous versions, this option was not available and the user had to delete the faulty communication and add a new one.
Resending also updates the email logs.
Editing Communication Data with "Sent" Status
On a "Sent" status communication with "Email" delivery method, it is no longer possible to change the recipient's email address after the fact. Changing the recipient Organization/Person is also prohibited, as this would also change the recipient's email address.
In the "New addressee" tab, the ability to change the recipient's email address is disabled, and in the "Existing contact" tab, all options are inactive.
NB!
If the email was sent outside of Amphora and later registered from Outlook/the Emails module, then the recipient's email address can be changed after the fact on that communication.
Response Document Feedback Functionality
The feedback functionality allows sending a feedback request via email to response documents that were themselves sent via email, after X hours have elapsed. If feedback email sending is activated and correctly configured, then every time a document with an originating document relation is sent via email, a feedback email is created that Amphora sends after X hours. For example, a survey link can be added to the feedback email content, where email recipients can rate your organization's service quality.
A feedback email is sent under the following conditions: - Feedback email sending is activated - It must be a response document - It is an outgoing communication where the delivery method is "email" - The response was sent after feedback activation.
When a feedback email is created, Amphora displays a (feedback) link in the status column of the Deliveries panel. Hovering the mouse cursor over the link opens a tooltip with information about the feedback email sending.
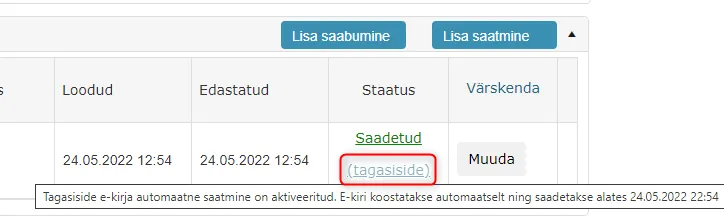 The (feedback) link becomes clickable after the feedback email is sent out. Clicking the link opens a window with the sent email logs.
A log entry is also created for the feedback, visible in the Admin -> Logs view (the "View other users' logs" policy needs to be enabled for these logs to be visible). The log content includes the feedback email sending date and time, the subject, and the sender and recipient email addresses.
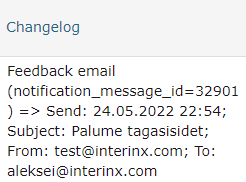 A new history event also appears on the document's History panel.
 CONFIGURATION
The first thing you need to do is create a new feedback template. This can be done in Admin -> Templates -> Add new button.
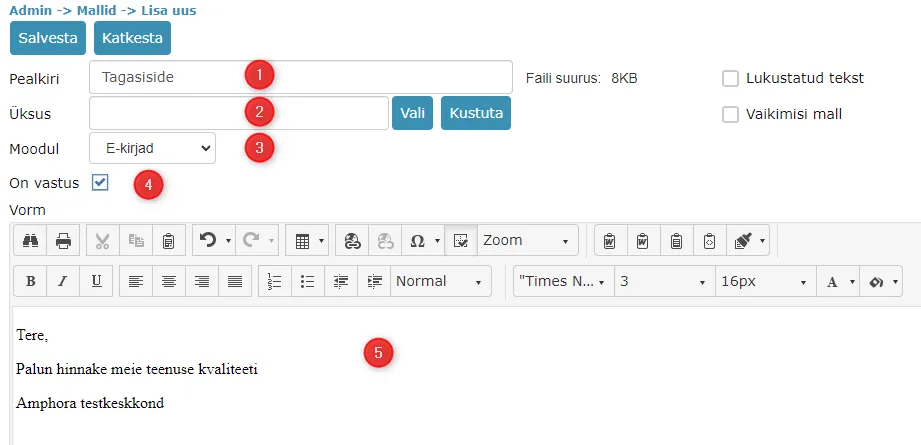 1. Template title
2. The unit does not need to be selected. Leave this selection empty
3. The module must be set to Emails
4. When the module is set to Emails, Amphora automatically adds the Is response checkbox. This checkbox is not mandatory.
5. Feedback email content
1. Template title
2. The unit does not need to be selected. Leave this selection empty
3. The module must be set to Emails
4. When the module is set to Emails, Amphora automatically adds the Is response checkbox. This checkbox is not mandatory.
5. Feedback email content
When creating the template, template elements cannot currently be used. The text must be static.
Feedback functionality configuration is unit-based. The unit settings (Admin -> Directories) contain Unit settings, which in turn has a Feedback tab.
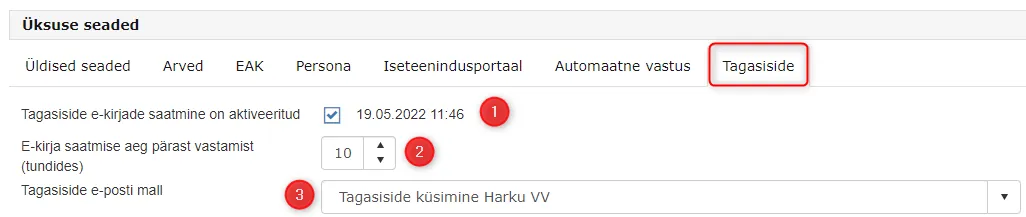 1. Feedback email sending is activated – adding a checkbox activates feedback email sending. The date and time shows when the checkbox was added
2. Email sending time after response (in hours) – here you can specify how many hours after sending the response the feedback email is sent. The number of hours must not be negative or zero (Amphora will not allow it), so immediate sending is not permitted
3. Feedback email template – the template selection used as the email content. Here you should select the previously added template
1. Feedback email sending is activated – adding a checkbox activates feedback email sending. The date and time shows when the checkbox was added
2. Email sending time after response (in hours) – here you can specify how many hours after sending the response the feedback email is sent. The number of hours must not be negative or zero (Amphora will not allow it), so immediate sending is not permitted
3. Feedback email template – the template selection used as the email content. Here you should select the previously added template
TRANSLATIONS
Three new translations were added as part of this development:
- HISTORY_GENERATE_FEEDBACK_EMAIL – text displayed in the document's History panel. Default translation – "Feedback email creation"
- Email_Feedback_Subject – feedback email subject. Default translation – "We request feedback"
- DeliveryFeedbackLink – feedback email link in the Deliveries panel. Default translation – "(feedback)"
Received Letters
The form for a received letter is also the form called Letter.
If a letter is registered directly in Amphora, you need to click the Add receiving button in the Deliveries panel to add the letter's sender. The sender data is not mandatory when saving the letter, but without it you cannot currently reply to the letter.
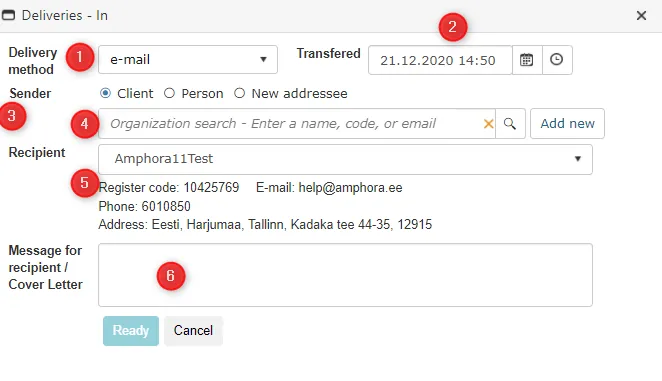 1. Letter delivery method. There are multiple delivery methods in the selection (options may vary across different environments, but the main options are available in every environment). Select one of them.
{: loading=lazy }2. Date and time when the letter was delivered.
-
The sender can be either an organization or a person. You can select organizations and persons that exist in Amphora's Organizations and Persons modules.
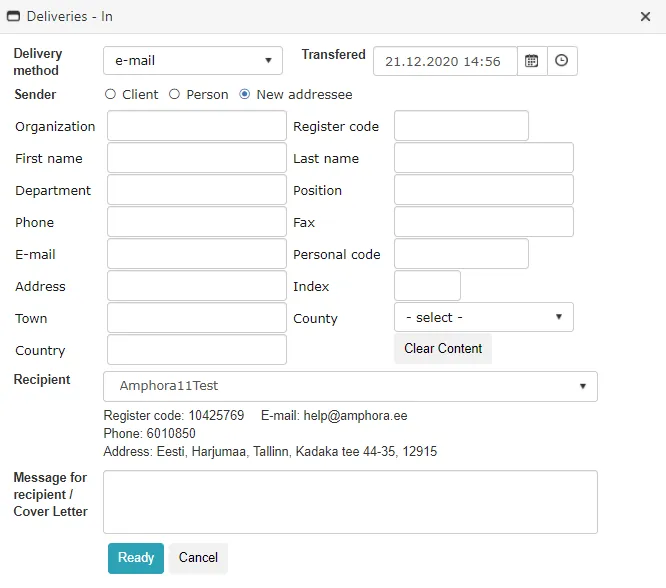 You can also add a new sender with more detailed data. To do this, select the New addressee option. No data field is mandatory, and when replying, all info is carried over to the reply letter's communication panel.
 -
Search field for an existing organization or person.
-
Recipient organization. By default, a selection is made; if needed, a different organization can be selected from the dropdown.
-
Comment field. A comment can be entered here.
Registering emails from the Emails module or Outlook has not changed much. You should use the Incoming letter (document) registration profile.
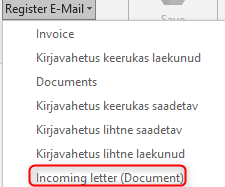 Data is carried over to the letter form along with files. The Deliveries panel contains sender and recipient info, as well as info about delivered files. To save the letter, click the Load button.
A received letter can have only one received communication. Once a received communication is added, the Add receiving button disappears.
If incorrect or faulty data appears in the Deliveries panel when registering an email, the communication can be deleted using the  trash can icon. After deleting the communication, a new one must be immediately added with the correct data.
It is possible to add outgoing communications to a received letter (so a single letter can have both outgoing and incoming communication directions). However, when replying to such a letter, Amphora only takes the incoming communication into account.
When registering from the DHX module, use the DHX letter to document registration profile. Data and files are similarly carried over to the form, and to save the letter, click the Load button.
If a letter is registered from the DHX module, that communication cannot be deleted. However, the option to edit is available.
A received communication can be edited. To do so, click the  icon. It can be edited both before the first save and after. The received communication editing window is the same as the Add receiving window. The existing sender can be deleted using the
  button. Then a new sender must be selected or entered.
Displaying Sender Name in the Routing Panel
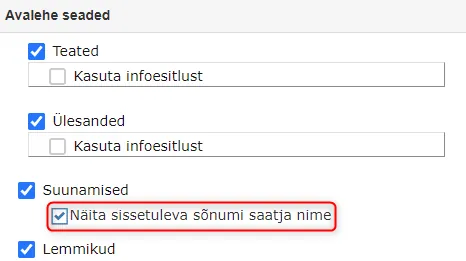
In Amphora, it is possible to display the sender organization and/or person name from a received document (incoming communication) in the Routing panel. The sender data is displayed in the Task column. If the sender data contains both an organization and a person name, the data is displayed in the format – Person name (Organization name).
 This is a configurable functionality. The setting is located in Admin -> Organization settings -> Homepage settings, "Show incoming message sender name" checkbox.
 ***
***
Composing a Reply Letter
Letter reply functionality has been added to the Documents module. When adding a new letter (make sure you are using the Letter form), there is a Link to main document panel at the top, where you can select new reply letter.

Important
When composing a reply letter, you must not click the document appendix button, as it has a different functionality behind it.
 1. Search field where you can enter the originating letter's number or title.
2. Using the Search button, you can run a search that finds documents and letters by search phrase.
3. Using the Clear button, you can clear the search result.
4. Through the advanced search, you can find the originating letter if you don't remember or don't know the originating letter's title or number. Here you can search by registration dates (date range) and directory.
1. Search field where you can enter the originating letter's number or title.
2. Using the Search button, you can run a search that finds documents and letters by search phrase.
3. Using the Clear button, you can clear the search result.
4. Through the advanced search, you can find the originating letter if you don't remember or don't know the originating letter's title or number. Here you can search by registration dates (date range) and directory.
 When the originating letter is found, you need to add
  in front of it.
 A reply letter can also be composed directly from the originating letter. To do this, click the Reply button located at the top and bottom of the button row in the Compose dropdown menu.
 This button only becomes active when the letter has at least one communication. If there is no communication, the button cannot be clicked (it is inactive).
When replying to a letter, a communication is automatically added to the new letter that is the opposite of the originating letter.
NB!
Amphora carries the original document's access restriction data to the response document, except for the Data holder value.
Composing a Follow-up Letter
In addition to a reply letter, you can also add follow-up letters. While a reply letter changes the communication direction and recipient/sender data, a follow-up letter keeps the communication direction and recipient/sender data the same. A follow-up letter can be created using the Follow-up option under the Compose dropdown menu.
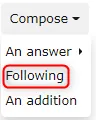 A new letter registration form appears, and at the very top you see a box titled Link to main document. Amphora has automatically selected "new reply letter" – this does not need to be changed.
 When registering a new follow-up letter this way, Amphora links the follow-up letter to the original letter, and the document gets a number based on the original letter: document number-1 (the final number depends on the number of follow-ups/replies).
Replying to Letters in the Correspondence Module
It is possible to compose a reply letter in the Documents module for letters in the Correspondence module. There are two ways to do this:
-
Go to the Correspondence module and open the desired letter. In the letter edit view, click the Reply button. The reply letter gets its number based on the originating letter.
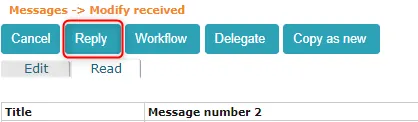 2. When adding a new letter (in the Documents module using the Letter form), click the new reply letter option in the Link to main document panel. Then click Advanced search and in the module selection, choose Correspondence. In addition to the module, you can enter the letter number (or part of it), title, dates, and also select a directory.
 ***
***
Communication Panel Info in Public View
The following data is visible in the public view in the letter detail view:
- Direction (In or Out). This also tells you whether the letter is incoming or outgoing.
- Sender organization. For persons, private individual is displayed.
- Recipient organization. For persons, private individual is displayed.
- Delivery method (DHX, email, postal mail, etc.).
- Delivery date.
- Status.
 In the registry view, the Letters tab now shows Recipient/Sender data.
In the public view, only communications with Sent or Received status appear.
For organizations, only the organization name is visible in the public view. For persons, private individual is always displayed. If the recipient/sender data was entered manually (using the New addressee window), the recipient/sender is private individual, except when an organization was entered – then the organization name is displayed.
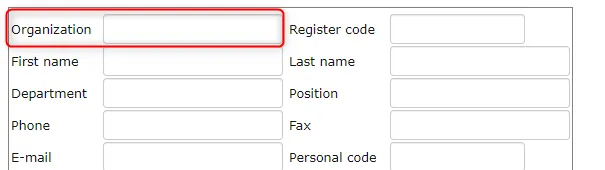 For a received communication, the recipient is always the organization, and Amphora adds it by default. For example, if a letter is registered to the Municipality folder, the organization associated with the Municipality unit is added as the recipient. The recipient can be changed manually.
For an outgoing communication, the sender is always the organization from which the letter is sent.
Making Communication Content Public
Communication content can be made public separately. This functionality is primarily useful for outgoing communications where the delivery method is email.
Each communication row now has a Content public checkbox. The Content public checkbox is added automatically if the text editor content is public. Otherwise, the Content public checkbox is not added automatically, but it can always be added manually.
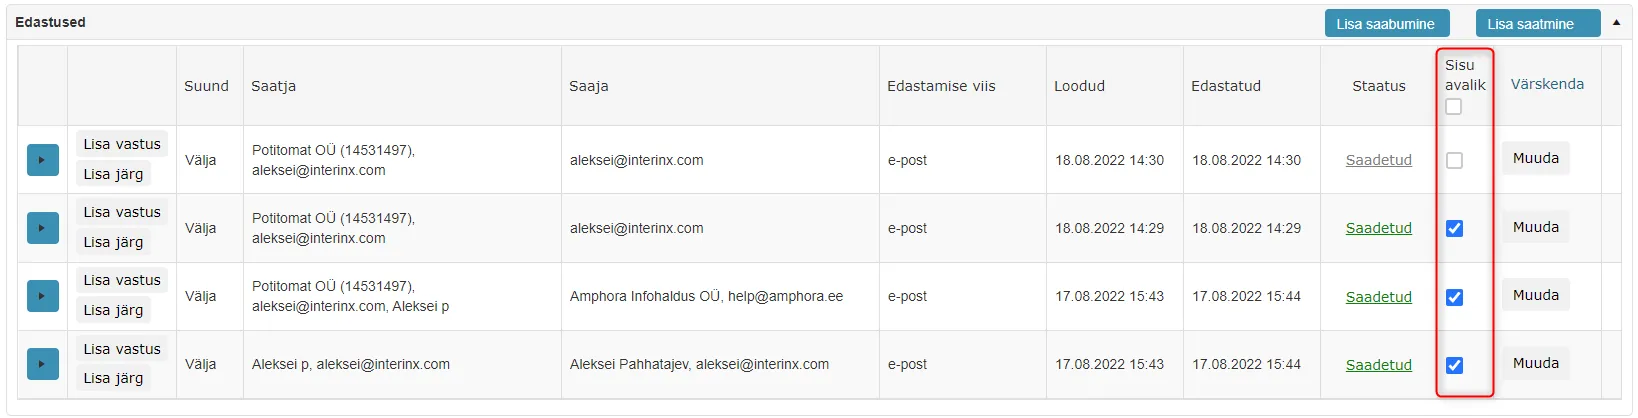 Communication content can also be made public for communications where the delivery method is DHX, postal mail, phone call, etc. For these delivery methods, the comment to recipient/cover letter is made public if it is selected.
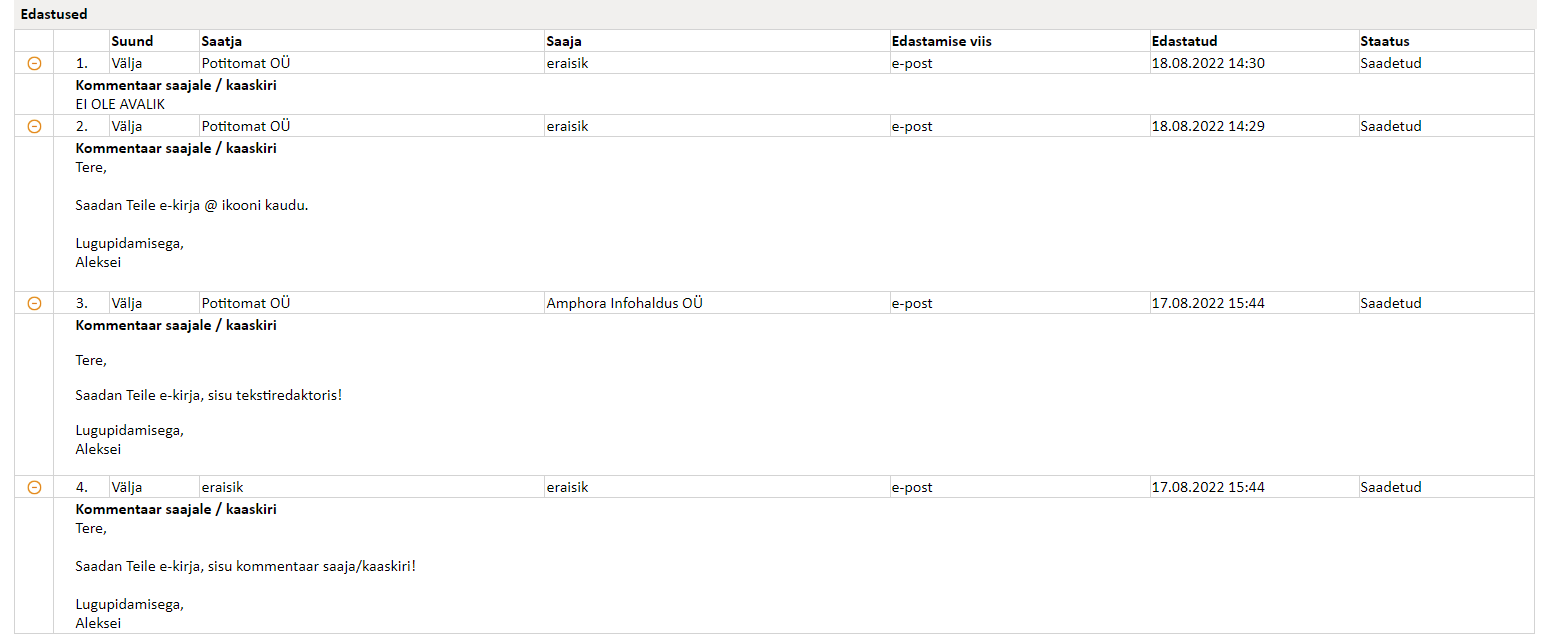
In the public view, each communication now has + icons; clicking them opens the communication content.
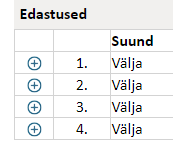 If the communication content is not made public, then NOT PUBLIC is displayed in the public view.
Example of communication content in public view:
NB!
In form settings (Admin -> Form Configuration), the Deliveries panel must be public for communications to be visible in the public view.
New Reports
All user groups have the following reports: My Unanswered Documents and My Unsent Documents. Additionally, administrators, main users, and registry groups have reports All Unanswered Documents and All Unsent Documents. These reports are visible on the homepage in the Reports panel.
- My Unsent Documents – user's own registered documents that have at least one outgoing communication and whose status is not Sent.
- All Unsent Documents – displays all unsent documents visible within this user's permissions.
- My Unanswered Documents – displays those documents where the user is responsible and which have an incoming communication, response deadline filled, and the response date field unfilled.
- All Unanswered Documents – displays all unanswered documents visible within this user's permissions.
Important
All Unanswered Documents and My Unanswered Documents reports may currently output documents that are not letters. This may be caused by a situation where before the first save, the Letter form was selected, which in turn had a Document completion deadline value, and then the form is changed. The new form may not have a Document completion deadline field, but the Document completion deadline value is still on the document. The same problem occurs when changing the form on a saved Letter form document.
New Policies in Documents Module
Policies can be turned on/off in Admin -> User Groups -> user group selection -> Policies.
Changing Responsible Person When Forwarding Document
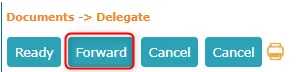
This policy allows changing/adding a responsible person on a document when forwarding. When forwarding a processing task, you need to click the Forward button in the Routing panel on the homepage.
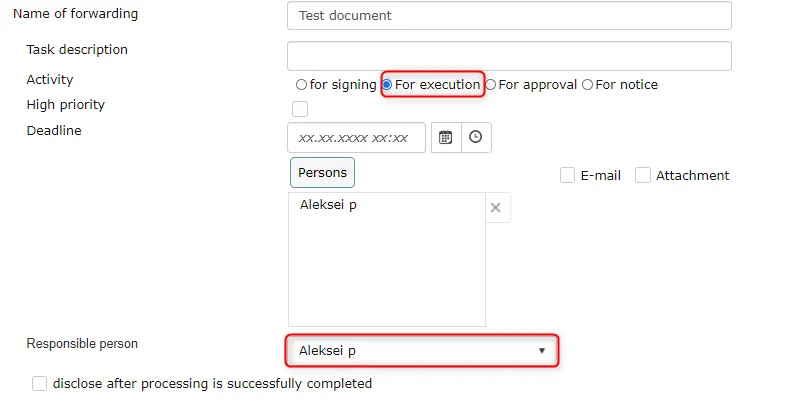
 The Forward button opens a new delegation task addition window, where the user can fill in delegation data and select person(s). The task type is always the same as the original task. When a person is selected, you can use the dropdown menu below the person box to change/add a responsible person. In addition to person selection, there is a Responsible person remains the same option. With this option, no new responsible person is changed/added to the document.
By default, the Responsible person remains the same option is selected.
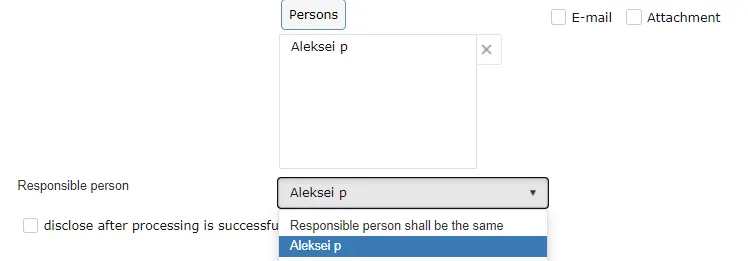 When forwarding a delegation task, you can similarly use the Forward button, but additionally, you can also click the Delegate forward button in the delegation task detail view.
 The principle is the same as Forward, but using Delegate forward always has For completion as the default task type (but this can be changed).
Some usage examples:
Example 1:
-
Registry specialist registers a letter and assigns the institution head as responsible. Checks Add work task, saves.
-
Head clicks Forward on the homepage and selects the actual performer.
-
Amphora changes the responsible person to the actual performer and sends a work task to the performer.
Example 2:
-
Registry specialist registers a letter, assigns the actual performer as responsible (if they know who the letter goes to for completion), does NOT check Add work task, composes and sends a processing task to the institution head.
-
Head clicks Forward on the homepage, the actual performer is already pre-filled, head sends the task for completion.
Automatic Changing of Responsible Person When Forwarding Document
This policy's functionality is almost the same as the Changing responsible person when forwarding document policy. The only difference is that when forwarding, if you select a new person and the task type is For completion, then this person is selected by default in the responsible person dropdown.
Mark All Document-Related Tasks as Done When Responsible Person Responds
This policy only marks tasks sent through the responsible person panel as done.
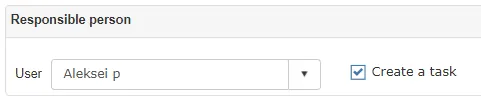 If a task is added to a person in the responsible person panel and the responsible person responds to this document and composes and registers a response document, then Amphora marks the responsible person's task as done. If a responsible person is added, but the task to the responsible person is sent through regular processing or delegation (Processing or Delegate button), then such a task is not marked as done within this policy framework.
Important
If the responsible person is changed and a task was added to the previous responsible person through the responsible person panel, then this task is still marked as done if the previous responsible person composes a response document.
Edit Sent Communications
Policy allows the user to edit already sent (status is "Sent") Outgoing communications. An Edit button appears on the communication line, which allows editing sent communications.
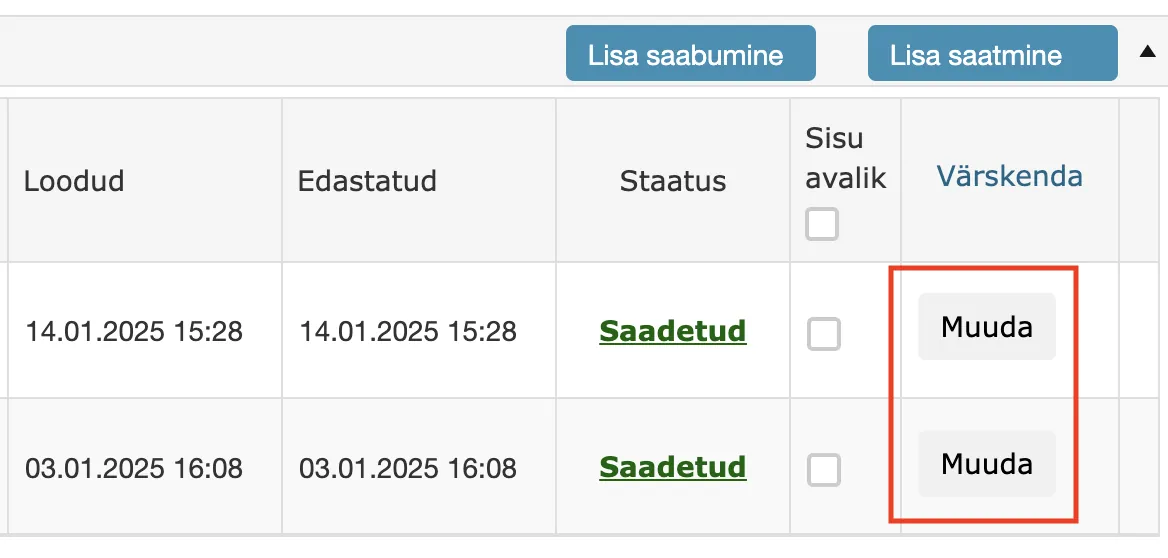
For sent communications, you can change sender and recipient data. In recipient data, you can only change the institution/individual name.
Useful Recommendations
- You must not change the Letter form and Incoming letter (document) registration profile.
- Always after changing/deleting files or changing text editor content, the letter must be re-saved.
- It's possible to delete the main file on the letter form. To do this, click the Delete button located next to the main file.
 ***
***
Last modified: 17 October 2026, 11:05:57