User Groups
- User Groups Overview
- Adding a User Group a. Setting User Group Rights b. Adding Users to a User Group c. Setting Up Email for a User Group d. Deleting a User Group
- Policies a. Policy Change Logs b. Policy List
- Changing User Group Data
- Setting Up Reading View
The User Groups module overview is where you manage system user groups, set their rights and authorizations. In this view, you can add new user groups and change the rights of existing groups.
User Groups Overview
 1. Add group - Lets you add a new user group.
2. Filter by group type - Lets you choose whether to display all groups, administration groups, or non-administration groups.
3. Reset - Lets you cancel the filter mentioned in the previous point, after which all groups are displayed again.
4.
1. Add group - Lets you add a new user group.
2. Filter by group type - Lets you choose whether to display all groups, administration groups, or non-administration groups.
3. Reset - Lets you cancel the filter mentioned in the previous point, after which all groups are displayed again.
4.  - This symbol appears in front of non-administration user groups.
Amphora only displays the user groups that are associated with a unit where the user has administration rights.
Adding a User Group
You can add user groups with different levels of rights to the system. Groups generally fall into administrators and regular users.
User groups can be distinguished as follows:
- Administration group – a user group that is assigned system action rights and access according to authorizations;
- Non-administration group – groups people by role, meaning you can group together people who have a similar function in the organization, such as signatories. This allows you to use the group in approval workflows, for example.
Important
A non-administration group cannot be assigned rights or policies. It is only for grouping users – in processes (e.g. an approval or signing round) and when sending notifications.
To add a user group, go to Admin -> User Groups and click the Add group button.
Select the unit to which the group belongs. To do this, click the Select button next to the corresponding field (a directory tree opens, from which you need to select the unit).
Enter a name for the group and specify whether it is an administration or non-administration group by clicking the radio button in front of the corresponding option.
Then configure the modules that the group can see in the system, set the group's rights, add users, and optionally set up email. To save, click the Save button.
For an administration group you can also set policies by clicking the Policies button. Read more about policies. Policies are not set for a non-administration group.
Setting User Group Rights
Open User Groups from the Admin module's submenu. Select the group you want to assign rights to by clicking the group name. The system opens the User Group -> Edit form.
Navigate to the Rights panel. To add a unit (directory) for which rights need to be assigned, click the Add button at the bottom of the Rights panel.
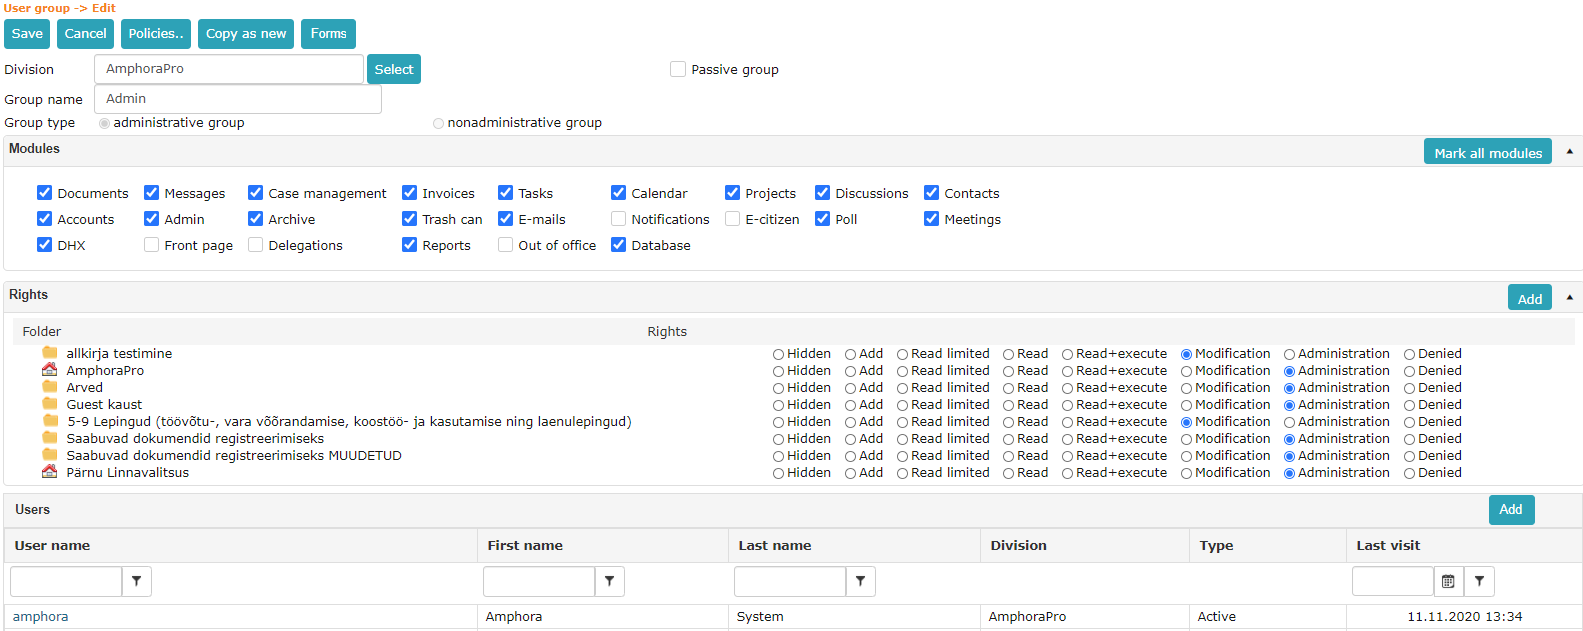 On the form that opens, move the appropriate directory (1) to the right-hand pane using the > button (2). To confirm your selections, click the Save button (3).
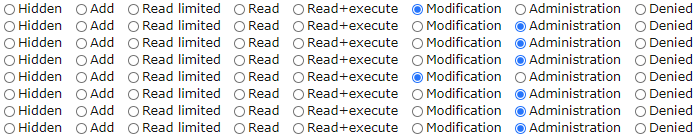
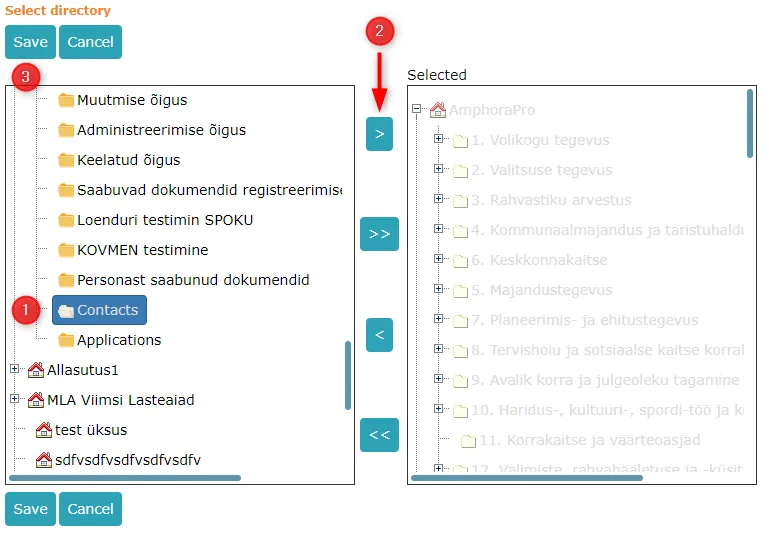 Set the rights (select the radio button in front of the corresponding right), see detailed rights explanation. To save the rights, click the Save button.
Adding Users to a User Group
Open the User Groups form from the Admin module menu. Select the group to which you want to add user(s) by clicking the group name. The system opens the User Group -> Edit form.
Navigate to the Users panel. To add user(s), click the Add button on the panel. The Select persons form opens, showing the names of users added to the system.
Click the name of the user you want to add to the user group and then click the > button. Repeat this action if you want to add more users (to add all users to the user group, click the >> button).
If you want to remove already selected users from the Selected box, click the user's name and then click the < button. Once your selection is made, click the Save button.
Setting Up Email for a User Group
The setup works the same way as email configuration in the Admin module's Personal Settings form. The difference is that on the User Group -> Edit form, you configure email for the user group.
Users belonging to the group can see everything happening in the email (e.g., a letter is sent to the group, one group member replies – other users belonging to the group can see this too).
Deleting a User Group
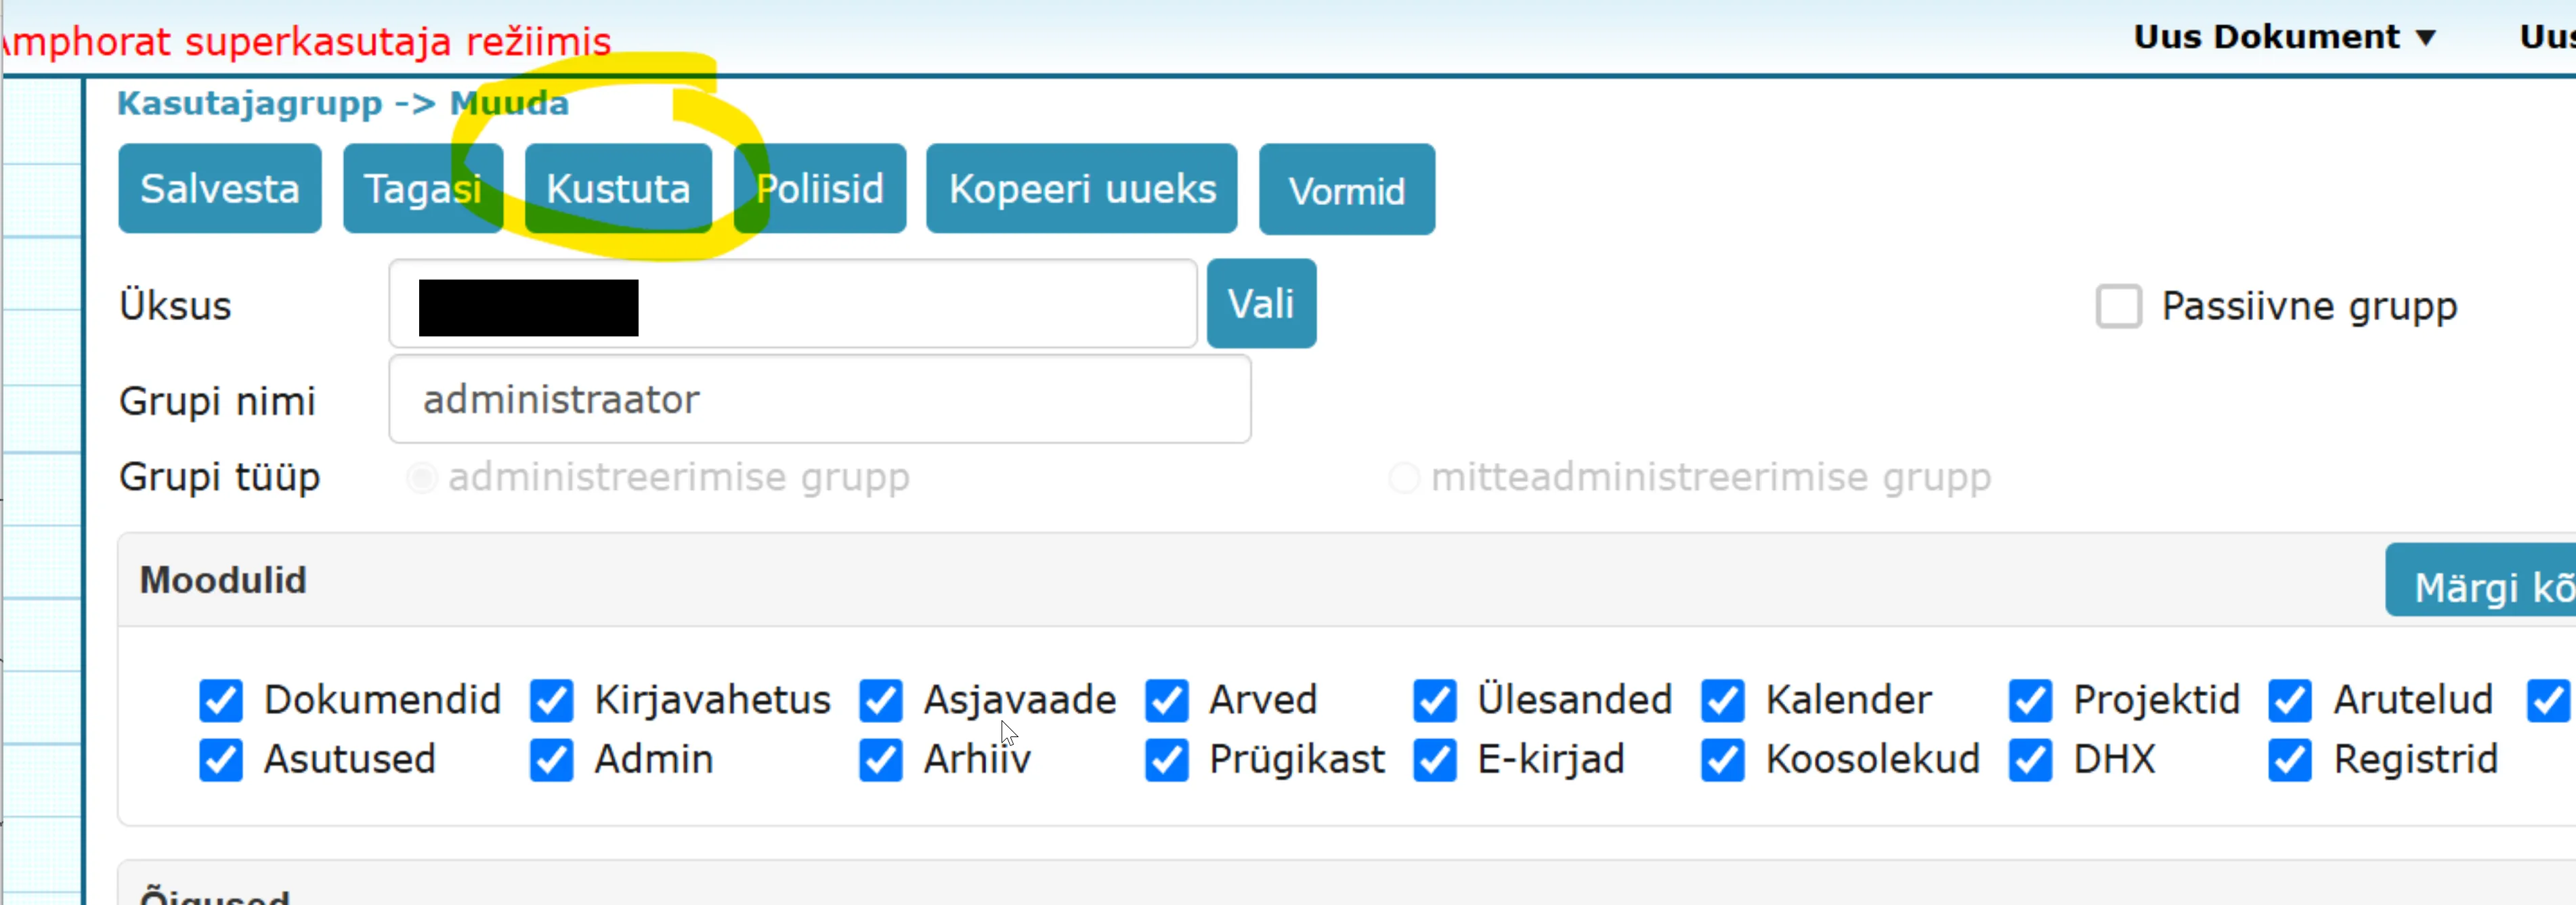
A user group can only be deleted in Superuser mode. In that case, a "Delete" button appears in the user group edit view. Before deleting a user group, you must remove all users from it.
 ***
***
Policies
Policies are system action rights that can be assigned to user groups. With policies, you can define, for example, user rights in approval workflows – whether it is possible to delegate documents further, assign a responsible person, etc.
Policies can be added to a group by opening the User Groups form from the Admin module's submenu. Select the group whose policies you want to configure by clicking the group name. The system opens the User Group -> Edit form.
Click the Policies button. Check the corresponding checkboxes – depending on what rights the users belonging to the group need to have.
Then click the button. To save the changes, click the Save button.
Policy Change Logs
Amphora logs user group policy changes. Both removed and added policies are logged. You can also see who made the changes. Logs are visible to main users in the Admin -- Organization settings -- Logs view.
Policy List
The policies are grouped by module.
Documents
- Display document info as TAB (History) – the History panel is displayed as a TAB. Similarly, the following panels are displayed as TABs by their respective policies: Signatures, Cases, Directory Rights, Attachments, Processing, Parties, Restrictions, Relations, Responsible/Involved Organization, Versions, Rights.
- Hide document info (History) – hides the History panel/TAB from the form. Similarly, the following panels/TABs are hidden by their respective policies: Signatures, Cases, Directory Rights, Attachments, Processing, Parties, Restrictions, Relations, Responsible/Involved Organization, Versions, Rights.
- View History panel – displays the History panel on the form.
- View document (file) – allows opening saved documents.
- Write document act – allows adding an act to Amphora using the "Act writing" form. This form is best suited for acts.
- Upload document act – allows adding an act to Amphora using the "Act upload" form. This form is best suited for acts.
- Create document discussion – allows adding a discussion to a document (the "Discussions" button is displayed).
- View document discussion – allows opening added discussions.
- Reply to document discussion – allows replying to an added discussion.
- Publish document – allows publishing a document.
- Create document delegation – allows delegating a document (the "Delegate" button is displayed).
- Automatic changing of responsible person when forwarding document
- Changing responsible person when forwarding document
- Upload document draft – allows adding cases/drafts to a document's composition.
- Document file text recognition (OCR) – enables the use of text recognition.
- Complex document writing – allows adding documents to Amphora using the "Complex writing" form. This form is best suited for documents that don't fit any other form.
- Complex document upload – allows adding documents to Amphora using the "Complex upload" form. This form is best suited for documents that don't fit any other form.
- Convert document – allows converting a document.
- Convert document to archival format – allows converting documents to archival format (PDF).
- Creating document meeting – meant for adding meetings to a document (the "Meetings" button). This right currently has no effect.
- Responding to document meeting – meant for replying to a document meeting. This right currently has no effect.
- Viewing document meetings – meant for opening document meetings. This right currently has no effect.
- Copy document – allows copying a document (the "Copy as new" button is displayed).
- Delete document – allows deleting documents (the "Delete" button is displayed).
- Write document contract – allows adding documents to Amphora using the "Contract writing" form. This form is best suited for various contracts.
- Upload document contract – allows adding documents to Amphora using the "Contract upload" form. This form is best suited for various contracts.
- Simple document writing – allows adding documents to Amphora using the "Simple writing" form. This form is best suited for simple documents and drafts.
- Simple document upload – allows adding documents to Amphora using the "Simple upload" form. This form is best suited for simple documents and drafts.
- Register document appendix – allows registering an appendix to an existing document.
- Locking document – allows locking documents.
- View processing workflow/delegation detail fields – allows viewing the following fields on the processing form: "Processing name", "Routing explanation".
- Cancel/modify processing workflow/delegation – allows canceling a processing workflow/delegation.
- Create processing workflow/delegation – allows creating processing workflows.
- Create processing workflow/delegation drafts – allows creating drafts for processing workflows/delegations. These can be reused later.
- View processing workflow/delegation – allows viewing processing workflows/delegations.
- Modify document metadata – allows modifying document metadata (entering/changing data on saved documents).
- View document metadata – allows viewing document metadata (opening saved documents).
- Modify document restrictions – allows modifying data in the Restrictions panel.
- View document restrictions – allows viewing the Restrictions panel.
- Write document protocol – allows adding documents to Amphora using the "Protocol writing" form. This form is best suited for protocols.
- Upload document protocol – allows adding documents to Amphora using the "Protocol upload" form. This form is best suited for protocols.
- Send document to Riigi Teataja – displays the "Send to RT" button on the legal act form.
- Send document via registered e-letter – allows seeing the Kirjakeskus icon.
- Scan document – enables scanning documents (the "Scan" button is displayed).
- Auto-fill document response deadline (+15 days) – the response deadline is automatically filled (+15 days). Amphora also takes the current date into account.
- Send document to VOLIS (VOLIS closed on 1 July 2026)
- Write document legal act – allows adding documents to Amphora using the "Legal act writing" form. This form is best suited for decisions, regulations, and orders.
- Upload document legal act – allows adding documents to Amphora using the "Legal act upload" form. This form is best suited for decisions, regulations, and orders.
- Add document rights – allows adding rights to a document.
- Modify document rights – allows modifying document rights.
- View document rights – allows viewing the Rights panel.
- Document search – allows using search (the Search link is displayed in the Documents submenu).
- Document registration allowed – allows saving/registering documents.
- Open documents in reading view by default – the document opens in reading view.
- Forward delegation – allows forwarding document delegation (the "Forward delegation" button is displayed).
- Export – allows exporting documents.
- Import – allows importing documents.
- View remotely loaded documents – displays the "From elsewhere" submenu.
- Delete quick query – allows deleting saved quick queries.
- Modify quick query – allows modifying quick queries.
- Save quick query – allows saving quick queries.
- Use quick queries – allows using saved quick queries.
- Show processing details also after processing ends – processing data is displayed on the "Approvals" panel even after processing ends.
- Show relation search when creating a new document – makes the relation search visible when creating a new document.
- Use templates – allows using templates.
- Accept and reject processing – allows accepting and rejecting processing (the "Accept" and "Reject" buttons are displayed).
- Save non-personal quick queries – allows saving non-personal quick queries.
- Change document number – allows changing existing numbers on documents. NB! This policy should only be enabled for the administrator user group.
- Mark all document-related tasks as done when responsible person responds – if the document has tasks sent to the user who responds to the document, Amphora marks those tasks as done.
- Send object via email – allows sending objects via email.
- First matching document is selected by default in main document search – when linking a main document, the first matching option is selected by default.
- Print – allows printing documents.
- Run reports – allows running reports.
- Add relation – allows adding a relation to a document.
- View relations panel – allows viewing the Relations panel.
- Replace filled template with empty one – displays the "Reset" button, which replaces a filled template with an empty one.
- New document writing link – allows adding documents to Amphora using writing forms.
- New document upload link – allows adding documents to Amphora using upload forms.
- Delete versions – allows deleting document versions.
- Add versions – when modifying a document, a new version is added.
- View versions – allows viewing versions.
Case View
- Display case info as TAB (History) – the History panel is displayed as a TAB. Similarly, the following panels are displayed as TABs by their respective policies: Case Objects, Cases, Attachments, Processing, Relations, Responsible/Involved Organization, Voting Results, and Comments.
- Hide case info (History) – hides the History panel/TAB from the form. Similarly, the following info is hidden by their respective policies: Case Objects, Cases, Voting Results, Comments, Attachments, Processing, Relations, and Responsible/Involved Organization.
- Create case delegation – allows delegating cases/drafts (the "Delegate" button is displayed).
- Use case quick query – allows using quick queries.
- Delete case quick query – allows deleting saved quick queries.
- Create case quick query – allows creating new quick queries.
- Modify case quick query – allows modifying saved quick queries.
- Save case quick query – allows saving quick queries.
- Use case quick queries – allows using quick queries.
- Copy case – allows copying an existing case.
- Copy case object attachments when copying case – copies case object attachments when copying a case.
- Delete case – allows deleting saved cases (the "Delete" button is displayed).
- Add case – allows adding new cases (the "Add new" link is displayed in the Case View submenu).
- Create case processing – allows creating processing workflows.
- View case processing/delegation panel – allows viewing the processing/delegation panel on the form.
- View case processing workflow/delegation detail fields – allows viewing the following fields on the processing form: "Processing name", "Routing explanation".
- Create case processing workflow/delegation drafts – allows saving processing/delegation drafts.
- Modify case – allows modifying saved cases.
- Remove case objects – allows removing added objects from a case's composition.
- Add case objects – allows adding objects to a case's composition.
- View case objects – allows viewing added objects.
- Search cases – allows searching cases (the "Search" link is displayed in the Case View submenu).
- Hide case panel – objects – hides the case objects panel.
- Scan case – enables scanning files to the case form.
- Case registration allowed – allows saving/registering cases.
- Open cases in reading view by default – opens every case in reading view by default.
- Option to add own directory to case – allows saving a case to a separate directory that is created when the case is saved.
- Forward delegation – allows forwarding case delegation (the "Forward delegation" button is displayed).
- Export – allows exporting documents.
- Import – allows importing documents.
- Show processing details also after processing ends – processing data is displayed on the "Approvals" panel even after processing ends.
- Accept and reject processing – allows accepting and rejecting processing.
- Save non-personal quick queries – allows saving non-personal quick queries.
Calendar
- Add new – allows adding calendar events.
Emails
- Select persons/organizations on email form – allows selecting persons and organizations on the email sending form. They can be selected for the sender, Cc, and Bcc fields.
Discussions
- Create discussion – allows creating new discussions.
- Delete discussions – allows deleting discussions.
- Reply to discussion – allows replying to discussions.
- View meetings without discussions – allows adding meetings, prohibits using discussions.
- Adding questionnaire – meant for adding inquiries. This right currently has no effect. The inquiries menu is visible to everyone whose profile includes the Discussions module.
- Viewing questionnaire – meant for viewing inquiries. This right currently has no effect.
- Add polls – allows adding polls.
- View polls – allows viewing polls.
Persons
- Allow Population Register search – allows making queries from the Population Register.
- Show persons from all units – shows persons entered from all units in the Persons module.
Archive
- Destroy data – allows destroying archive files.
- Administer archive scheme – allows administering archive schemes (modifying, generating, exporting).
- Manually link document to file – allows manually linking documents (one by one) to a file.
- Run reports – allows using reports directly in the Archive module.
- Delete file – allows deleting archive files.
- Transfer files to public archive – allows sending archive files to the public archive.
Admin
- Delete signature files
- Fix signature file names
- Archiving
- Administer organization settings – displays the "Organization settings" link.
- Administer automatic processing workflows – displays the "Automatic processing" link.
- Open public view from left menu – displays the "Public view" link.
- Enter public view comments – allows entering comments.
- Configure public view – allows configuring the public view.
- Manage email registration profiles – allows adding/modifying email registration profiles.
- Export – directory tree export. It is also possible to export selected folders from the directory tree and folders with objects.
- Modify own personal settings – allows modifying your own personal settings.
- Administer import/export – allows administering import/export.
- Administer info presentations – allows adding info presentations to directories.
- View info subscription icon – the info subscription icon is visible.
- Administer info subscriptions – the info subscriptions panel is visible.
- View user data – allows viewing user data.
- Assign rights to user group – allows assigning rights to user groups.
- Create user groups – allows creating user groups.
- View user groups – allows viewing user groups.
- Configure user groups – allows configuring user groups.
- Assign user licenses – allows adding/removing mass-signing licenses for users.
- Modify user data – allows modifying user data.
- Modify user groups – allows configuring user groups.
- Create users – allows creating users.
- Locking/unlocking users – allows locking/unlocking users.
- Modify users in user group – allows modifying user group members.
- View users – allows viewing the user list.
- Mark users as passive/active – allows marking users as passive/active.
- Modify user rights – allows modifying user rights.
- Administer directory info presentations – allows adding info presentations to folders.
- Administer directory notifications – allows administering notifications (adding and modifying).
- Import directories – allows importing new directories to the Amphora environment.
- Add directories – allows adding directories.
- View directories – allows viewing directories (the "Directories" link is displayed in the Admin module submenu).
- Publish/unpublish directories/units – allows publishing/unpublishing directories/units.
- Delete directories/units – allows deleting directories/units.
- Modify directories/units – allows modifying directories/units.
- Mark directories/units as passive/active – allows marking directories/units as passive.
- Modify directory/unit rights – allows modifying directory/unit rights.
- View directory filter dropdown in directory tree
- Administer directory filters and default filters – allows adding/modifying/deleting directory filters and default filters.
- View language settings – allows viewing language settings.
- Synchronize language file with database – displays the "Update translations from XML file" button on the Admin -> Translations form. Intended only for updating translations after SP installation.
- Configure languages – opens the language selection where another language can be chosen.
- Configure environment – allows configuring the system environment (Admin -> Organization settings, Environment Design panel).
- Administer out-of-office data – allows using the "Out of office" panel (Admin -> Personal Settings).
- Administer office software – displays the "Office software integration" panel (Admin -> Personal Settings).
- Manage duplicate record checking – allows configuring duplicate record checking in form settings.
- Show person group selection for automatic processing workflows – displays the person group selection for automatic processing workflows.
- Add link – allows adding links to a directory.
- Configure counters – allows configuring/adding counters.
- Log in as another user – allows logging in on behalf of another user.
- View logs – allows viewing logs.
- Gateways – allows configuring/adding gateway queries.
- Administer templates – allows adding and modifying templates.
- View template data – allows viewing template data.
- Delete templates – allows deleting templates.
- Create templates – allows creating templates.
- Modify templates – allows modifying templates.
- View templates – allows viewing templates.
- Configure non-working days – allows configuring non-working days.
- Assign modules – allows assigning modules to a user.
- Edit sent communications – allows editing "Sent" status outgoing communications.
- Publish object in search engine – allows publishing objects/folders in the search engine.
- Organization homepage settings – organization homepage configuration.
- Organization notices settings – organization notices configuration.
- Administer search profiles – search profile configuration/adding/deleting.
- View policies – allows viewing policies.
- Publish main file – allows publishing/unpublishing main files on document/letter forms.
- Manage reports – allows configuring reports.
- Registration profiles – opens the registration profile settings and allows the user to add/modify/delete registration profiles.
- Create roles – allows creating and modifying roles.
- Administer roles, substitutes, and responsible persons – allows modifying user roles, assigning a substitute, and responsible person.
- Configure message settings – determines whether the message settings section is visible under organization settings (options like "Copy incoming message send and receive date to response message!").
- Synchronization
- Configure system log files – determines whether the log file configuration section is visible under organization settings.
- Configure system restrictions – allows configuring system-wide restrictions.
- Administer tables – allows opening and administering tables located in the Admin module.
- Administer notices – allows administering notices.
- Service management – allows opening and administering services located in the Admin module.
- View other users' logs – allows viewing other users' logs. In the logs, you can see what a specific user has done in the Amphora environment.
- Modify other users' personal settings – allows modifying other users' personal settings.
- Modify file retention period and archival value – allows configuring retention periods on directories.
- Configure selection fields – allows configuring selection fields.
- Configure form settings – allows configuring/creating/deleting forms.
- Configure shared resources – allows configuring shared resources.
- Create units – allows creating units.
E-Citizen
- Administer E-Citizen module – allows administering the E-Citizen module.
- View E-Citizen module – allows viewing and using the E-Citizen module.
DHX
- Send document via DHX – allows sending a letter via DHX from Amphora.
- Delete document received via DHX – allows deleting a letter received via DHX.
- Register document received via DHX – allows registering a letter received via DHX to the directory tree.
Homepage
- Show action buttons in routing list – the "Forward" and "Approve" buttons are visible on the routing panel.
Recycle Bin
- Delete objects from recycle bin – allows deleting objects from the recycle bin.
Finance
- Delete invoice – allows deleting invoices.
- Create invoice processing workflow drafts – allows creating processing workflow drafts for invoices. These drafts can be reused later.
- Send invoice – allows sending invoices from Amphora.
- Scan invoice – allows scanning an invoice as a PDF document.
- Forward delegation – allows forwarding an invoice task.
- Generate HTML file – allows generating an HTML file from invoices.
- Manage receipts – opens new tabs in the Invoices module: receipt, sales ledger, balance, and reminders.
- View logs – allows viewing invoice logs.
- Add templates – allows adding invoice templates.
- Accept and reject processing – allows accepting and rejecting processing (the "Accept" and "Reject" buttons are displayed).
- Change invoice status – allows changing the invoice status. By default, the invoice status cannot be changed; only Amphora itself can do this.
- Add sales invoice – allows adding sales invoices.
- Add purchase invoice – allows adding purchase invoices.
- Generate PDF file – allows generating a PDF file from an invoice.
- Send to accounting software – allows sending invoices to accounting software.
- XML export – allows downloading an invoice XML file.
Correspondence
- Display message info as TAB (Links) – TABs are used instead of panels on the form.
- First matching letter is selected by default in original letter search – when registering an email, the original letter is selected by default in search results.
- View cases panel – makes the cases panel visible on letter forms.
- Add incoming letter via DHX – allows adding a letter using the "Document received via DHX" form.
- Add outgoing letter via DHX – allows adding a letter using the "Document sent via DHX" form.
- Copy DHX responsible person as author – allows copying the DHX letter's responsible person as the letter's author.
- Export – allows exporting letters.
- Import – allows importing letters.
- Delete quick query – allows deleting saved quick queries.
- Modify quick query – allows modifying quick queries.
- Save quick query – allows saving a quick query.
- Use quick queries – allows using saved quick queries.
- Pre-fill author panel with logged-in user data – fills the Author panel with the logged-in user's data (from the Persons and Organizations modules).
- Copy letter content when replying to message – the original letter's text editor content is copied to the reply form.
- Show original letter search when composing new letter – an original letter search panel appears on the letter form, allowing you to search for and link the new letter to an existing one.
- Show confirmation when saving unsent DHX letter – if a DHX letter has not been sent, a confirmation window appears on save where you can directly save and send (or just save).
- Show processing details also after processing ends – processing data is displayed on the "Approvals" panel even after processing ends.
- Show additional file fields on complex received/sent letter form – the "Response file" and "Related file" fields are visible on the form.
- Show responsible person in selected persons list on forwarding form – the responsible person (from the letter form) is automatically selected on the forwarding form.
- Complex received message adding – allows using the "Complex received" form.
- Simple received message adding – allows using the "Simple received" form.
- Use templates – allows using templates.
- Accept and reject processing – allows accepting and rejecting processing (the "Accept" and "Reject" buttons are displayed).
- Change letter number – allows changing existing letter numbers. NB! This policy should only be enabled for the administrator user group.
- Mark all letter-related tasks as done when responsible person responds – if the letter has tasks sent to the user who responds to the letter, Amphora marks those tasks as done.
- Send object via email – the "@" icon is available on letter forms, which opens the Emails module (requires a configured Amphora mailbox).
- Start/end restriction – allows using the restrictions panel.
- Print – allows printing documents.
- Run reports – allows running reports directly in the Correspondence module.
- Message adding links – allows adding letters to the Amphora environment.
- Complex sent message adding – allows using the "Complex sent" form.
- Simple sent message adding – allows using the "Simple sent" form.
- Add relation – allows adding relations to a message.
- View relations panel – allows viewing the Relations panel.
- Create message discussion – allows adding discussions to a message.
- View message discussions – allows opening added discussions.
- Reply to message discussion – allows replying to discussions.
- Automatic changing of responsible person when forwarding message – the letter's responsible person changes when forwarding.
- Changing responsible person when forwarding message – allows changing the responsible person when forwarding.
- Message file text recognition (OCR) – enables file text recognition.
- Convert message to archival format – allows converting a letter to archival format (PDF).
- Copy message – allows copying a message (the "Copy as new" button is displayed).
- Delete message – allows deleting messages (the "Delete" button is displayed).
- View processing workflow/delegation detail fields – allows viewing the following fields on the processing form: "Processing name", "Routing explanation".
- Cancel/modify processing workflow/delegation
- Create processing workflow/delegation – allows creating processing workflows/delegations.
- View processing workflow/delegation – allows viewing processing workflows/delegations.
- Create processing workflow/delegation drafts – allows saving processing/delegation drafts.
- Modify message metadata – allows opening saved messages.
- Modify message number (prefix, suffix) on save – allows changing the letter prefix/suffix if it differs from the counter prefix/suffix.
- Send message via registered e-letter – allows seeing the Kirjakeskus icon.
- Scan message – enables scanning files to the letter form (the "Scan" button appears).
- View message – allows opening saved messages.
- Auto-set message response deadline (+30 days) – the response deadline is automatically filled (+30 days).
- Mark message as answered when delegation task is marked as done – a field appears on the delegation form that allows marking the letter as answered (the field only appears for users who are selected as the letter's responsible person).
- Assign message responsible person – allows assigning a responsible person to a message.
- Reply to message – allows replying to a message (the "Reply" button is displayed).
- Message search – allows using search.
- Message registration allowed – allows registering/saving messages.
- Open messages in reading view by default – opens every letter in reading view by default.
- Replace filled template with empty one – displays the "Reset" button, which replaces a filled template with an empty one.
- View responsible person panel – the "Responsible person" panel is visible.
Changing User Group Data
Open the User Groups form from the Admin module's submenu. Select the group whose data needs to be changed by clicking the group name. The system opens the User Group -> Edit form.
Make the necessary changes and then click the Save button. If you click the Cancel button before saving, the system restores the data to its state before the changes.
Setting Up Reading View
Reading view is designed for everyday use by those who search for and browse documents in the system. Reading view can be configured for users who are not involved in document registration and editing, so that the document reading view is displayed as their default view, showing only the metadata fields that were filled in at the time of registration. If a user wants to make changes to the document data, they can switch to the editing view.
How to make reading view the default for users?
- Open User Groups from the Admin module submenu.
- Click the user group name, then click the Policies button.
- In the view that opens, enable the Documents and Correspondence module policies Open documents in reading view by default and Open messages in reading view by default.
- After configuration, press "Done" and then Save.
After this definition, the selected user group has Reading view as the default opening view.
Important
If this policy is not enabled, then the default displayed view is Modification view and Reading view must be opened separately!
Last modified: 17 October 2026, 11:05:57