Case Templates
Introduction
Case templates (for example Job Application Documents) allow you to group different case objects in the Case Object panel according to the selected template rules. For example, if the template -> Job Application Documents is selected, Amphora adds the panels (rules) associated with this template -> CV, Health Certificate, and Motivation Letter.
 When registering a new or existing case object, all case objects are added to these panels if the rules and rule conditions (if they exist) are fulfilled.
If there is at least one case object in the rule panel, the panel color changes to green, and if the panel is empty, the panel color is red.
If the added case object does not match the rule or rule condition, this object is added to the Other Data panel.
Case objects can be added using the buttons in the case view and also from the document view itself.
The following example describes the options for adding case objects from the case view.
 1. Object type selection. You need to select the object type and Amphora opens the registration view.
2. Using the Add existing object button, you can select and add existing objects.
3. Amphora opens a new object registration view where the case template rules and rule conditions are already taken into account. That is, the necessary selections have already been made.
1. Object type selection. You need to select the object type and Amphora opens the registration view.
2. Using the Add existing object button, you can select and add existing objects.
3. Amphora opens a new object registration view where the case template rules and rule conditions are already taken into account. That is, the necessary selections have already been made.
NB!
Additionally, it is possible to add a status field to the case form and with correct configuration, Amphora will automatically change this status (for example Incomplete -> Completed) if all rules and rule conditions are fulfilled (all template panels are green).
Such configuration is currently not possible through the user interface, so you should contact Amphora customer support for this request.
Configuration
Case Template
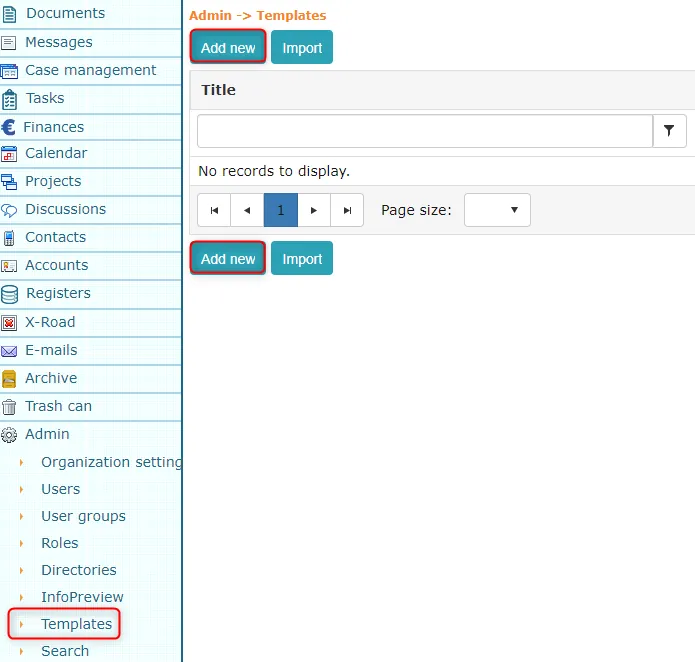
To add a new case template or modify an existing one, select Admin -> Templates and press the "Add new" button.
 The new case template creation view looks like this:
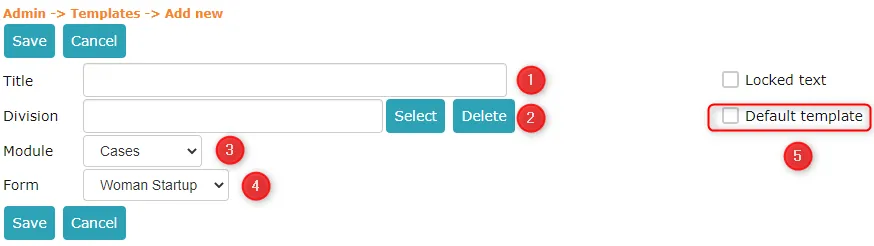 1. Template title must be entered manually.
2. Unit selection. If a unit is selected, only users of that unit will see and be able to use this template.
3. In the module dropdown selection, you must select "Cases".
4. Case form selection with which this template will work.
5. Default template selection. If the checkbox is enabled, the template will be immediately selected when opening the selected form.
1. Template title must be entered manually.
2. Unit selection. If a unit is selected, only users of that unit will see and be able to use this template.
3. In the module dropdown selection, you must select "Cases".
4. Case form selection with which this template will work.
5. Default template selection. If the checkbox is enabled, the template will be immediately selected when opening the selected form.
To save the template, press the "Save" button.
To modify a template, you need to open the required template from the templates list (by clicking on the template title), make changes, and then save the template.
Rules
When a case template is selected and a rule is associated with that template, Amphora applies that rule to case objects.
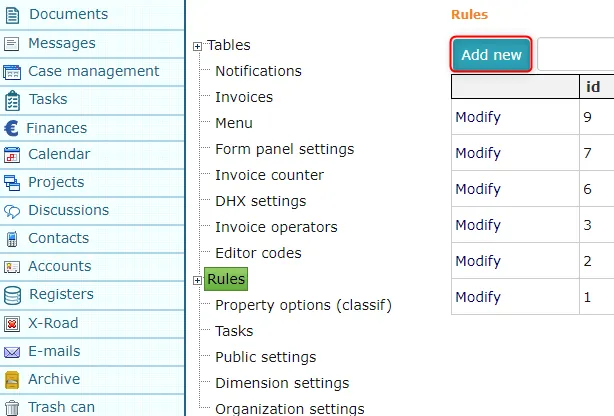
After adding a case template, you need to add a new rule. Select Registries -> Rules and press the "New" button.
 The rule addition form looks like this:
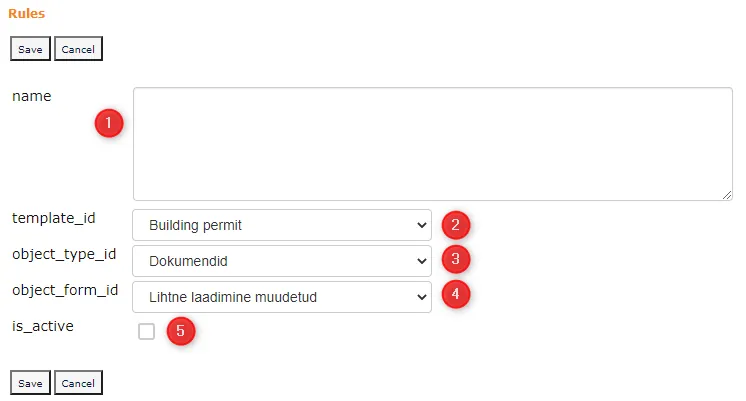 1. Rule name must be entered manually. The rule name is displayed in the case object panel on a separate panel.
2. Case template selection. Here you can select the required template.
3. By default, the Documents module is selected, this does not need to be changed.
4. Form selection where you can select the document form. Amphora applies the rule to documents that are registered with this form.
5. Here you can select whether the rule is active or not.
6. This setting is related to automatic status change. This cannot currently be configured through the user interface. You should contact Amphora customer support.
1. Rule name must be entered manually. The rule name is displayed in the case object panel on a separate panel.
2. Case template selection. Here you can select the required template.
3. By default, the Documents module is selected, this does not need to be changed.
4. Form selection where you can select the document form. Amphora applies the rule to documents that are registered with this form.
5. Here you can select whether the rule is active or not.
6. This setting is related to automatic status change. This cannot currently be configured through the user interface. You should contact Amphora customer support.
To save the rule, press the "Save" button.
An existing rule can be modified or deleted by pressing the "Edit" button in the rules view. After making changes, you must save the rule again by pressing the "Save" button.
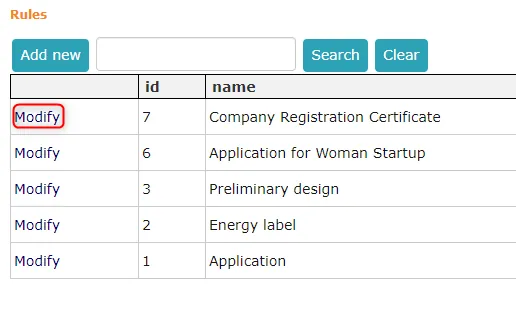 You can only delete rules that are not associated with any condition. To delete a rule, press the "Delete" button.
Rule Conditions
A rule condition must be associated with a rule. When adding a case object to which some rule is applied, Amphora checks whether the rule is associated with some rule condition.
To add a new condition, select the Registries module and press the + sign to open the Rule Condition option.

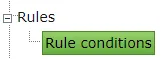 Click on Rule Condition and then the "New" button.
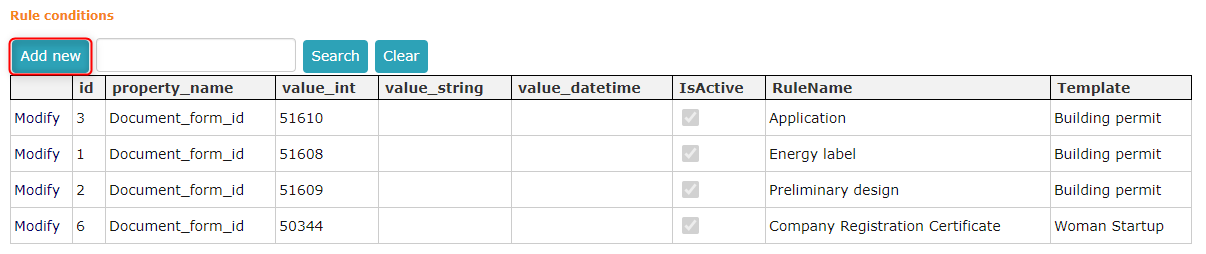 Rule condition addition view:
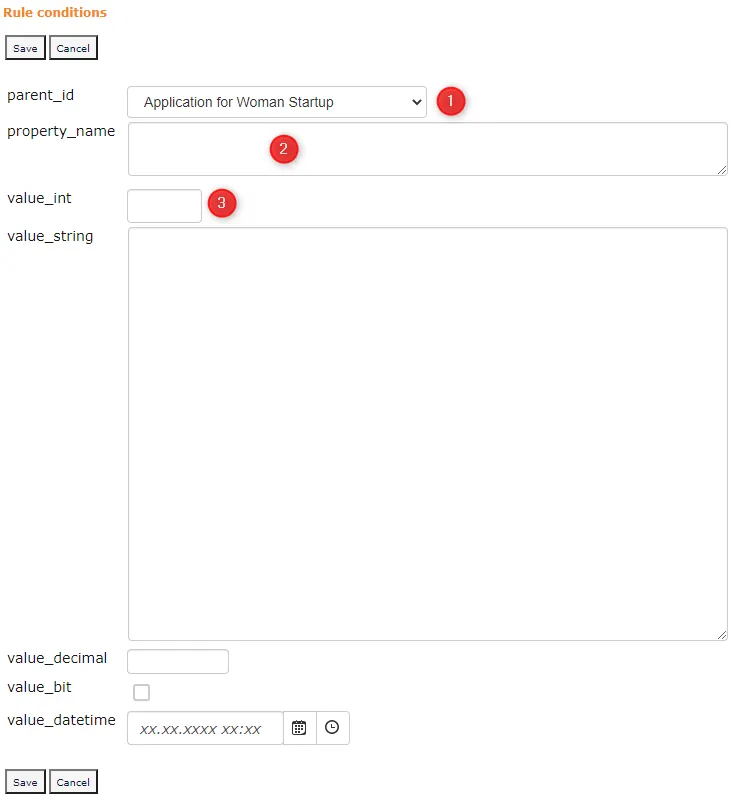 1. Rule selection. The selection includes all Registries -> Rules rules. You need to select the rule to which you want to add a condition.
2. In the property_name field, you must add the Amphora field name of the specific form field. When adding a new case object, Amphora checks the value of the added field.
3. Amphora field name value. You need to add the dropdown selection ID, that is, the number, not the selection name.
1. Rule selection. The selection includes all Registries -> Rules rules. You need to select the rule to which you want to add a condition.
2. In the property_name field, you must add the Amphora field name of the specific form field. When adding a new case object, Amphora checks the value of the added field.
3. Amphora field name value. You need to add the dropdown selection ID, that is, the number, not the selection name.
NB!
Currently, only one rule condition may be added to one rule. If you add multiple rule conditions, the added rule conditions will not work correctly.
NB!
Only DropDownList type fields are supported in rule conditions. This means that value_string, value_decimal, value_bit and value_datetime currently do not work and do not need to be filled.
Where is it possible to find property_name(Amphora field name) and value_int(dropdown selection ID)?
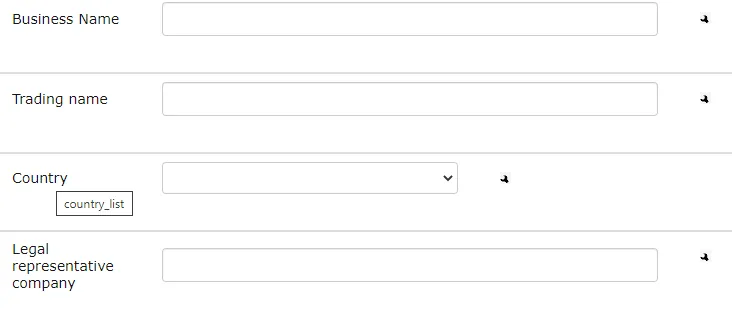
property_name(Amphora field name) You need to go to Admin -> Form Settings and open the document form that was selected when adding the rule. Move the mouse cursor over the field name and Amphora displays the property_name(Amphora field name).
 value_int(dropdown selection ID)
You need to open Registries -> Property options (classif) and in the opened view, search for value IDs by property_name. It is possible to use search and sorting functionality.
value_int(dropdown selection ID)
You need to open Registries -> Property options (classif) and in the opened view, search for value IDs by property_name. It is possible to use search and sorting functionality.
For example, searching for Document_form_id dropdown value IDs looks like this:
 In the search field, you need to write property_name(Amphora field name) and the "id" column displays the ID of each selection.
Last modified: 17 October 2026, 09:18:57